1. Items Needed:
2. System Requirements:
3. Firmware Upgrade
4. Remove Heatsink (AGP Graphics & Gigabit Ethernet)
8. Remove Processor Card (QuickSilver & QuickSilver 2002)
7. Remove Processor Card (AGP, Gigabit & Digital Audio)
6. Remove Heatsink (Digital Audio & QuickSilver)
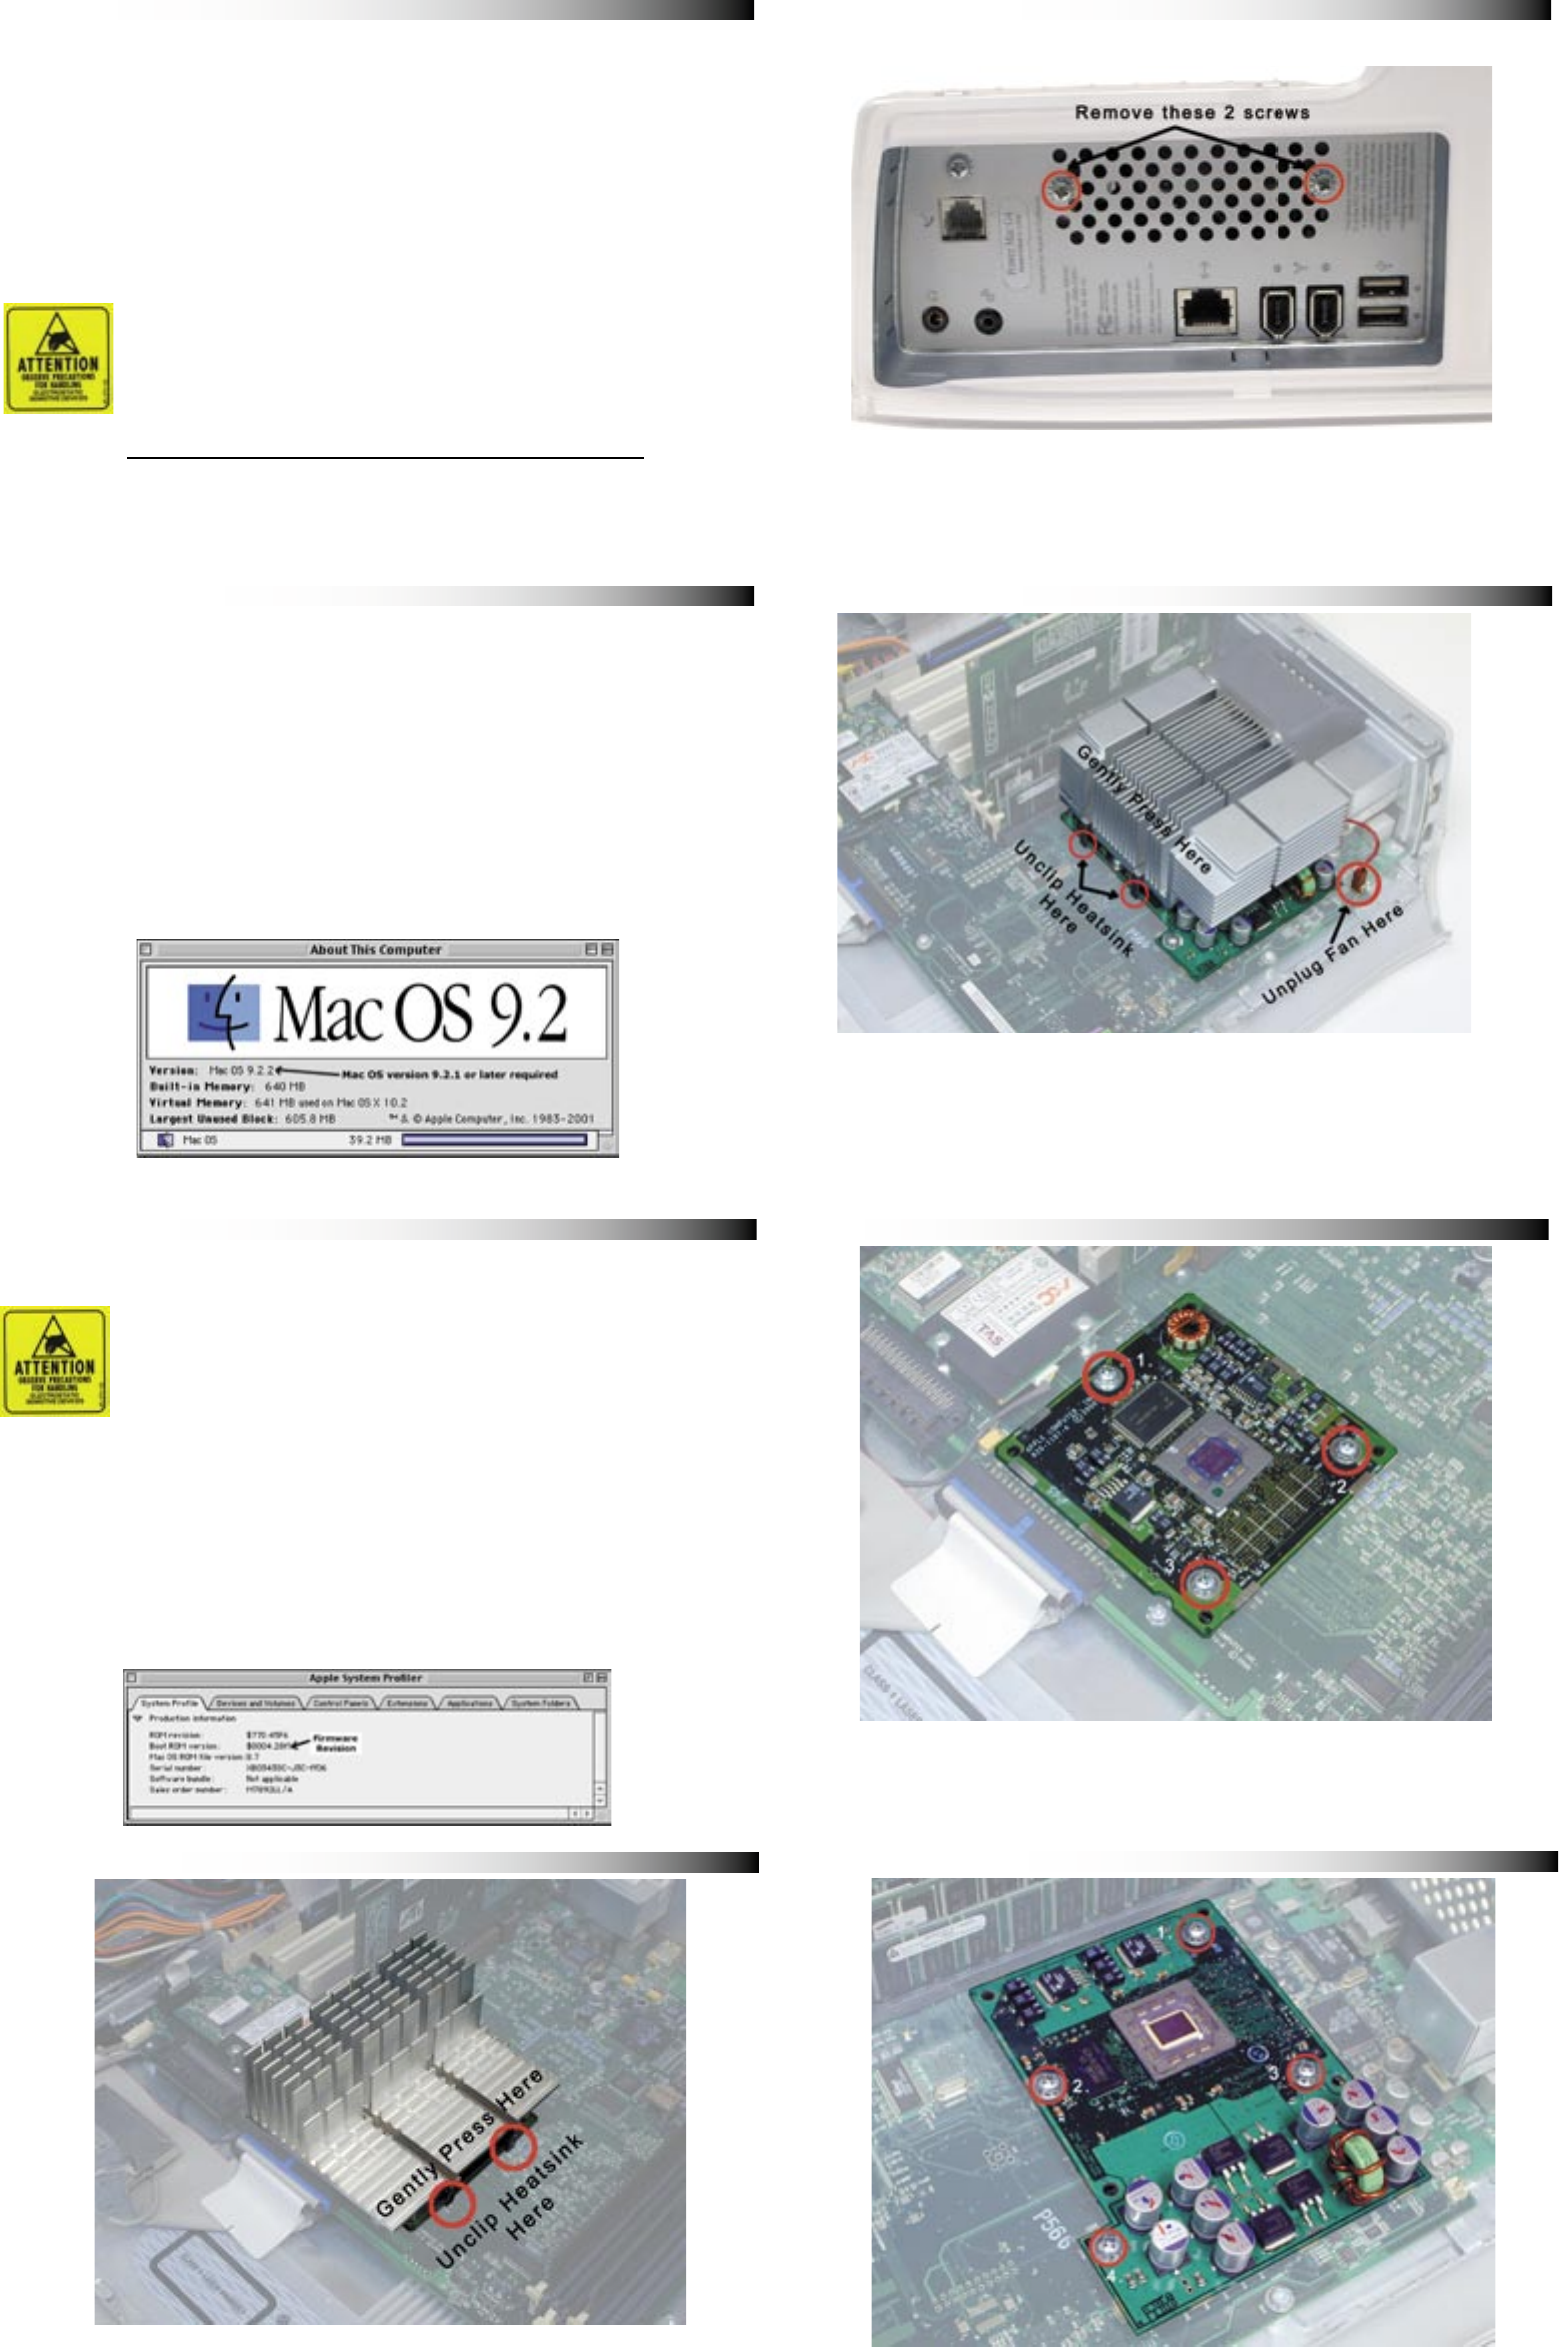
5. QuickSilver & QuickSilver 2002 - Fan Removal
ATTENTION! While performing these upgrade procedures,
static safe conditions must be met. Do not walk around,
hold all components by their edges, and do not touch the
connector contacts.
Thank you for purchasing your new OWC Mercury Extreme
G4 AGP processor upgrade! Please read through this entire
installation manual before proceeding with the upgrade to
familiarize yourself with the process. Before installing any
hardware component, it is recommended that you back up
any important data from your hard drive. If you are planning
on performing multiple upgrades, it is highly recommended
that you complete one upgrade at a time before proceeding
with the next.
Items needed to perform this upgrade
• #1 Phillips Screwdriver (Included!)
• Needle Nose Pliers (to remove heatsink clips)
• Internet Access (to update fi rmware, if needed)
The OWC Mercury Extreme G4 processor is compatible with
any Power Macintosh G4/AGP Graphics, Gigabit Ethernet,
Digital Audio, QuickSilver or QuickSilver 2002 model. To de-
termine which system you have, please refer to this online
Apple document.
http://docs.info.apple.com/article.html?artnum=58418
The OWC Mercury Extreme G4 processor is compatible with
Mac OS 9.2.1 and later, including all versions of Mac OS X.
ATTENTION! If your computer is a Power Macintosh AGP
Graphics, Gigabit Ethernet or Digital Audio model, you
must upgrade it’s fi rmware to version 4.2.8. This cannot be
performed using Mac OS X, you must boot into Mac OS 9
to upgrade the fi rmware. Please refer to this online Apple
document:
http://docs.info.apple.com/article.html?artnum=120068
To verify which revision of fi rmware your system is running,
boot into OS 9 and open the Apple System Profi ler from under
the Apple Menu. The last drop down tab is “Production Infor-
mation”, and the second item listed is the Boot ROM Version.
Your system must be at $004.28f1 or later to proceed.
Remove the heatsink from your logic board. Use the needle
nose pliers to unhook the clips from the processor card.
Skip to step 7 to remove the processor card.
Remove the 3 circled screws from the processor
daughtercard and set them aside, you do not reuse them.
Skip to step 10 to install your new processor.
Unscrew these two screws from the rear port panel on
your system. This will release the fan from behind the
heatsink and allow you to unhook the rear heatsink clips in
the next step. You will not be reinstalling this fan.
Remove the heatsink from your logic board. Use the needle
nose pliers to unhook the clips from the processor card. If
your system includes a processor fan or cover, unplug it and
then remove by unclipping it and pulling straight up and out.
You will not be reinstalling this heatsink, fan or shroud.
Skip to step 8 to remove the processor card.
Remove the 4 circled screws from the processor daughtercard
and set them aside, you do not reuse them.


