4 EN
3 Get started
Always follow the instructions in this chapter in
sequence.
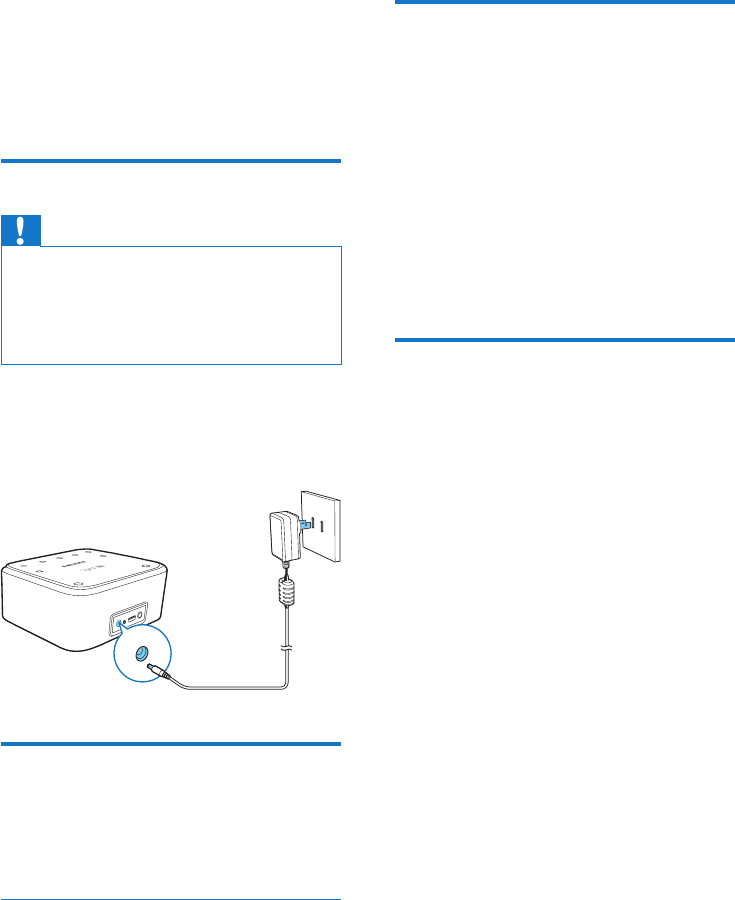
Connect power
Caution
• Risk of product damage! Make sure that the power
supply voltage matches the voltage printed on the
bottom of this product.
• Risk of electric shock! When you unplug the AC power
adaptor, always pull the plug from the socket. Never
pull the cord.
Connect the AC power adaptor between
• the DC IN socket at the back of this
product, and
• the power supply.
Turn on
Press POWER.
» The product switches to the last selected
source.
Switch to standby mode
Press POWER again to switch the product to
standby mode.
» The clock (if set) is displayed.
DC IN
Select a source
Press SOURCE/SET to select a source.
• Bluetooth mode: Bluetooth indicator lights
up.
• FM preset mode: PXX is displayed with
XX blinking (XX indicates the preset
number of the current station), and then
the current station is broadcast with its
frequencydisplayed.
• FMmode:Thefrequencyofcurrentstation
is displayed.
• AUDIO IN mode: AUX is displayed.
Set the clock
1 In standby mode, press and hold
SOURCE/SET for two seconds.
» Hour digits begin to blink.
2 Press - TUNE/TIME or TUNE/TIME+
repeatedly to set the hour.
3 Press SOURCE/SETtoconrm.
» Minute digits begin to blink.
4 Press - TUNE/TIME or TUNE/TIME+
repeatedly to set the minute.
5 Press SOURCE/SETtoconrm.
» [12H] or [24H] begins to blink.
6 Press - TUNE/TIME or TUNE/TIME+ to
select a time format.
• [12H]: 12-hour time format
• [24H]: 24-hour time format
7 Press SOURCE/SETtoconrm.
» The set time is displayed.


