Turning the PS4660T/PS5560T On
PS4660T and PS5560T User Guide 25
Turning the PS4660T/PS5560T On
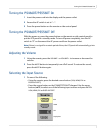
1 Insert the power cord into the display and the power outlet.
2 Ensure the AC switch is set to “—“.
3 Press the power button on the remote or side control panel.
Turning the PS4660T/PS5560T Off
With the power on, press the power button on the remote or side control panel to
put the LCD panel in a standby mode. To turn off power completely, turn the AC
switch to “O” or disconnect the AC power cord from the power outlet.
Note: If there is no signal for a certain period of time, the LCD panel will automatically go into
standby mode.
Adjusting the Volume
1 Using the remote, press the VOLUME - or VOLUME + to increase or decrease the
volume.
2 Press the MUTE button to temporarily turn off all sound. To restore the sound,
press the MUTE button again.
Selecting the Input Source
1 Do one of the following:
• Using the remote, press the desired source button (VGA, HDMI, DVI or
DISPLAYPORT).
• Press the source button on the PS4660T/PS5560T’s keypad. Use the arrow
buttons (
▲ ▼) to select one of the following input sources and press ENTER:
VGA, HDMI, DVI or DISPLAYPORT.
VGA
HDMI
DVI
DisplayPort


