


4
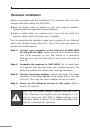
Hardware Installation
Before you proceed with the installation, it is necessary that you have
enough information about the WAP-4036.
Keep the access point as central in your work area as possible.
Signal strength and speed fall off with distance.
Higher is often better. For instance, set it up on the top shelf of a
bookcase rather than the bottom one, if possible.
Prior to connecting the hardware, make sure to power off your Ethernet
device and Wireless Access Point (AP). Then follow the steps below to
connect the related devices.
Step 1: Connect your computer to the LAN port of WAP-4036
by using RJ-45 cable. Attach one end of the Ethernet cable
with RJ-45 connector to your hub, switch or a computer’s
Ethernet port, and the other end to one of the LAN ports of
your AP.
Step 2: Assemble the antenna to WAP-4036. Try to place them
to a position that can best cover your wireless network. The
antenna’s position will enhance the receiving sensitivity.
Step 3: Connect the power adapter. Connect the single DC output
connector of the power adapter to the power jack on the side
of the AP. Then plug the Power Adapter into an AC outlet.
Step 4: Power on the following devices in this order: HUB or
Switch, AP, and PCs
ONLY use the power adapter supplied with the WAP-
4036. Otherwise, the product may be damaged. If you
want to reset your WAP-4036 to default settings, press
the Reset button 5 second. Then release the button and
wait for 10 seconds for rebooting.
l
l