15
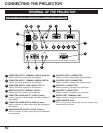
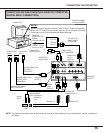
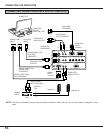
CONNECTING THE PROJECTOR
USB
audio
R
analog RGB in
analog RGB out
RGBHV
L
(mono)
(mono)
control
USB
R/C jack
serial
audio
audio
RL
RL
control
digital in
PC IN-1
PC IN-2
PC OUT
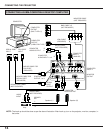
COMPUTER
MONITOR CABLE
(NOT PROVIDED)
SERIAL PORT
INPUT
AUDIO CABLE
(NOT PROVIDED)
AUDIO CABLE
(NOT PROVIDED)
COMPUTER
AUDIO INPUT 1
CONTROL PORT
OUTPUT 1
MOUSE CABLE FOR
PS/2 PORT
(PROVIDED)
MOUSE CABLE FOR
SERIAL PORT
(PROVIDED)
PS/2 PORT
INPUT
L R
R L
Speaker (L)
Speaker (R)
Amp.
L
R
R
L
AUDIO
INPUT
SPEAKER
OUT
MONITOR
OUTPUT
COMPUTER
AUDIO OUTPUT
SERIAL PORT CABLE
(NOT PROVIDED)
SERIAL
PORT
OUTPUT
COMPUTER
AUDIO OUTPUT
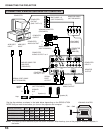
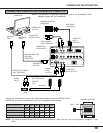
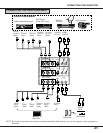
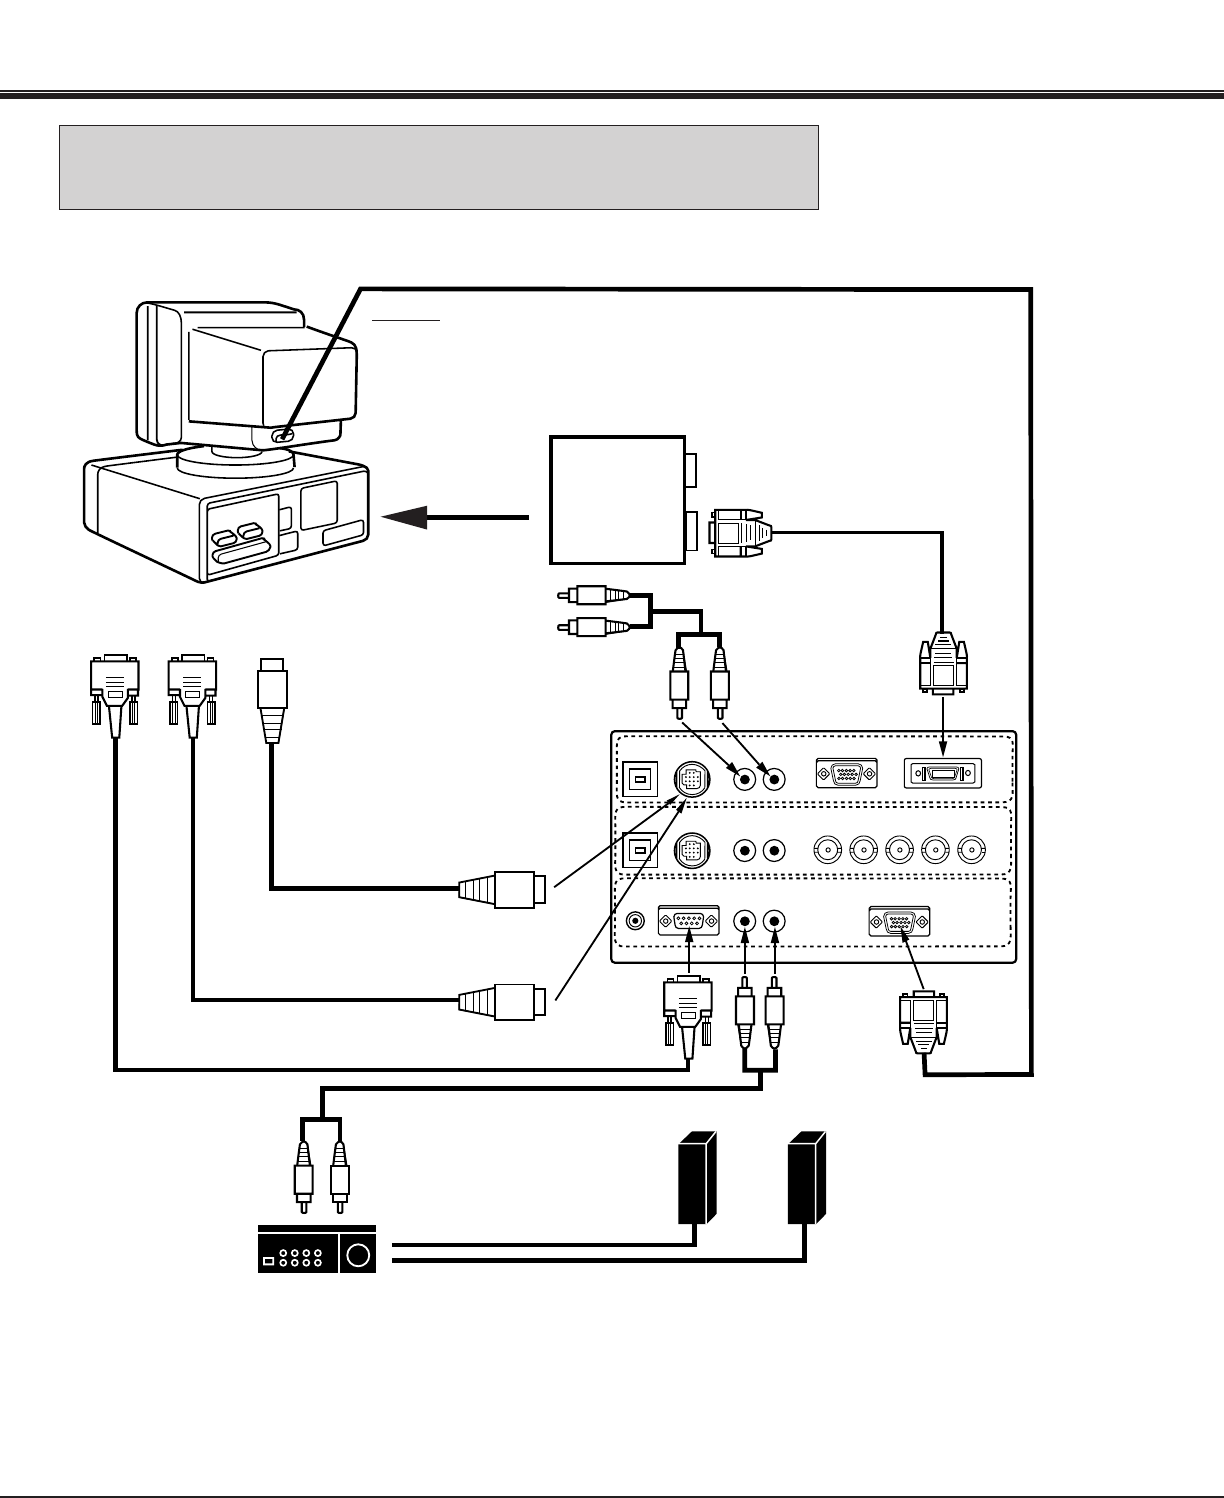
NOTE: The hook up should be done as per the above illustration. After hook up, turn on the projector, monitor, computer, in
that order.
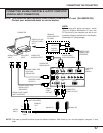
COMPUTER
INPUT 1
(DIGITAL)
CONNECTING AN IBM-COMPATIBLE DESKTOP COMPUTER
(DIGITAL INPUT CONNECTION)
DIGITAL FLAT
PANEL CABLE
(PROVIDED)
NOTE:
Before using with digital connection, install (Plug in) Graphic Accelerator
Board into PCI slot of the computer and set up the computer following
instructions in the Graphic Accelerator Board package.
GRAPHIC
ACCELERATOR
BOARD
(GA-SS21P8/PCI)
DIGITAL
OUTPUT
ANALOG
OUTPUT
INSTALL (PLUG)
INTO PCI SLOT


