


3800/5800 Series Fibre Channel Switch Rack Mounting Guide
Corporate Headquarters QLogic Corporation 26650 Aliso Viejo Parkway Aliso Viejo, CA 92656 949.389.6000 www.qlogic.com
International Offices UK | Ireland | Germany | France | India | Japan | China | Hong Kong | Singapore | Taiwan
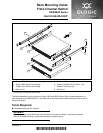
Install Switch Rails
Install the switch rails on the switch using two
screws to secure each rail. The switch can be
mounted flush or with a 1.25 inch setback
depending on how you match the holes.
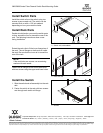
Install Rack Rails
Decide which direction you want the switch ports
to face: toward the front or toward the rear of the
rack. The following instructions show a rear-
facing installation.
1. Switch rails, flush mount
2. Switch rails, with setback
3. Screws, 10-32 x 3/8
Extend the rack rails to fit the inner dimensions of
the rack. The rail flanges on both ends fit inside
the rack. Be sure that the inner rail is toward the
rear of the rack.
NOTE:
If the rack holes are square, use a centering
washer with each screw.
Fasten the rail flanges to the rack at both ends
with two screws using the upper and lower holes.
1. Screws
2. Inner rack rail
3. Centering washer
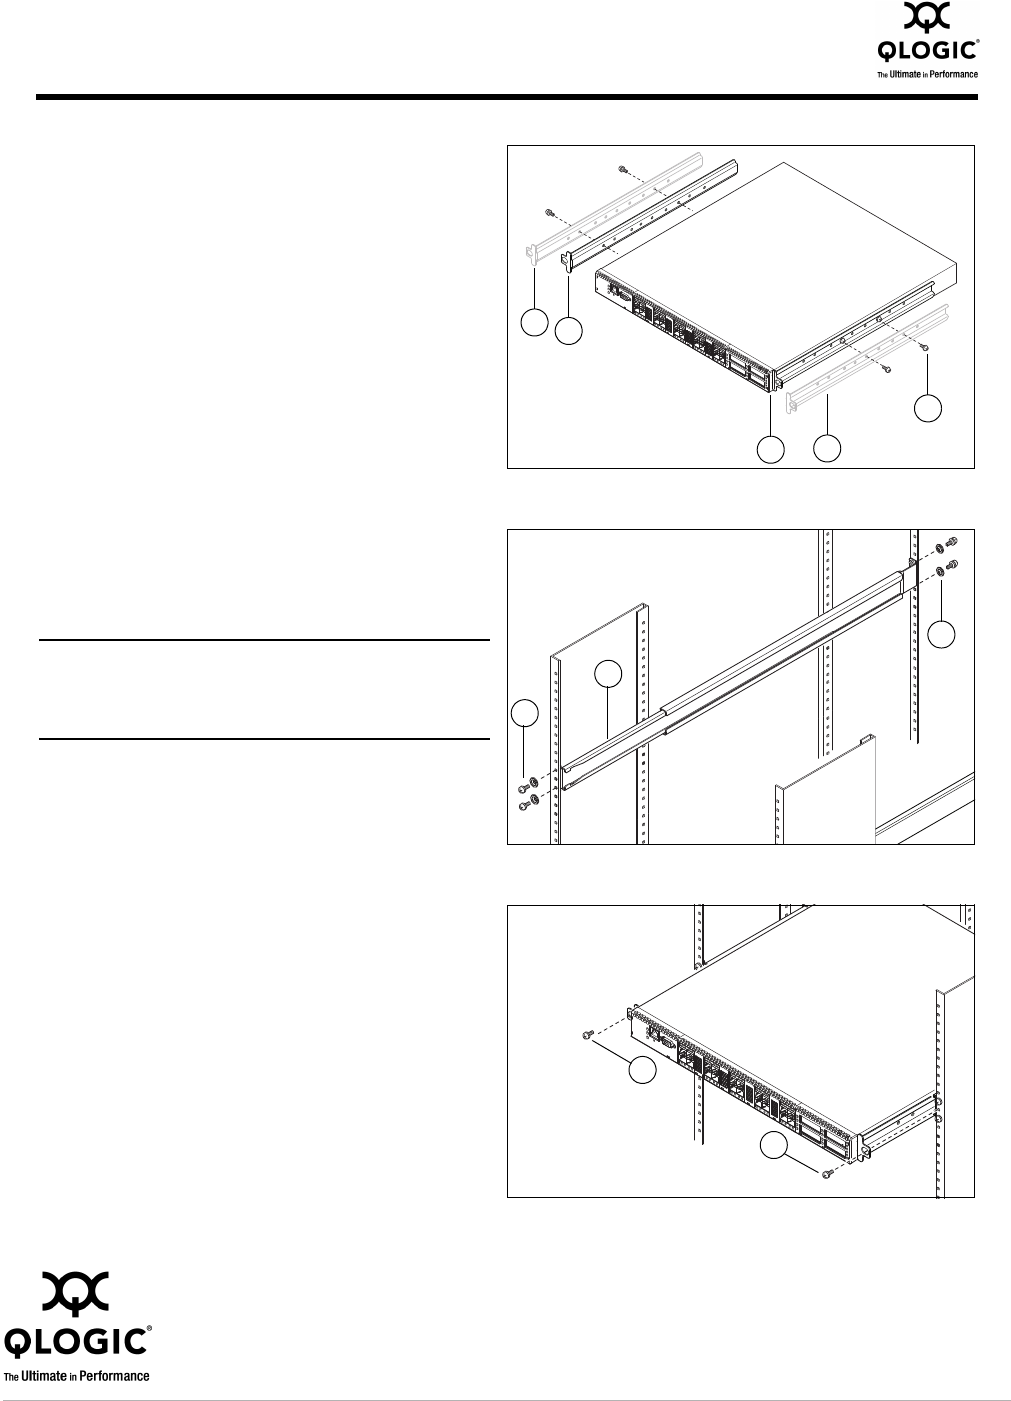
Install the Switch
1. Slide the switch and rail assembly into the rack
rails.
2. Fasten the switch to the rack with two screws:
one through each switch rail flange.
1. Screws
2
1
1
2
3
1
3
2
1
1
© 2011 QLogic Corporation. Specifications are subject to change without notice. All rights reserved worldwide. QLogic and the QLogic logo are registered trademarks of QLogic Corporation. All
other brand and product names are trademarks or registered trademarks of their respective owners. Information supplied by QLogic Corporation is believed to be accurate and reliable. QLogic
Corporation assumes no responsibility for any errors in this brochure. QLogic Corporation reserves the right, without notice, to make changes in product design or specifications.