


Quatech Freedom USB Adapter User’s Manual Installing the software
Installing the Freedom USB
This section explains how to install the Freedom USB under different
operating systems. Please locate and follow the procedure for your
computer’s operating system.
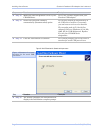
Note: The installation process
takes place in two stages: the
serial adapter board and then
the serial ports.
Windows maintains a registry of all known hardware installed in
your computer in which it keeps track of all of your system resources,
such as I/O locations, IRQ levels, and DMA channels. The Add New
Hardware Wizard utility helps you to add new hardware and updates
this registry.
Caution! Be sure to allow
the installation process to
finish without interruption.
If you stop the process
before the adapter board(s)
and all of the serial ports
are installed, you will
corrupt the installation.
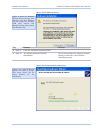
The Freedom USB includes an INF configuration file to allow easy
configuration in the Windows environment. Windows uses the INF
file to determine the system resources required by the Freedom USB,
searches for available resources to fill the boards requirements, and
then updates the hardware registry with an entry that allocates these
resources.
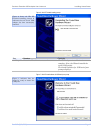
The Freedom USB also includes Windows device drivers that enable
the Freedom USB serial ports to appear to Windows as standard
COM ports.
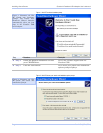
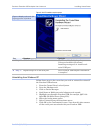
Installing under Windows XP
Follow these steps to install the Freedom USB under Windows XP.
Step Procedure Description
Step 1 Turn on the power to your computer
system.
This is the system in which the Freedom
USB is to be installed.
Step 2 Plug the wide flat end of the USB cable
into the downstream connector.
This is the connector located on the back of
the computer or USB hub.
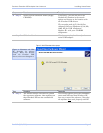
Step 3 Plug the square end of the USB cable into
the back of the Freedom USB box.
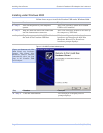
Windows tells you that it has found new
hardware and launches the Found New
Hardware Wizard.
Rev 2.02 (2/24/2004) Page 3