Quick Reference Sheet Applicable models: 4/8/16-port 19” Rackmount PS/2 KVM Switch
30-170-7009-478-16 Rev. 1.6 Copyright© All rights reserved.
Quick Reference Sheet
Notes:
1. You can use either top row number keys or the keypad number keys for hotkeys commands.
2. Normally, you should have no problem with mouse hot-plugging on a Plug-and-Play OS. However, a non-PnP OS only performs hardware detection while booting up--that is why hot-plugging sometimes will
see a mouse lock…..
Mouse Troubleshooting on a non-PnP OS (Linux, NT4.0): If you experience mouse lock when hot-plugging mouse on a non-PnP OS such as Linux or WinNT 4.0, just hit one of the following hotkey commands for
mouse reset according to your mouse configuration on the non-PnP OS ….
ScrLk + ScrLk + M + 1 for a 2-key mouse setting; ScrLk + ScrLk + M + 2 for a 3-key wheel mouse setting; ScrLk + ScrLk + M + 3 for a 5-key wheel mouse setting.
LED information: a solid red-lit LED indicates a live power input for that specific port; a solid green-lit LED indicates an active port; a flashing green LED indicates no connection for the active port (i.e. no power input
from the active port).
Hotkey convention: The hotkey notation ScrLk + ScrLk + (key), denotes that you should hit the individual keys consecutively one at a time, not simultaneously.
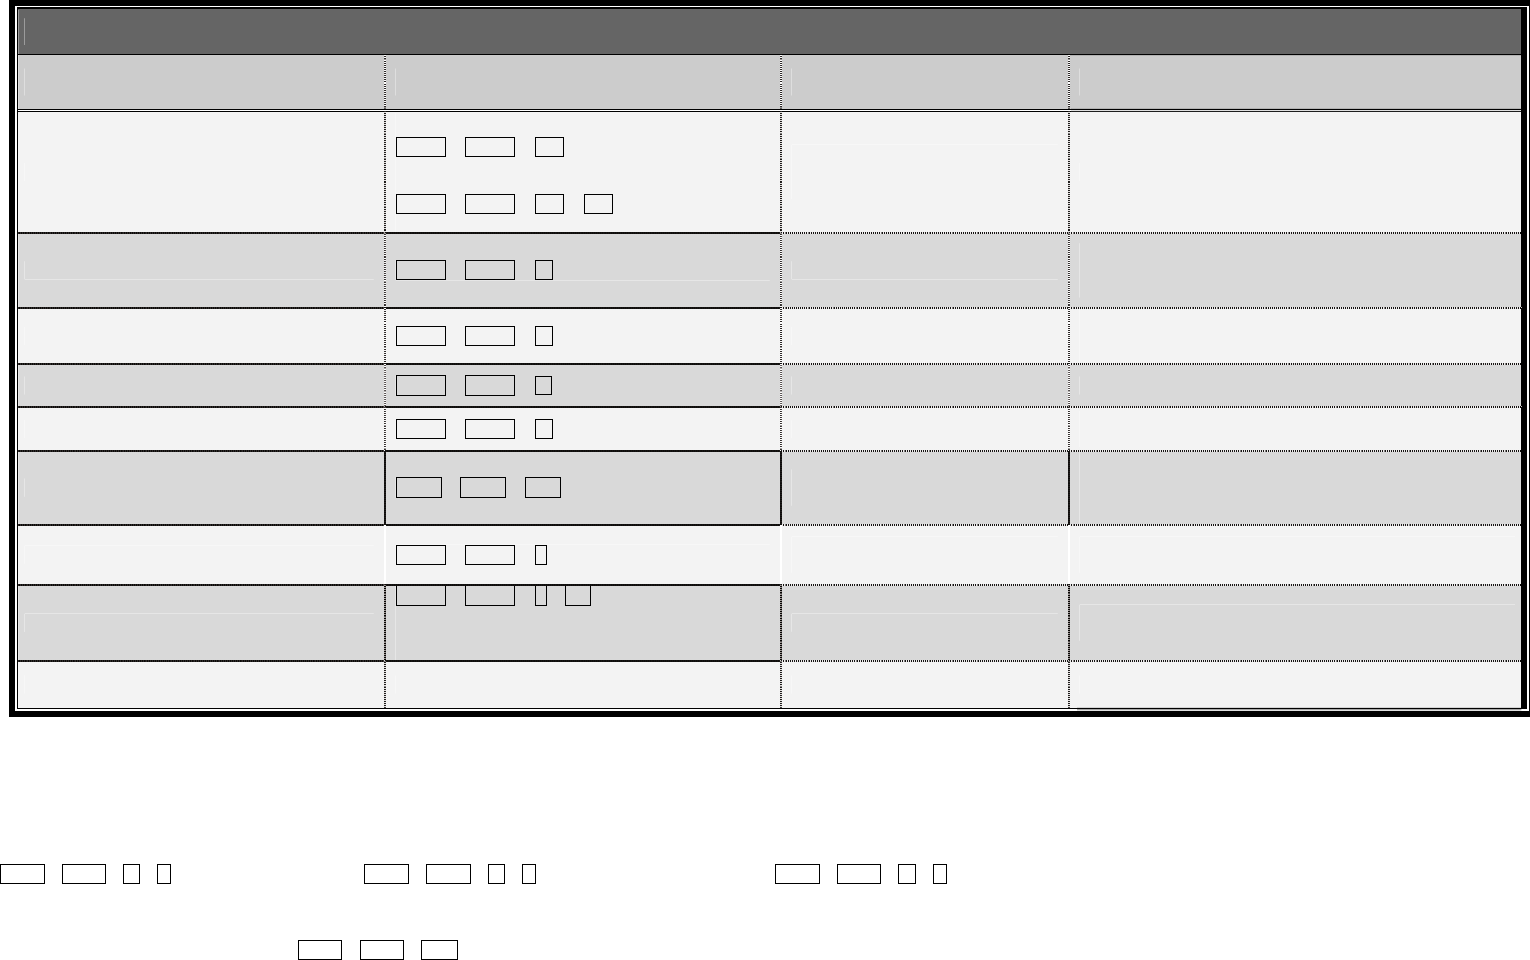
19” Rackmount KVM Switch / Operation Commands for Hotkeys/ Front-Panel Button
Command Hotkeys Front-panel Button Description
Select PC Channel
For 4-port/8-port model
ScrLk + ScrLk + (x)
1
x = 1 ~ 4/1~8 for PC channel number
For 16-port model
ScrLk + ScrLk + (x) + (y)
1
xy = 01~16 for PC channel number
Press the corresponding front-panel
button to select the desired PC
channel
Select the active PC channel
Next lower PC channel ScrLk + ScrLk + ↑ (arrow up)
--
Select the next lower PC channel
(Switch only to the next lower channel with live power input
from PS/2 interface)
Next higher PC channel
ScrLk + ScrLk + ↓ (arrow down) --
Select the next higher PC channel
(Switch only to the next higher channel with live power input
from PS/2 interface)
Previous PC channel
ScrLk + ScrLk + Å (Backspace) -- Toggle between the previous channel and current channel
Beep Sound On/Off
ScrLk + ScrLk + B --
Toggle on/off the beep sound for hotkey/channel switching
operation
Console Mouse/Keyboard Reset
2
ScrLk + ScrLk + End
Button 1
(Press and hold down for 2”)
Reset mouse/keyboard on the console side
(This hotkey command works only for PnP OS such as
Windows 98 SE or later Windows OS; for non-PnP OS, see
Note 2).
Autoscan ScrLk + ScrLk + S
Last Button
(Press and hold down for 2”)
Autoscan through every connected channel for quick screen
browsing of each channel (scan delay = 5 sec.)
Autoscan with Programmable Delay Time
ScrLk + ScrLk + S + (x)
1
x = 0~9
1 Æ 10” ; 2 Æ 20” ; 3 Æ 30” ; 4 Æ 40” ; 5 Æ 50”
6 Æ 60” ; 7 Æ 70” ; 8 Æ 80” ; 9 Æ 90” ; 0 Æ 100”
--
Autoscan with a user-defined delay time within a range of 5 ~
100 seconds
Stop Autoscan
Press any key on keyboard Press any button Terminate Autoscan activity


