


25. On the Project Generator Information window: Click <OK>.
The project that is created has two configurations. The Release configuration can be used for the final release code
version. The Debug configuration allows modifications to the configuration for debugging.
26. Select the Debug build configuration in the left hand drop down list on the toolbar.
27. Click on the “Build” icon to compile, assemble and link the project.
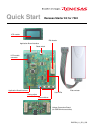
4. Programming and Debug
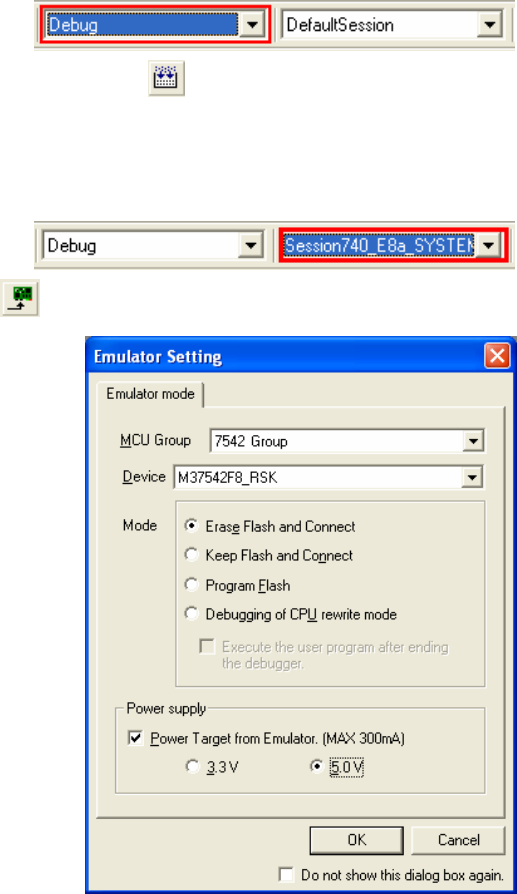
28. Ensure the “Session740_E8a_SYSTEM” session in the right hand drop down list on the toolbar is selected.
29. Click the <Connect> button on the debug toolbar.
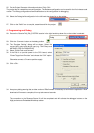
30. The “Emulator Setting” dialog will be shown. Select the
correct MCU group and device type (e.g. 7542 Group and
M37542F8_RSK for RSKM37542).
31. Select “Erase Flash and Connect”.
32. If the E8a is to provide power to the CPU board, select
“Power Target from Emulator” and choose the “5.0V” option.
Otherwise connect a 5V centre positive supply.
33. Click <OK>.
34. Accept any dialog warning that an older version of E8a firmware is necessary to work with the application. Allow
download of firmware to complete, this may take several seconds.
The connection to the Renesas Starter Kit will be completed and will activate the debugger buttons on the
High-performance Embedded Workshop toolbar.