C o n t e n t s a n d S p e c i f i c a t i o n s
C o n n e c t i n g t h e R i o 5 0 0
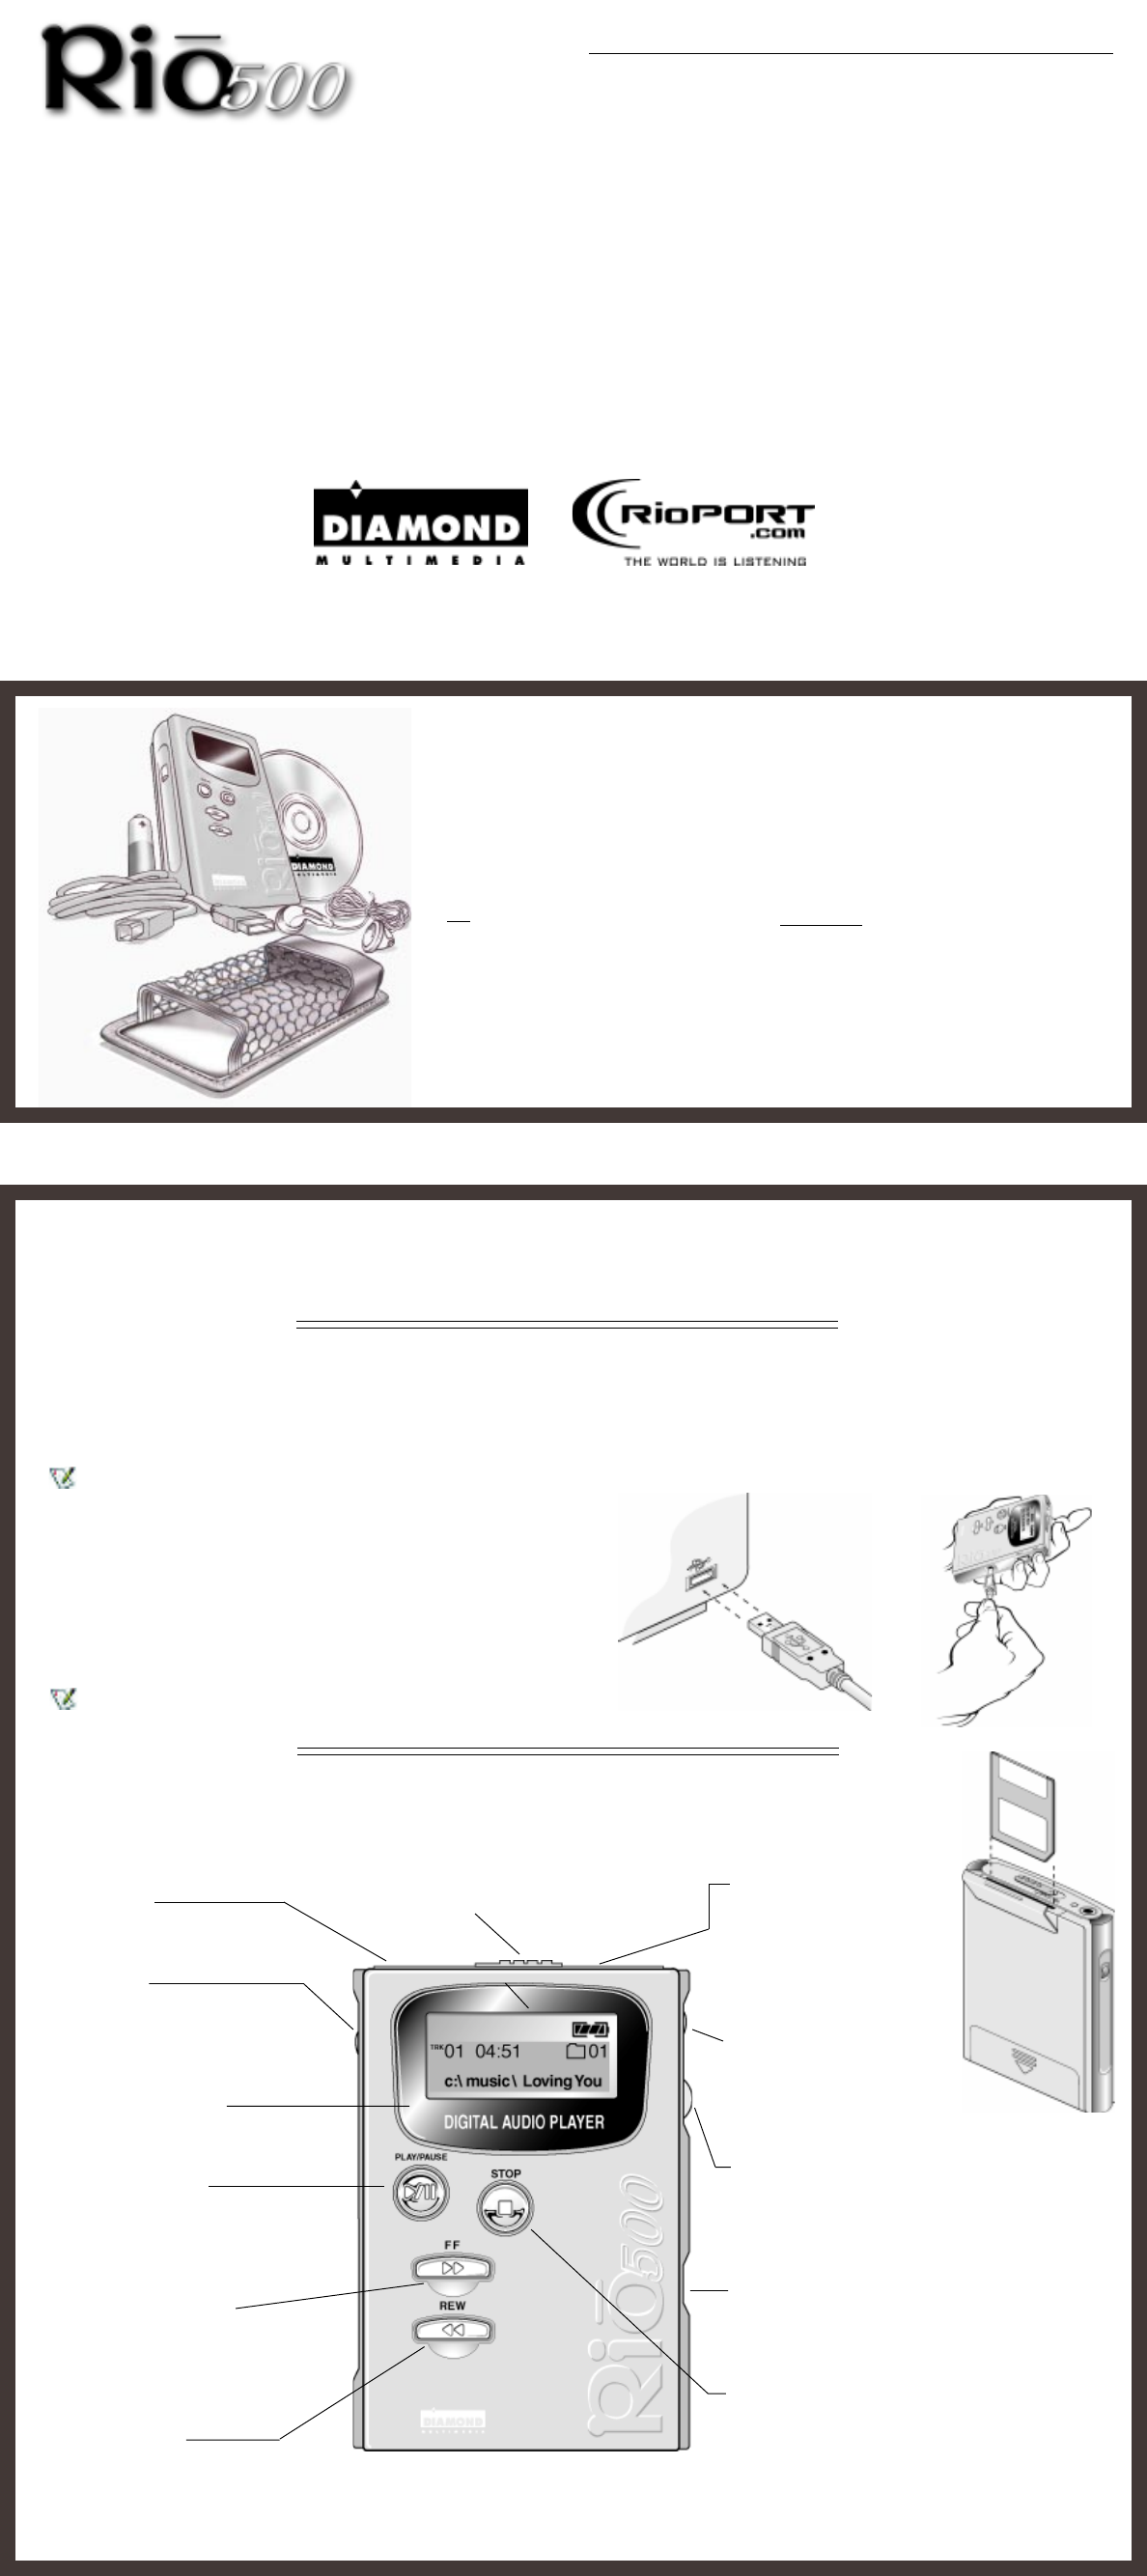
RIO 500 HARDWARE CONNECTION
Rio 500 uses the USB port of your computer to transfer digital audio files. To set up Rio 500 for audio file transfers, you need to
attach the USB cable (provided) to your computer’s USB port. You must also make sure you have the proper USB drivers installed
on your computer (please consult user’s guide for proper USB driver installation).
Some systems do not properly support USB, please consult your computer’s hardware guide for proper USB driver installation.
1. Locate the USB port on your computer (you may need to refer
to the your computer’s hardware guide).
2. Attach the larger end of the provided USB cable to the USB port,
then connect the smaller end to the Rio 500.
3. Power on your Rio 500 device.
4. You can now install and run the RioPort Audio Manager
software (see Installing the Software section).
Rio 500 must be awake to enable communication to the PC or
Mac.
Bookmark
Automatic bookmarking for audio
content. To create a bookmark, hold
button down for two seconds. Also
used for editing bookmarks.
ADVANCED FEATURES
• 64MB onboard memory, expandable with removable flash
cards
• Supports Windows 98 (PC) & Macintosh OS 8.6 (iMAC, G3)
• USB port for faster downloads
• Skip-free designno moving parts
• Automatic bookmarking features for marking locations
within a track
• RioPort Audio Manager software included for locating,
organizing, downloading, creating and playing back digital
audio files
• Audible Manager 2.0 software for spoken audio content
(Windows 98 only)
• MetaTrust security “ready” (Windows 98 only)
• Upgradeable firmware provides future compatibility
• Uses a single AA battery for up to 13 hours of continuous
play
• Advanced Features
• Contents and Specifications
• Connecting the Rio 500
• Installing the Software
RIO KIT CONTENTS
• Rio 500 player
• Carrying case
• AA battery
• Earphones
• USB (Universal Serial Bus) cable
Play/Pause Button
Push once to play the current song.
Pauses and resumes playback at last
position. Push to wake up (while in
sleep mode).
Stop Button
Stops playback. Hold down for two
seconds to put the Rio 500 into sleep
mode.
Off/Hold/On Switch
Off position - Rio 500 is powered off
Hold position - Locks functionality of all buttons
On position - Rio 500 on and all buttons functional
Flash Memory Card Slot
A removable flash memory
card (sold separately) allows
Rio 500’s base memory to be
extended. Push in the
memory card until it clicks.
Push again to eject the card.
Browse
Toggles between folder,
track, and bookmark views.
To create a program list, hold
button down for two seconds.
Multi
Press and scroll interface for folder, track,
bookmark, volume and EQ controls. Scroll for
choices and press to select. Also used for
program list editing.
Earphones
Connect your earphones here
for stereo output.
SPECIFICATIONS
PC
• Microsoft Windows 98
• Pentium 90 or higher
• 16MB available RAM
• USB Port (1.0 compliant)
• CD-ROM drive (for MP3 encoding
from CD)
Macintosh
• Mac OS (8.6 or higher)
• iMAC or G3 system
• USB Port (1.0 compliant)
• CD-ROM drive (for MP3 encoding
from CD)
Backlit LCD Display
Shows song/book title, artist,
time and more.
BEFORE YOU BEGIN
Rio is designed to connect easily to your PC or Mac for downloading digital audio files. Before you can enjoy digital audio with
your Rio 500, you must first connect to the USB port on your computer and then install the Rio 500 software.
Fast Forward Button
Skip to the next track while in Stop
mode or playback mode. For fast-
forward searching within the current
track, hold down the button.
Rewind Button
Turn back to the previous track while in
Stop mode or playback mode. For fast-
rewind searching within the current track,
hold down the button.
RIO 500 HARDWARE OVERVIEW
• Software included on CD-ROM:
- RioPort Audio Manager 2.0 (Win98)
- RioPort SoundJam MP by C&G (Mac)
- Audible Manager 2.0 (Win98)
- Sonic Foundry Acid Style (Win98)
- RioPort .MP3 sample content (Web
browser)
USB Port Connector
Connects the Rio 500 device to your
computer using the supplied cable. USB allows for
fast file transfers.
GETTING STARTED GUIDE
for Windows
®
98 and Macintosh
®
OS 8.6


