


INTRODUCTION
The RFX RP93s Patchwork is a MIDI control device that provides control of 4 switch and
a 4 stereo FX loop devices. Up to 128 control combinations can be programmed into the
RP93s and are retrieved through MIDI Program Change commands or button selection.
The Program Change command that retrieves programmed control information from the
RP93s can also be selected for one or all channels.
DESCRIPTION
FRONT PANEL
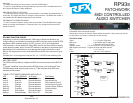
ATCHWORK
RP93
P
STORE DOWN UP
FX LOOP
1
FX LOOP
2
FX LOOP
3
FX LOOP
4
SWITCH
1
SWITCH
2
SWITCH
3
SWITCH
4
FX LOOP 1 - 4: When pressed and the LED is lit, the corresponding FX Loop jacks are
enabled. Used for programming presets.
SWITCH 1 - 4: Identical function to that of the FX LOOP switches except that these
enable the Switch 1 - 4 jacks on the rear panel.
STORE: Used to store presets when making changes in Learn Mode.
DOWN: Decrements presets, program numbers and MIDI channels.
UP: Increments presets, program numbers and MIDI channels.
LED Display: Shows the current program number, or the information to be displayed while
in Learn Mode.
Power Switch: Applies power to the RP93 when the unit is connected to an AC outlet.
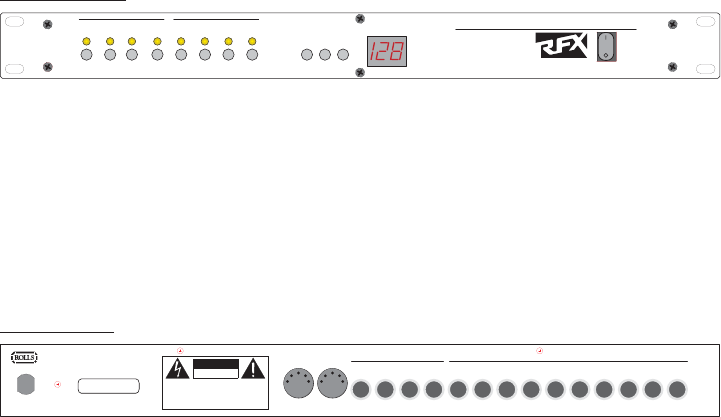
REAR PANEL
MIDI IN
MIDI THRU
SWITCHES
1
234
FX LOOPS
OUT RETURN 4 SEND 4
RETURN 3 SEND 3 RETURN 2 SEND 2 RETURN 1 SEND 1
IN
CAUTION
WARNING:
DO NOT EXPOSE THIS EQUIPMENT TO RAIN
OR MOISTURE.
CAUTION:
TO REDUCE THE RISK OF ELECTRIC SHOCK DO NOT
NOT REMOVE BACK. NO USER SERVICABLE PARTS INSIDE. REFER
SERVICING TO QUALIFIED SERVICE PERSONNEL.
RISQUE DE CHOC - NE PAS ENLEVER
RISK OF ELECTRIC SHOCK
DO NOT OPEN
MODEL RP93
120 VAC
50/60 Hz 15 VA
SERIAL NUMBER
93-
MADE IN U.S.A.
MIDI IN: For connection to the device that is sending the MIDI information to the RP93.
MIDI THRU: This jack is used to directly pass the MIDI information that is present at the
MIDI IN jack.
SWITCHES 1 - 4: 1/4" jacks used to devices that require a "tip to sleeve" switching
activation. The tip of the jack is alternately connected to the sleeve or open depending on
the status of the corresponding front panel switch.
OUT: 1/4" TRS jack containing the signal(s) from the IN and the four FX Loop jacks.
RETURN/SEND jacks 1 - 4: 1/4" TRS jacks used to send stereo signals from the IN jacks
out to signal processing devices, and return them back to the OUT jacks.
IN: 1/4" TRS jack for connection to the device with the signal to be processed in the FX
Loop jacks.
OPERATION
Operating Mode
The RP93s switch settings, once pre-programmed, are recalled via MIDI Program
Change information and are then shown on the front panel display. The Program Change
information must be sent on a MIDI Channel that matches the Channel of the RP93s.
• The factory setting for the MIDI Channel Number is "omni" or channels 1 - 16.
• The factory setting for all RP93s presets is all Switches and FX Loops OFF.
• While in Programmed Operation mode, pressing the UP or DOWN button will increment
or decrement the display and the switch setting presets. Pressing and holding the UP or
DOWN button will cause the display to increment rapidly, but the switch and FX loop
settingsa will not change until the button is released. Pressing a SWITCH or LOOP button
will alternate the on or off state of the associated switch or FX loop port. Changing the
state of a port in this way does not affect the programmed setting for the displayed
Program Number.
The 8 front panel LEDs always show the current state of the switch and FX loop ports.
Program Numbers 100 - 128 will show a 00 - 28 along with a dot in the lower right of the
tens digit to indicate the 100s. There is no program number 0, and 1 - 9 are displayed as
single digits.
DEVICE CONNECTION
The FX loops have an input, 4 sets of sends and returns and an output. These may be
used to control the presence of foot pedals, rack processors, other instruments, etc. in the
signal path. These may also be used as a 4-way A/B box by connecting to the FX returns
only and using the Main Out as the output.
Since the RP93s is passive in its signal path (all switching is done with relays), the signal
may go either way. This means the RP93s may also send a single signal to up to 4
different amplifiers.
There is no change of interference or crosstalk because the switches are contact closure
between the tip and sleeve of the 1/4" connectors. There is no connection between the
different switches.
LEARN MODE
Changes to the Switch and FX Loop settings for each Program Number settings are all
made and stored in Learn Mode. Setting the MIDI Channel, and utilizing the RFX MIDI
Test Mode are also done in Learn Mode.
ENTERING LEARN MODE
• The RP93 enters Learn Mode by pressing both UP and DOWN buttons simultaneously,
and holding them down for approximately 5 seconds.
When in Learn Mode, the numeric desplay blinks. Please note that in Learn Mode, no
MIDI data is processed by the RP93s but data will continue to pass to the MIDI Through
port.
MODIFYING PRESETS
• Pressing the UP and DOWN buttons will increment and decrement the display of the
Program Number. As in Operating Mode, changing the Program Number with the UP and
DOWN buttons will cause the stored switch and FX loop settings to be engaged.
• Pressing a switch or LOOP button will alternate the on or off state of the associated
switch or FX loop port. Changing the state of a port in this way does not affect the
programmed setting for the displayed Program Number (until the STORE button is
pressed). The state of a switch or FX loop port is indicated by the LEDs.
• When the desired setting is shown on the LEDs, press STORE. This will save the
current setting of the switch and FX loop ports for the displayed Program Number. The
display will blank momentarily during the storing operation.
CHANGING THE MIDI CHANNEL
In order for a Program Change commant to affect the switch and FX loop settings, the
proper MIDI channel must be set.
• To set the MIDI Channel, enter Learn Mode. Press the DOWN button until 01 is dis-
played, then press once more - an oF appres in the display. To set a specific MIDI
Channel, press the DOWN button until the desired channel is displayed. For Omni mode,
continue pressing the DOWN button until "on" is displayed, for all off mode, leave "oF"