


Operation
Runco CR-26HD/CR-32HDi Owner’s Operating Manual 35
PRE
L
IMINAR
Y
Time Zone: To set the local (North American) time zone, select Time Zone from the Timer
menu and press ENTER. Use the up- or down-arrow button to select Eastern, Central,
Mountain or Pacific. Press ENTER to confirm your selection.
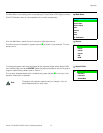
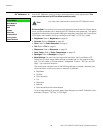
SetupUse the controls in the Setup menu to perform advanced image quality adjustments and
access various other Crystal Series LCD Display features.
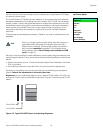
OSD Language: Select OSD Language from the Setup menu and press ENTER. Then,
use the up- or down-arrow buttons to select the OSD language (English, French, Spanish,
Portuguese or German). Press ENTER again to confirm your selection.
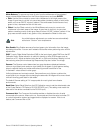
PC Mode Adjust: To improve the quality of projected images from a computer or other
VESA-compliant, RGB source, select PC Mode Adjust and press ENTER.
•Auto Adjust: Auto Adjust automatically adjusts settings to optimize computer images.
To execute Auto Adjust on command, select Auto Adjust and press ENTER.
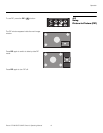
•H Position: Use the up- or down-arrow buttons ( , ) to highlight H Position. Then,
use the right-arrow button ( ) to shift the image to the right; use the left-arrow button
( ) to shift the image to the left.
•V Position: Use the up- or down-arrow buttons ( , ) to highlight V Position. Then,
use the right-arrow button ( ) to shift the image up; use the left-arrow button ( ) to
shift the image down.
•H Size: Use the up- or down-arrow buttons ( , ) to highlight H Size. Then, use the
right-arrow button ( ) to increase the width; use the left-arrow button ( ) to
decrease it.
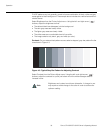
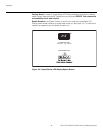
•Phase: Adjust the phase if the image shows shimmer or “horizontal” noise. Pixel phase
adjusts the phase of the pixel sampling clock relative to the incoming signal. The effect
of this control is similar to that of a tracking control on a VCR.
For best results, use a good test pattern such as a smooth gray consisting of a clear
pattern of black and white pixels, or a similar “half on, half off” graphic image. (You may
notice that you can stabilize the image at more than one point. Use either setting in this
case.)
To restore the factory-default Position, Size and Phase settings, select Factory Preset and
press ENTER.
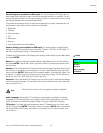
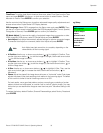
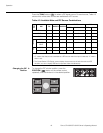
Setup
OSD Language
PC Mode Adjust
Caption
Parental Control
Letterbox Mode
Input Selection
Monitor Out
Overscan
Auto Adjust may take some time to complete, depending on the
characteristics of the incoming signal.
Note