


Operation
Runco CinemaWall SP Series Owner’s Operating Manual 37
PRE
L
IMINAR
Y
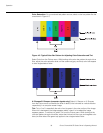
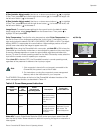
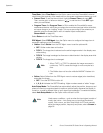
Sharpness: “Sharpness” is the amount of high-frequency detail in the image. To adjust
sharpness, select Sharpness from the Picture menu and press SET. On your external test
pattern source, select a pattern like the one shown in
Figure 4-6. Adjust as needed,
looking for white edges around the transitions from black to gray and different sized lines
in the “sweep” patterns at the top and bottom. Lower the sharpness setting to eliminate
them.
Figure 4-6. Typical Test Pattern for Adjusting Sharpness
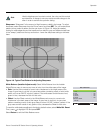
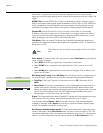
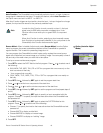
White Balance (Installer Adjust mode): Select White Balance from the Installer
Adjust/Picture menu to remove any trace of color from the white areas of the image.
• Gain: Use the Gain controls to correct color imbalances in the bright areas of the
image. A good way to do this is to use a test pattern consisting mostly of solid white
areas, such as an 80 IRE “window” pattern. If the white areas contain traces of red,
green or blue, decrease the Gain for that color.
•Offset: Use the Offset controls in the White Balance sub-menu to correct color
imbalances in the dark areas of the image. A good way to do this is to use a test
pattern consisting mostly of dark gray areas, such as a 30 IRE “window” pattern. If the
gray areas contain traces of red, green or blue, decrease the Offset for that color.
To reset the white balance settings to the factory default values, select White Bal. Reset.
Then, press
to highlight YES and press SET.
Select Return to exit the White Balance menu.
Like the brightness and contrast controls, the color and tint controls
are interactive. A change to one may require a subtle change to the
other in order to achieve the optimum setting.
Note
WHITE BALANCE
R. GAIN : +128
G. GAIN : +128
B. GAIN : +128
R. OFFSET : +128
G. OFFSET : +128
B. OFFSET : +128
WHITE BAL. RESET
RETURN
ENTER
SET
EXIT
MENU