


12
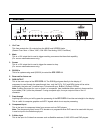
Now that your PFP-7/PFP-11 has been installed, it's time to get it configured for use in your system.
Please follow the procedures and recommendations below:
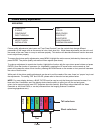
1. First, connect all sources (DVD, VCR, Satellite receiver, etc.) to the PFP-7/PFP-11, if this has not already
been done. Also, ensure all sources are ON and functioning, if possible.
2. Connect the RGB (or component) output of the PFP-7/PFP-11 to the display device it is to be used with.
NOTE: It may be necessary to set the 'output format' and 'resolution' in the Installation menu to match the
input type and scan rate of the display device it is to be used with (see page 19).
3. With everything properly connected, turn the PFP-7/PFP-11 on, followed by the display device itself.
4. If the output scan rate and output format have not been optimized for the display device the processor will be
used with, set them now (see page 19 for recommendations).
5. Next, set the 'screen type' in the installation menu, either 16:9 screen (for installations using widescreens or
other display devices with a 16:9 aspect ratio (i.e. a plasma display)) or 4:3 screen for those displays using a
4:3 screen only.
Once the initial settings have been completed, the 'front panel settings' (color, tint, sharpness, etc.) can be
adjusted for each aspect ratio. The calibration procedures for these adjustments are outlined in 'picture quality
adjustments', page 15.
Getting Started