


29
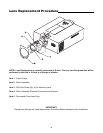
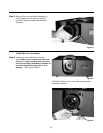
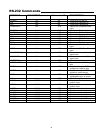
Step 1: Remove the Front Cover (Item 5) by
loosening #2 Phillips screw below lens.
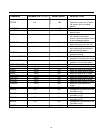
Step 2: Locate and unplug the Motor Assembly
Connector (Item 4); remember wire routing
for the new lens.
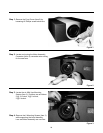
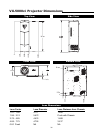
Step 3: Locate the six 9/64 Hex Mounting
Screws (Item 3). Positions are as follows:
2 @ 12 o'clock, 2 @ 9 o'clock,
2 @ 6 o'clock.
Step 4: Remove the 6 Mounting Screws (Item 3)
while supporting the Lens Assembly;
Lens and Motor Assembly are now free.
Figure 3
Figure 2
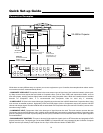
Figure 1