SNH-1011N English
Quick Start
Guide
If you have any questions or need help
installing your new product please contact
our free technical support.
Telephone : 1-877-349-3149
9am - 9pm EST, Monday - Friday
Internet : http://www.samsungsv.com/Support/Index
Related manual can be downloaded from
https://www.samsungsmartcam.com/web/pages/main_support.jsp.
Thank you for purchasing the Samsung
SmartCam Wifi Home Security Camera.
Follow the simple
steps in this guide to set
up and start using your new SmartCam.
UNPACKING
Make sure all following items are in the packaging:
Camera Adapter Network Cable
Double Sided
Tape
Screws /
Wall anchors
Quick Guide X3
Warranty Card X1 /
GPL License X1
J
Save the packaging for later use.
You will need the serial number found on the side of
the packaging.
CONNECTING THE CAMERA TO YOUR ROUTER
1.
Connect the power adapter to the camera.
2.
Connect the network cable to the camera
and your network router.
3.
The camera bootup will take about 1
minute then the camera status LED will
change from red to green.
J
For proper networking to a Wi-Fi router with
using the router’s WPS function, refer to the router’s manual and the product’s
user manual available on the web page.
SETTING UP YOUR ACCOUNT
J
The subscription and camera registration explained below can be made on your
smartphone too. Refer to the “iPhone” or “Android” section of <Support> on
the product web site.
1.
From your PC, go to http://www.
samsungsmartcam.com.
2.
Select <Sign Up> to register.
After reading the terms of use, check
“I Agree...”, and click <Next>.
3.
Enter requested information, and click
<Sign Up>.
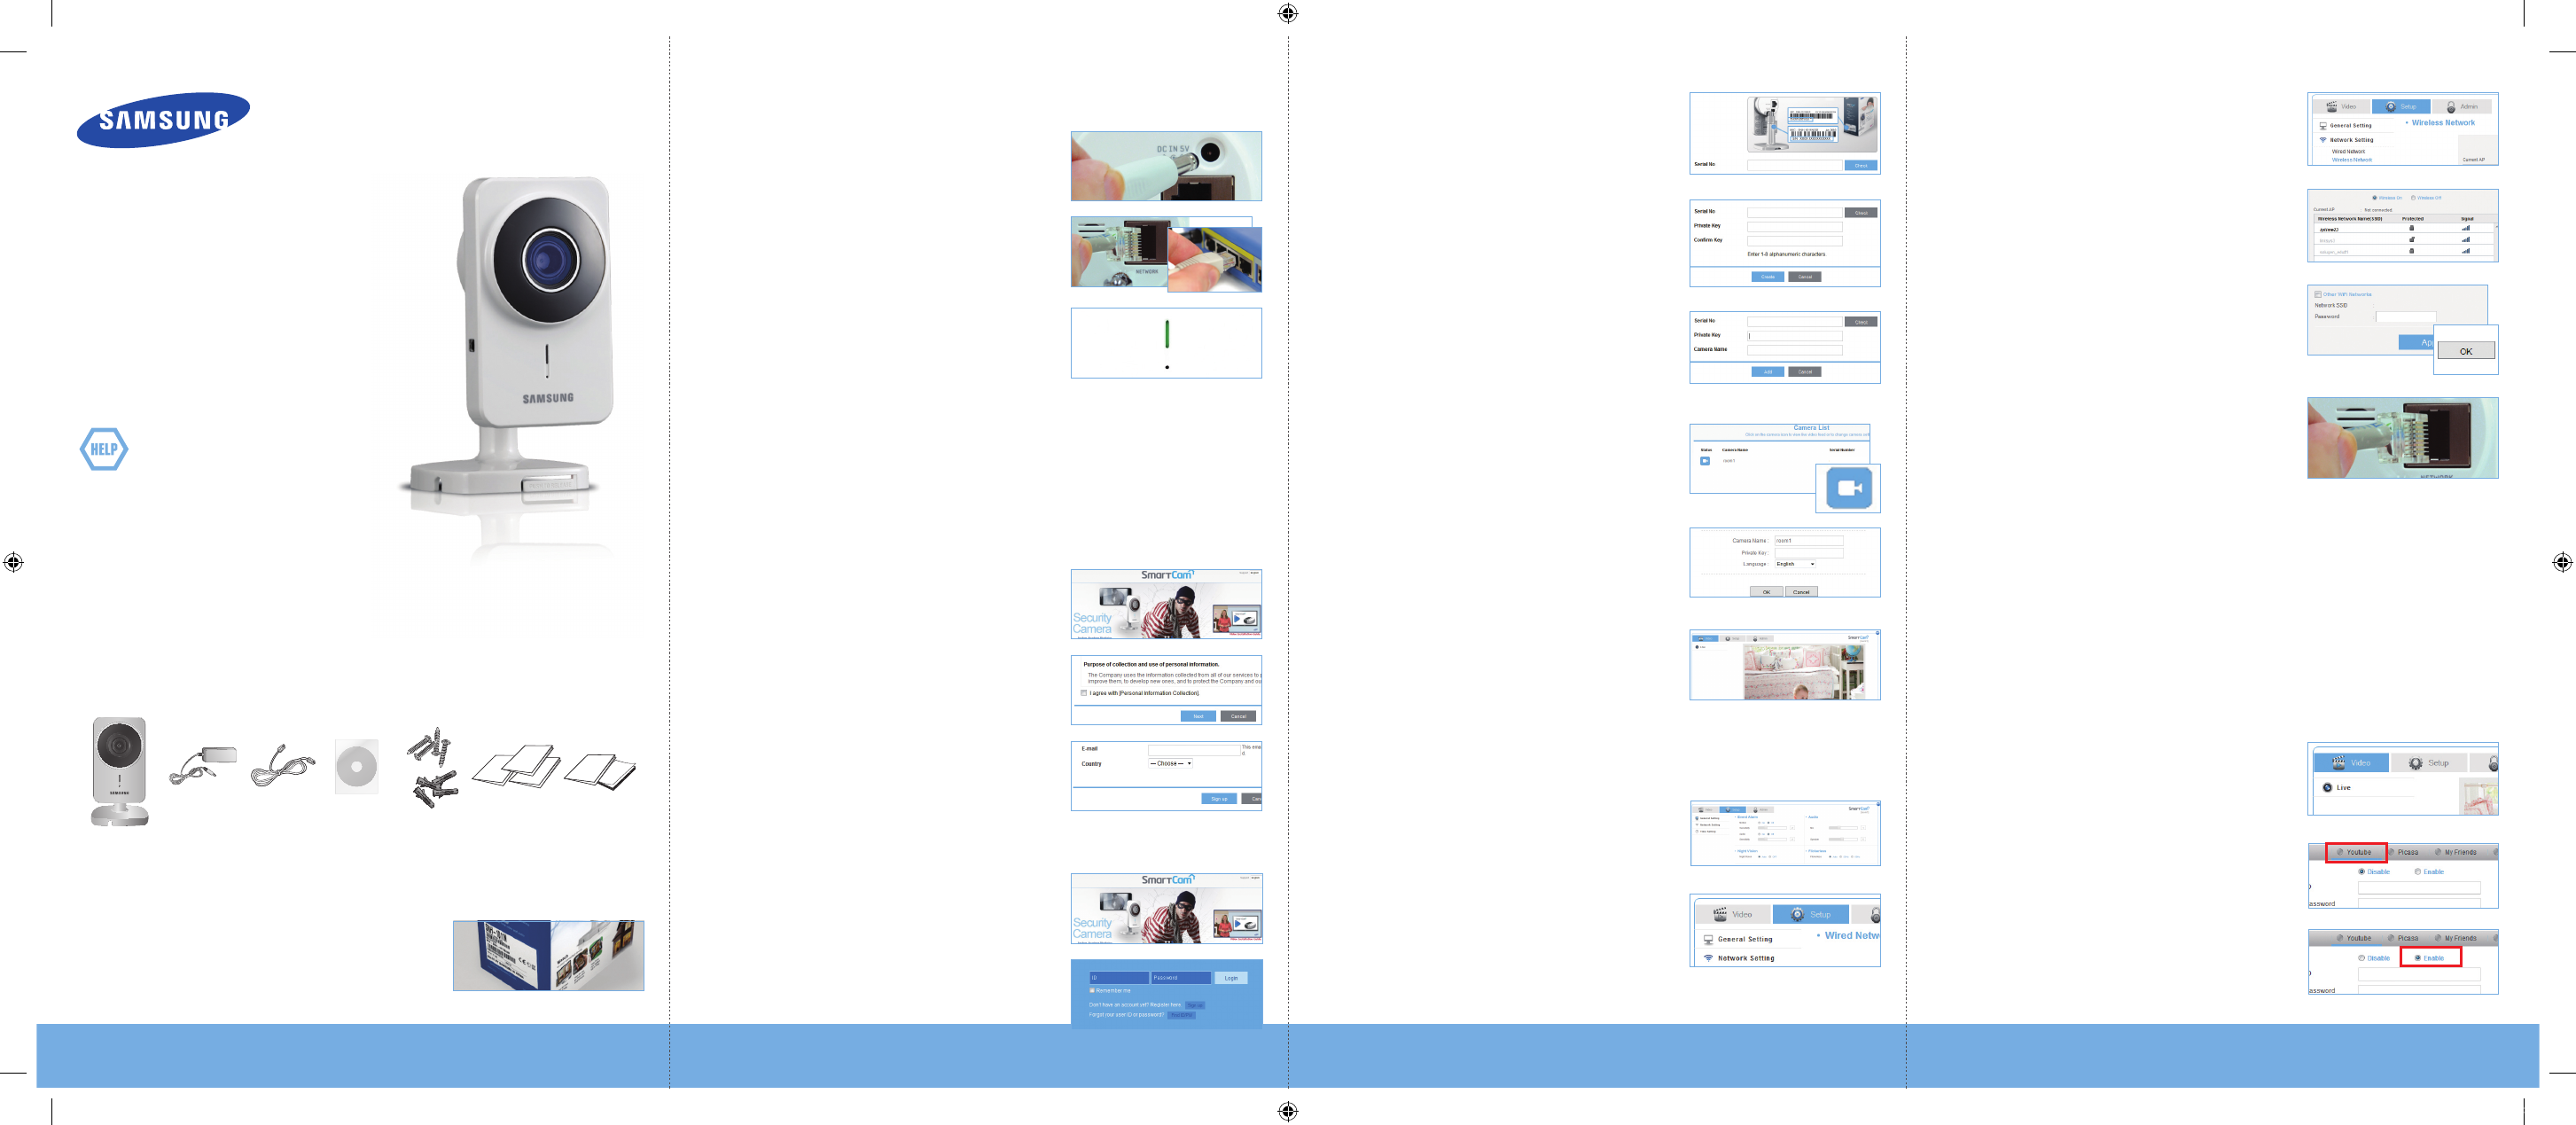
ADDING YOUR CAMERA
1.
From your PC, go to http://www.
samsungsmartcam.com.
2.
Enter your SmartCam account username
and password and <Login>.
3.
Enter your camera Serial Number and click
<Check>.
4.
Create a private key (Password) for the
camera. Use 1 to 8 alphanumeric characters.
5.
Create a name for the camera. I.e., Home
And click <Add>.
6.
Click camera icon in the camera list.
7.
Enter the Private Key for the camera and
click <OK>.
J
If you forget your Private Key, you must reset the
camera. Refer to the full manual for details.
8.
View your camera.
You will be asked to install the web viewer
plug-in to view the video for the first time.
After installation, please restart the browser
and login again.
CONNECTING TO YOUR WIFI NETWORK
1.
Click <Setup>.
2.
Click <Network Setting>.
3.
Click <Wireless Network>.
4.
Select <Wireless On> then select your wifi
network. If your network is hidden, select
<Other Wifi Networks>.
5.
Enter the password for your wifi network
and click <Apply> then in the popup, click
<OK>.
6.
Disconnect the network cable from the
camera and the wireless router.
J
The camera status LED will flash blue then turn steady green after about 20 seconds.
You can now unplug the camera and place anywhere around the home within the WiFi
range. If it continues to flash blue, a wifi connection has not been established.
Please contact our tech support at 1-877-349-3149
SETTING UP NOTIFICATIONS
YouTube
Automatically uploads 30 second clip to your private YouTube account.
1.
Click the <Video> tab.
2.
Click the <Youtube> tab.
3.
Select <Enable>.
XXXXXXXXXXXXXXX
XXXXXXXXXXXXXXX
XXXXXXXXXXXXXXX
SNH-1011N-Quick Start Guide-ENGLISH.indd 1 2012-10-23 오후 5:44:43


