


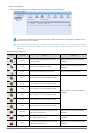

3-6 Using
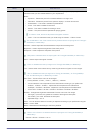
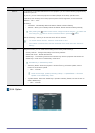
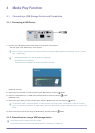
<Projector List>, and then select <Add Projector>.
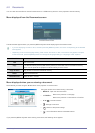
• Specify the <Projector Name>, <IP Address> and <Group Name> to register, and then press <ADD>.
Any group whose name is not specified will automatically be named <Default Group>. To remove and / or
rename a registered projector, right-click and then select <Delete> and / or <Rename> respectively.
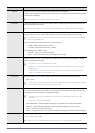
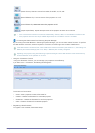
If a projector is not displayed on the <Projector List >after registration, check if the network connection and the
network settings are properly configured. See section 2-17, Connecting to a Network and section 3-5-3,
<Setup>→<Network> for information and instructions.
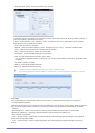
To save or load the registered projector's information, select <File>→<Export Config>.