


11
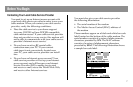
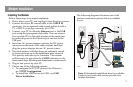
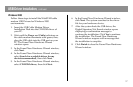
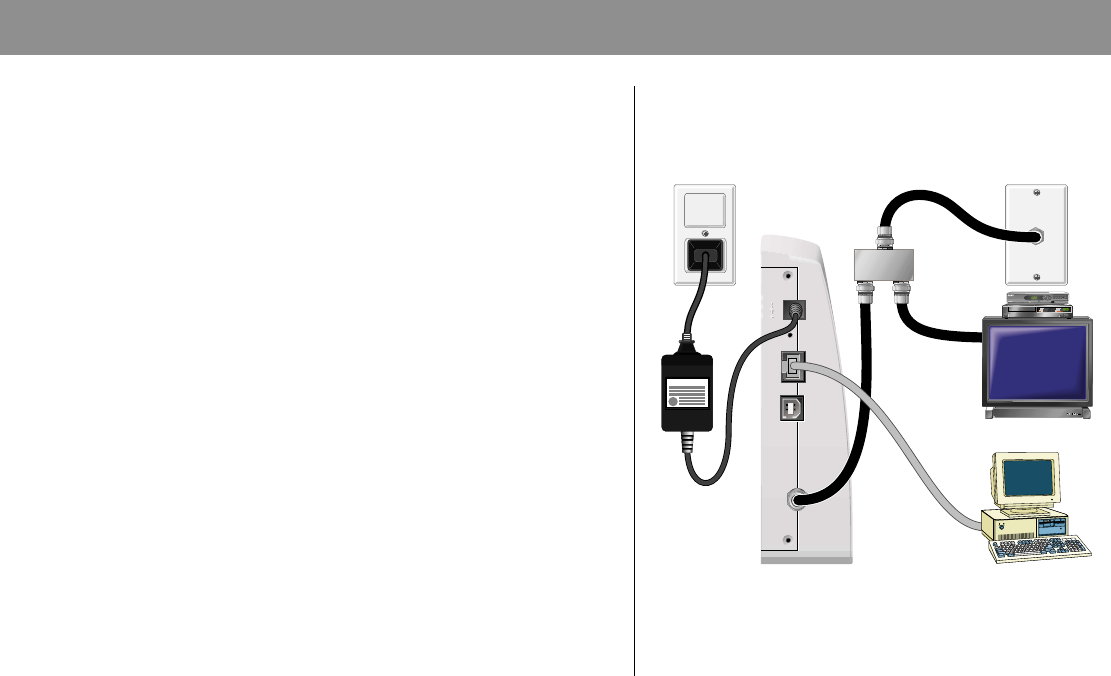
Modem Installation
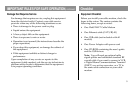
The following diagram illustrates one of the
various connection options that are available
to you.
Note: Professional installation may be available.
Contact your local cable service provider for
further assistance.
Installing the Modem
Follow these steps for proper installation.
1. Power down your PC and unplug it from the power source.
2. Connect the active RF coaxial cable to the CABLE IN
connector. Use an optional cable signal splitter to add a
TV, a DHCT or set-top converter, or a VCR.
3. Connect your PC to either the Ethernet port or the USB
port using the appropriate data cable. You can connect
two separate PCs to the cable modem at the same time
by connecting one to the Ethernet port and one to the
USB port.
4. Insert the AC power adapter cord into the DC power
connector on the back of the cable modem, and then
plug the power adapter into an AC power source.
5. The cable modem will then begin an automatic search
to locate and sign on to the broadband data network.
This process may take up to 5 minutes. The modem
will be ready for use when the CABLE indicator on the
front panel stops blinking and illuminates continuously.
6. Plug in and power up your PC.
7. Choose one of the following options:
• To configure the TCP/IP protocol for Ethernet—
see TCP/IP Configuration.
• To install the USB Drivers for USB—see USB
Driver Installation.
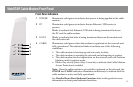
POWER
12 VDC
POWER
12 VDC
RESET
RESET
ETHERNET
ETHERNET
USB
USB
CABLE
IN
CABLE
IN
Power
Supply
Cable-Ready TV,
VCR, or Set-Top
Converter
PC
Ethernet
Cable
RF
Cable
RF
Cables
Cable
Splitter
T9918
Power Supply
BYPASS
VOLñ VOL+
CH+
CHñ
MENUGUIDEINFOA/B
POWER