INSTALLING THE PRINTER DRIVER AND UTILITIES (SOFTWARE INSTALLATION)
7
■
■■
■ Installing the printer driver (custom installation)
The procedure for a custom installation of the printer driver is explained here. Select [Custom installation] if you
wish to install a display font or directly specify the IP address of the machine.
1
Insert the "SOFTWARE CD-ROM (1)" that
accompanied the machine into your CD-
ROM drive.
2
Click the [start] button, click [My
Computer], and then double-click the CD-
ROM icon.
In Windows 95/98/Me/NT 4.0/2000, double-click
[My Computer], and then double-click the CD-
ROM icon.
3
Double-click the [SETUP] icon.
4
The License Agreement window will
appear. Make sure that you understand
the contents of the license agreement, and
then click the [Yes] button.
5
After confirming the message in the
"Welcome" window, click the [Next]
button.
6
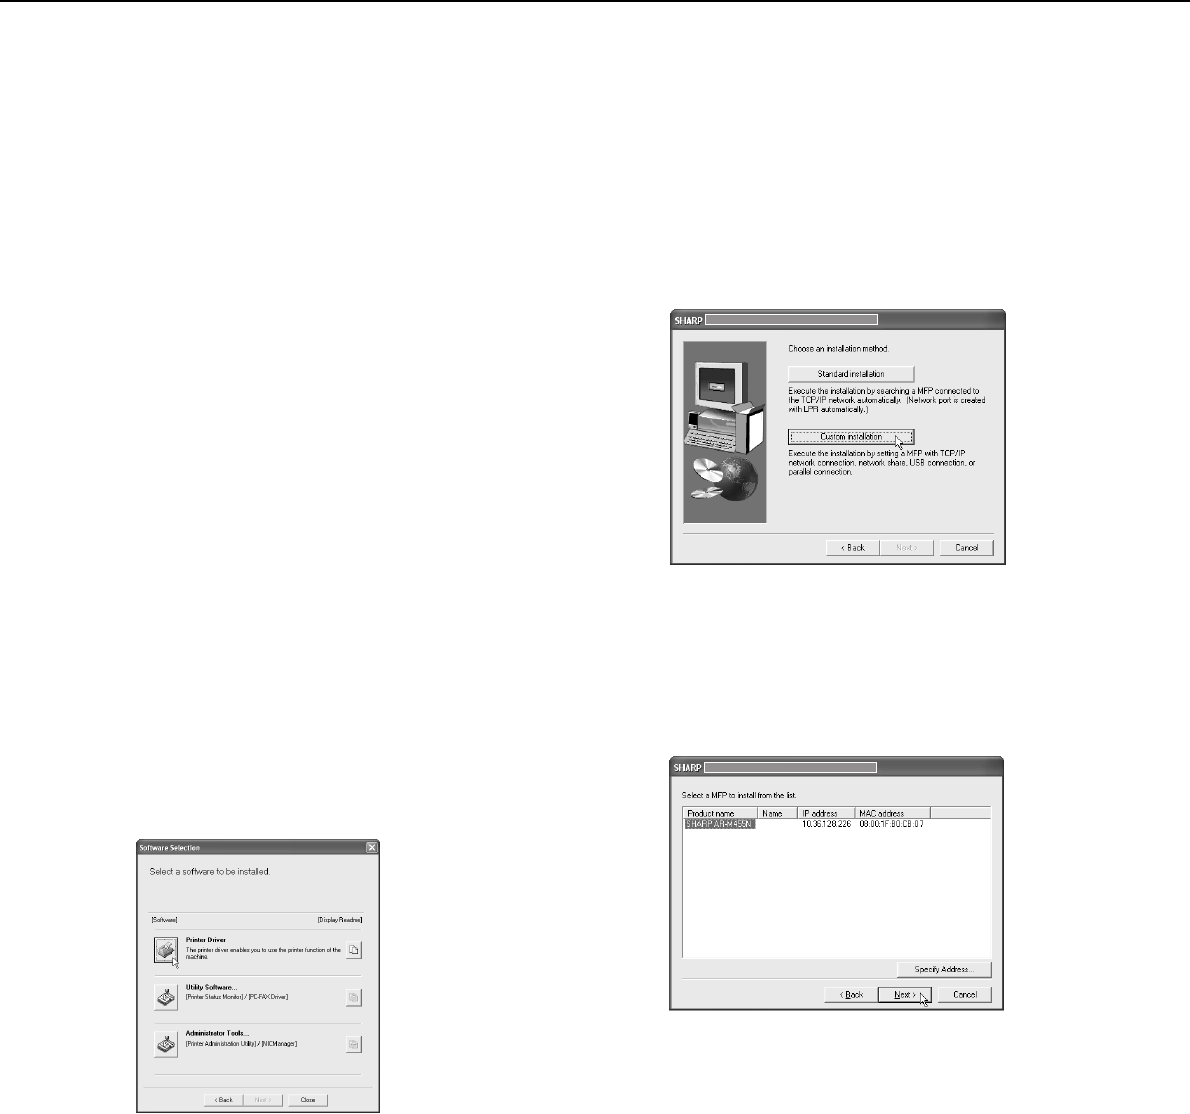
Click the [Printer Driver] button.
To view detailed information on the software, click
the [Display Readme] button.
●If you wish to install the printer status monitor or the
PC-FAX driver, click the [Utility Software] button in
this window and then click the [Printer Status
Monitor] or [PC-FAX Driver] button and follow the
on-screen instructions.
●If you wish to install the printer administration
utility, click the [Administrator Tools] button in this
window and then click the [Printer Administration
Utility] button and follow the on-screen instructions.
7
Click the [Next] button.
8
Click the [Custom installation] button.
9
Select the [LPR Direct Print] and click the
[Next] button.
10
The printers that are connected to the
network are found. Select the machine and
click the [Next] button.
If you wish to directly specify the IP address, click
the [Specify Address] button, enter the IP address,
and click the [Search] button.
Be sure to ask your network administrator for the
correct IP address to be entered.
11
A confirmation window will appear. Read
the contents and click the [Next] button.
inst_us.book 7 ページ 2004年9月2日 木曜日 午前10時19分
