12
Connecting the monitor and turning the monitor on and off
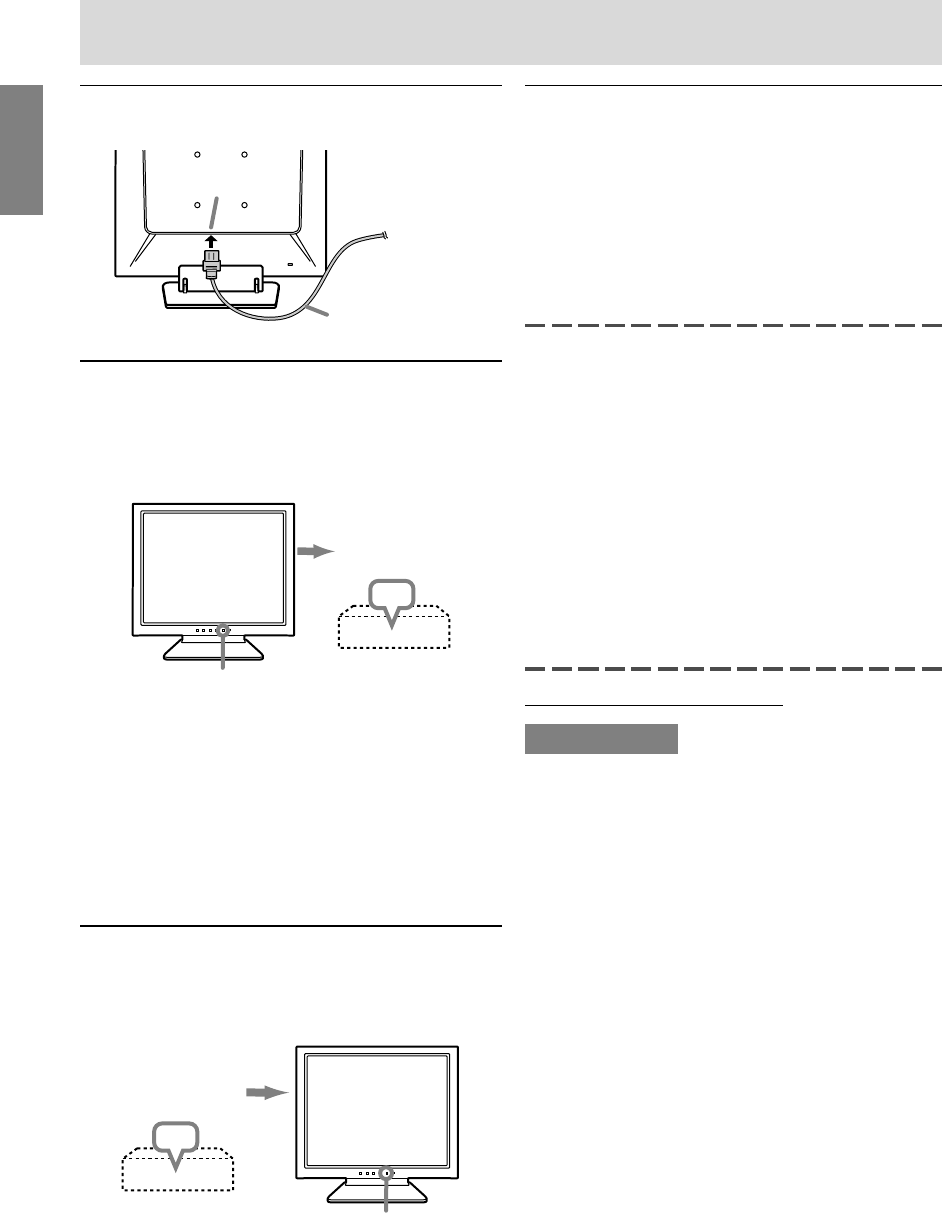
Connecting the monitor to a power source
Turning the power on
1.Press the monitor's power button.
2.Turn on the computer.
The power LED will be lit green, and the screen
will display an image.
ON
Notes:
- If using the monitor for the first time or after
having changed the system settings during use,
perform an automatic screen adjustment. (p.17)
- Depending on the type of computer or OS, you
may need to install the monitor set-up information
on your system. If so, follow the steps below to
install the monitor set-up information.
Turning the power off
1. Turn the computer off.
2.Press the monitor's power button.
The power LED will disappear.
OFF
If the monitor is not going to be used for a long
period of time, be sure to unplug it from the AC
outlet.
Power terminal
AC outlet
Press power button.
Power cord
Turn on the
computer.
Turn the
computer off.
Press power button.
Installing set-up information and the
ICC profile (for Windows)
Depending on the type of computer or OS, you may
need to install the monitor set-up information on your
system. If so, follow the steps below to install the
monitor set-up information. (Depending on the type
of computer or OS, command names and methods
may differ. Please follow the computer's own
operation manual while reading this.)
About the ICC profile
An ICC (International Color Consortium) profile is a
file that describes the color reproduction
characteristics of the LCD monitor. Using an
application compatible with an ICC profile, highly
accurate color reproduction can be realized.
- Windows 98/2000/Me/XP all use the ICC profile.
- When installing Windows 98/2000/Me/XP set-
up information (described below), the ICC
profile is also installed. If you would like to
install the ICC profile only, please refer to
Installing the ICC profile on page 14.
- When using an ICC profile, set [DISPLAY
MODE] to either [STD] or [OFFICE], and set
[WHITE BALANCE] to [STD].
Installing set-up information
For Windows 95
Installing monitor set-up information into Windows
95.
This explanation assumes that the floppy disk drive
is "A drive".
1. Place the Utility Disk (provided) into the
computer's A drive.
2. Click on the [Start] button. From [Settings],
choose [Control Panel].
3. Double click on [Display].
4. Click on [Settings], [Advanced Properties], and
[Monitor], then [Change].
5. Click on [Have disk], confirm that [Copy
manufacturer's files from:] is [A:] then click
[OK].
6. Confirm that the monitor details are selected,
and click [OK].
7. Check that the monitor details are displayed,
then click [Apply].
8. Click [OK], and close the window.
9. Remove the Utility Disk from the A drive.
T15A4_gb.p65 3/14/2003, 5:33 PM12


