


25
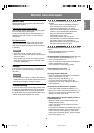
EnglishDeutschFrançaisItalianoEspañolEnglish
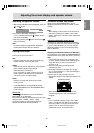
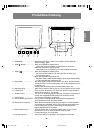
An arm or stand based on the VESA standard
(commercially available) can be attached to the
monitor.
Procurement of the arm or stand is at the custom-
er's discretion.
When choosing the arm to be installed please take
note of the following points.
- The arm should be compatible with the VESA
standard, and there must be a gap of 100mm x
100mm between the screw holes on the section
to be attached.
- The arm must not fall off or break off after being
attached to the monitor.
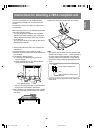
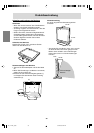
1.Ensure that both the monitor and computer are
switched off.
2.Unplug the power cord from the AC outlet.
3.Remove the analog signal and audio cables from
the computer.
4.Fold back the display section.
1) If carrying out adjustments to the monitor,
place it upright.
2) While pressing the rear lock disable button,
gently fold back the monitor.
- Do not overly bend the cable or add extension
cords as this could lead to malfunction.
5.Being careful not to damage the monitor, spread
out a soft cloth and lay the monitor on it display-
side down.
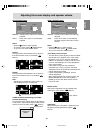
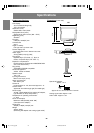
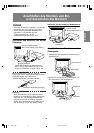
Instructions for attaching a VESA compliant arm
Screw used to attach arm
Arm
Part of monitor to which arm is
attached
6. Attach the arm to the monitor with four screws.
Note:
- The screws used to attach the arm should be M4
screws with a length of 7 mm ~ 10 mm protruding
from the surface to be attached. Using different
screws could lead to malfunction or may lead to
the monitor falling off,internal damaged,personal
injury.
7 - 10mm
7.Connect the analog signal and audio cables and
power cord.
Lock disable button
02_LL-T17A3_gb.p65 9/12/2002, 6:02 PM25