60
Specifying the send size of the image
Specify the send size as a paper size. If a send size bigger than the scan size is selected, the image will be enlarged. If
a send size smaller than the scan size is selected, the image will be reduced.
• The send size cannot be specified when [Long Size] is selected for the scan size, or when the scan size is specified by
numerical values.
• The send size cannot be specified when [TIFF-S] is selected for the format in Internet fax mode. (The send size is fixed at
A4R (8-1/2" x 11"R).)
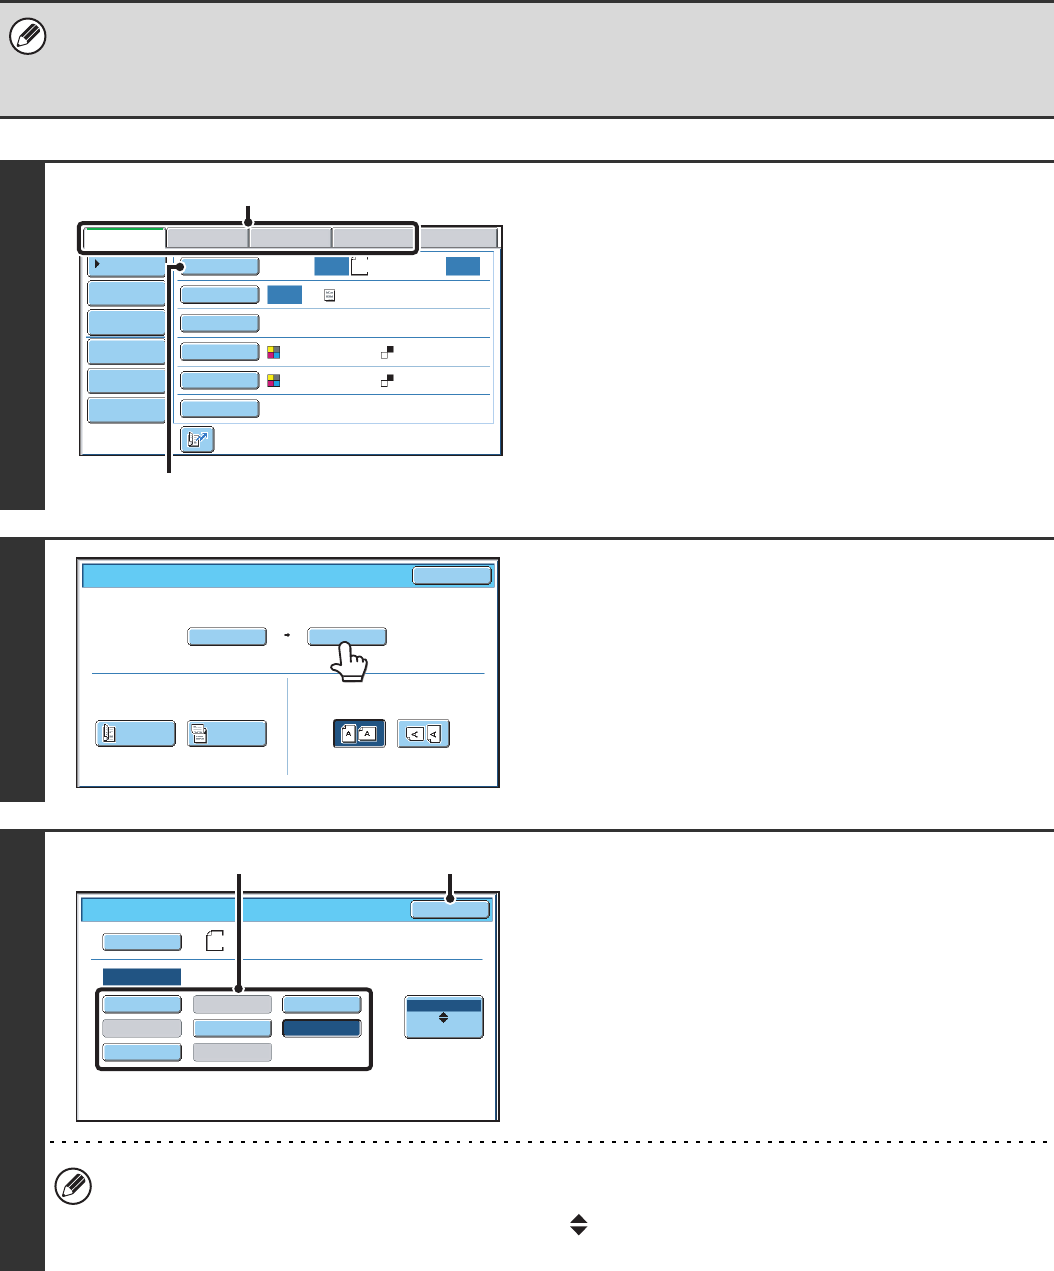
1
Select the mode and display the image
settings screen.
(1) Touch the tab of the mode that you wish to
use.
(2) Touch the [Original] key.
2
Touch the [Send Size] key.
3
Specify the send size.
(1) Touch the desired send size key.
(2) Touch the [OK] key.
• Depending on the paper size specified for the "Scan Size", it may not be possible to select some sizes for the "Send
Size". Size keys that cannot be specified for the "Send Size" are greyed out to prevent selection.
• To specify an inch size for the send size, touch the [AB Inch] key to highlight the [Inch] side and then specify the
send size.
Auto Auto
Auto
File
Quick File
Address Review
Send Settings
Address Entry
Address Book
USB Mem. ScanFaxInternet Fax PC Scan
Special Modes
Colour Mode
File Format
Resolution
Exposure
Original
Scan:
Scan
Send:
Text
200X200dpi
PDF
Auto/Greyscale Mono2
PDF
A4
(2)
(1)
Scan/Original
OK
Auto
Scan Size
2-Sided
Tablet
2-Sided
Booklet
Send Size
100%
Image Orientation
Auto A4
Scan/Original
OK
Auto
Inch
AB
Manual
A4
A5
A5R
B5
B5R
A4
B4
A3
A4R
(2)(1)
