Label Objects for Mac OS X
Object buttons are used to add different elements to the labels. The object buttons appear
in the layout palette at the bottom of the Main Window.
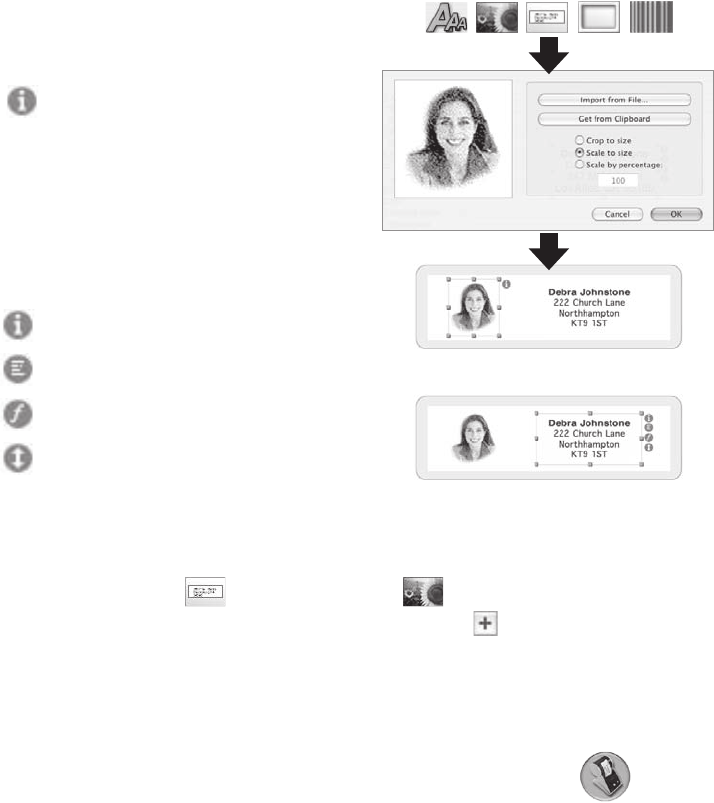
• Click an object button, define its attributes in
the drop down sheet and click OK.
• To modify an object on the label, click the
button to the right of the object.
• To change the import characteristics,
double-click the object.
• Drag handles to resize the object or drag the
object to move it.
• To adjust text objects, click one of the
following buttons to the right of the handles:
Text object properties sheet will appear.
A pop-up menu for text alignment will appear.
A pop-up menu for fonts will appear.
A pop-up menu for font size will appear.
How To’s
Create a New Label. Click a Smart Label Icon in the Templates list or create a new format
by adding objects. Click to add an address or to add a picture, for instance.
Save Labels in Folders. Click in the Saved Labels list. Click the button and name
the folder. Drag saved labels to this folder.
Save a Template. Choose Save Template... from the File menu. Name the template
and click OK.
Edit a Saved Label. Click the label in the the Saved Labels list and edit as shown above.
Print Saved Labels. Click the label in the the Saved Labels list then click the button.
Print Labels from Another Application. Click on Advanced button located near the bottom
of the window. Choose the program from which to print the labels. Select the labels from
the list and click OK.
Quick Tour


