13
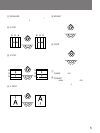
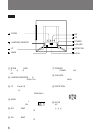
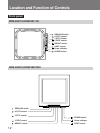
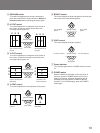
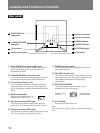
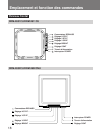
1 DEGAUSS switch
This switch demagnetizes the screen. Momentarily
press this switch with the power turned on. Wait for 5
minutes or more before activating the switch again.
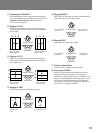
2 H STAT control
This control adjusts the convergence at the center of
the screen, so that the vertical red and blue lines
converge with the green line.
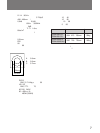
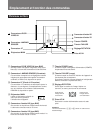
5 BRIGHT control
This control adjusts the picture brightness. Normally set
the control at the center detent position.
Move red line to the
right, and blue line to
the left
Move red line to the
left,and blue line to
the right
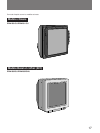
(Chassis model)
(B/C model)
3 V STAT control
This control adjusts the convergence at the center of
the screen, so that the horizontal red and blue lines
converge with the green line.
Move red line
downward, and
blue line upward
Move red line
upward, and blue line
downward
(Chassis model)
(B/C model)
4 V CENT control
This control adjusts the vertical position of the picture.
Move the picture
upward
Move the picture
downward
(Chassis model)
(B/C model)
(Chassis model)
(B/C model)
RGB
BGR
R
G
B
B
G
R
7 Power indicator
This indicator lights when the POWER switch is turned
on.
8 POWER switch
When the MAIN circuit breaker on the rear panel is
turned on, press the POWER switch to turn on the
display. At this time, automatic degaussing will be
activated causing the picture to shake for about 5
seconds. To turn off the display, press the POWER
switch again.
6 CONT control
This control adjusts the picture contrast.
(Chassis model)
(B/C model)
For less contrastFor more contrast
For a brighter
picture
For a darker
picture


