


VAIO® System Reference Manual
26
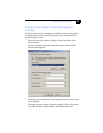
Installing a PCI Add-In Card
1 Remove the side cover (see “Removing the Side Cover” on page 24).
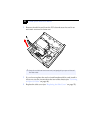
2 Locate an available expansion slot.
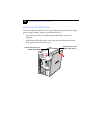
3 Remove the slot cover adjacent to the selected slot (see “Removing a
Slot Cover” on page 39).
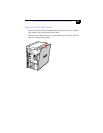
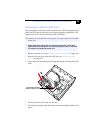
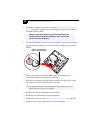
4 Insert the add-in card into the PCI slot. Use a gentle rocking motion,
pressing down until the card is fully seated.
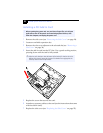
5 Replace the screw that secures the card.
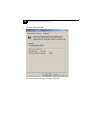
6 Attach any necessary cables to the card (see the instructions that came
with the add-in card).
7 Replace the side cover (see “ReplacingtheSideCover”on page 25).
! Before opening the system unit, save and close all open files, exit all open
applications, turn off the power to all attached peripheral devices, shut
down the computer, and unplug the power cord.
✍ Align the card's bracket so that the bottom of the bracket fits into the slot at the
bottom of the chassis. Assure that the top of the bracket fits snugly against the
chassis lip after the card is fully inserted.