


23 (GB)
Resizing and Positioning
the Picture
You can shift the position of the picture so that it fits
in the screen, or adjust the vertical and horizontal size
of the picture separately.
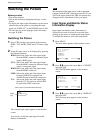
Resizing the Picture
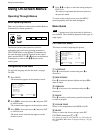
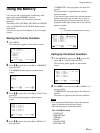
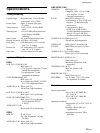
1 Press MENU.
The main menu appears on the monitor screen.
MA IN MENU
PIC CONTROL
PIC SIZE
CONF IG
MEMORY
REMOTE
STATUS
SELECT CANCEL
ENTER
MENU
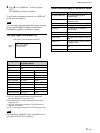
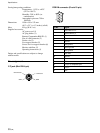
2 Press M/m to move the cursor (B) to “PIC SIZE”
and press ENT.
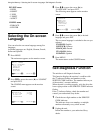
The PIC SIZE menu appears on the monitor
screen.
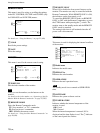
PIC SIZE
HSIZE : 00
HSHIFT : 00
VSIZE : 00
VSHIFT : 00
ASPECT : 4x3
RESET
SELECT CANCEL
ENTER
MENU
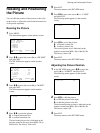
3 Press M/m to move the cursor (B) to “H SIZE”
and press ENT.
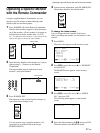
The following menu appears on the monitor
screen.
HSIZE : 00
4 Press M/m to resize the picture.
M: to expand horizontal size
m: to reduce horizontal size
The horizontal picture size is indicated on the
monitor screen in the range from MIN(–50) to
MAX(+50). The factory value is 00.
5 Press ENT.
The menu returns to the PIC SIZE menu.
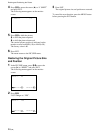
6 Press M/m to move the cursor (B) to “V SIZE”
and press ENT.
The following menu appears on the monitor
screen.
VSIZE : 00
7 Press M/m to resize the picture.
M: to expand vertical size
m: to reduce vertical size
The vertical picture size is indicated on the
monitor screen from MIN(–50) to MAX(+50).
The factory value is 00.
8 Press ENT.
The menu returns to the PIC SIZE menu.
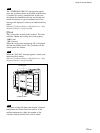
Adjusting the Picture Position
1 In the PIC SIZE menu, press M/m to move the
cursor (B) to “H SHIFT” and press ENT.
The following menu appears on the monitor
screen.
HSHIFT : 00
2 Press M/m to shift the picture.
M: to shift the picture to the right
m: to shift the picture to the left
The horizontal picture position is indicated on the
monitor screen from MIN(–50) to MAX(+50).
The factory value is 00.
3 Press ENT.
The menu returns to the PIC SIZE menu.
Resizing and Positioning the Picture