


SY-7IWM Quick Start Guide
10
Quick BIOS
Setup
3
3
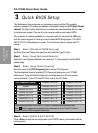
Quick BIOS Setup
This Motherboard does not require any hardware jumpers to set the CPU operating
frequency. Instead, CPU settings are software configurable through the BIOS
[Soyo Combo
Feature].
The [Soyo Combo Feature] menu combines the main parameters that you need
to configure your system. They are all in one menu to enable a quick setup in BIOS.
After completion of hardware installation, turn the power switch on, then press the
<DEL>
key
while the system diagnostic is checking to enter the Award BIOS Setup program. The CMOS
SETUP UTILITY will be displayed on screen. Then follow these steps to configure the CPU
settings.
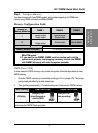
Step 1. Select [Standard CMOS Features]
Set [Date/Time] and [Floppy drive type], then set [Hard Disk Type] to “Auto”.
Step 2. Select [Load Optimized Defaults]
Select the “Load Optimized Defaults” menu and type “Y” at the prompt to load the BIOS
optimal setup.
Step 3. Select [Soyo Combo Feature]
Move the cursor to the
[CPU Frequency]
field to set the CPU frequency.
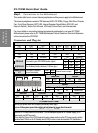
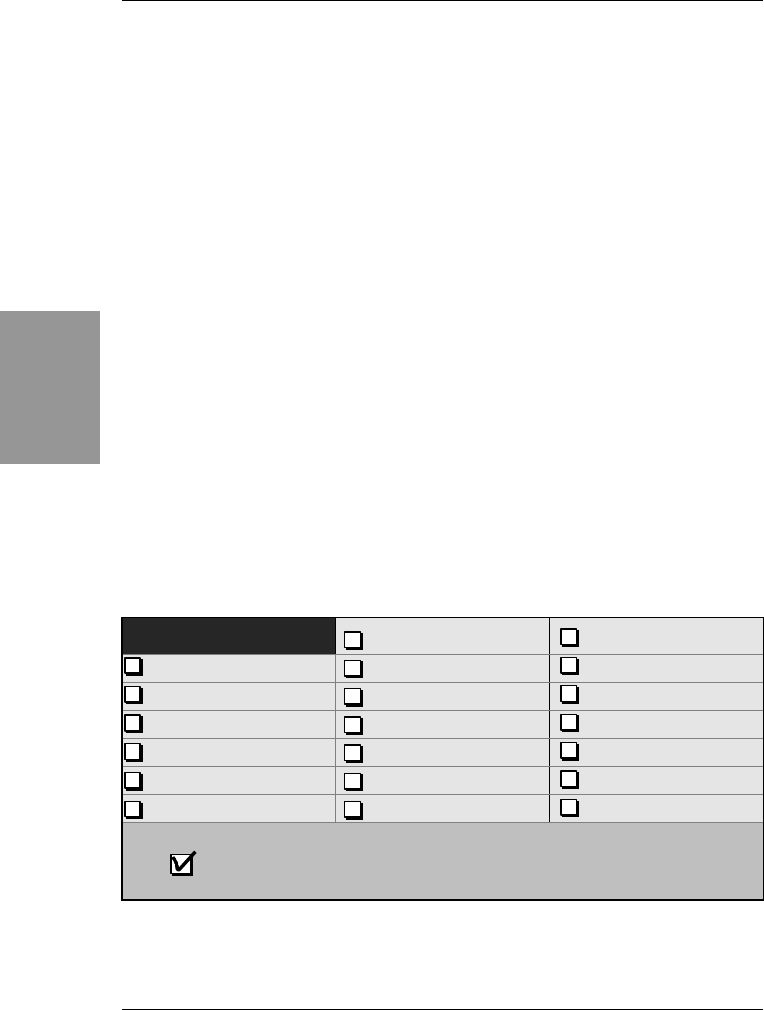
The following table shows all available [CPU Frequency] settings on your SY-7IWM
Motherboard . If you set this field to [Manual], you will be required to fill in the next two
consecutive fields: (1) the CPU Host/PCI Clock, and (2) the CPU Ratio.
CPU Frequency (MHz)
500MHz (100 x 5.0) 533MHz (133 x 4.0)
Manual 550MHz (100 x 5.5) 600MHz (133 x 4.5)
400MHz (66 x 6.0) 600MHz (100 x 6.0) 666MHz (133 x 5.0)
433MHz (66 x 6.5) 650MHz (100 x 6.5) 733MHz (133 x 5.5)
466MHz ( 66 x 7.0) 700MHz(100 x 7.0) 800MHz (133 x 6.0)
500MHz( 66 x 7.5) 750MHz (100 x 7.5) 866MHz (133 x 6.5)
533MHz ( 66 x 8.0) 800MHz (100 x 8.0) 933MHz (133 x 7.0)
Select the working frequency of your Pentium
®
III, Celeron processor among these preset values.
Note: Mark the checkbox that corresponds to the working frequency of your Pentium
®
III, Celeron
processor in case the CMOS configuration should be lost.
Step 4. Select [SAVE & EXIT SETUP]
Press
<Enter>
to save the new configuration to the CMOS memory, and continue with the
boot sequence.