


ection roller
I
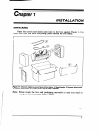
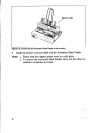
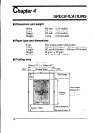
Figure 1-B. Confirm that the Automatic Sheet Feeder is set correctly.
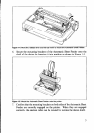
8. Install the printer cover provided with the Automatic Sheet Feeder.
Notes: 1. Please keep the original printer cover in a safe place.
2. To remove the Automatic Sheet Feeder, carry out the above in-
stallation procedures in reverse.
4