


Introduction
Thank you for buying a StarTech.com 300-Watt replacement power supply. The
ATXPOWER300 and ATXPOWR300GB are guaranteed compatible with Intel and AMD
processors and designed for an extra long-life in personal and industrial computers. This
power supply ensures stable system performance and uses an automatic temperature
control fan to maintain an optimal operating environment for heat-sensitive components.
Features
•Automatically detects temperature and adjusts fan speed to maintain optimal
performance
•Provides extra power capacity for PC servers with several hard drives
•Provides the extra current required by 1 GHz and faster CPUs
•Provides extra power required by leading edge 3D video accelerator cards
•Provides extra current and power capacity for overclocking CPUs
•Uses superior EMI/RFI power filtration system to ensure system components receive
clean, stable power
• Backed by StarTech.com’s two-year warranty
WARNING! Computer parts can be severely damaged by static electricity. Be sure that
you are properly grounded before opening your computer case. StarTech.com
recommends that you wear an anti-static strap when installing any computer
component. If an anti-static strap is unavailable, discharge yourself of any static
electricity build-up by touching a large grounded metal surface (such as the computer
case) for several seconds. Also make sure that your computer is turned off and
unplugged before attempting to open your computer case.
Contents
This package should contain:
•1 x ATXPOWER300 or ATXPOWR300GB power supply
•1 x power cord
2
Installation
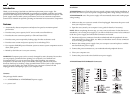
ATXPOWER300 users: Check the red power supply voltage switch before installation. It
should be the same as your local power voltage. Change the voltage setting if necessary.
ATXPOWR300GB users: The power supply will automatically detect and set the proper
voltage setting.
1. Make sure that your system is turned off and unplugged. Disconnect the power cord
from your old power supply.
2. Open the case (consult your computer’s user guide for details, if necessary).
NOTE: Before completing the next step, you may want to take note of what devices are
attached to your current power supply so you know which devices need to be connected
to the new power supply and where their connectors are located.
3. Disconnect all power connectors from the motherboard and the peripheral devices
such as hard drives, floppy disks, etc. Make sure that there are no devices connected
to your existing power supply.
4. Remove the existing power supply from your computer case and replace it with the
new StarTech.com power supply.
5. Connect the power connectors to your motherboard and peripheral devices.
6. Close your computer case.
7. Connect the power cord to the StarTech.com power supply.
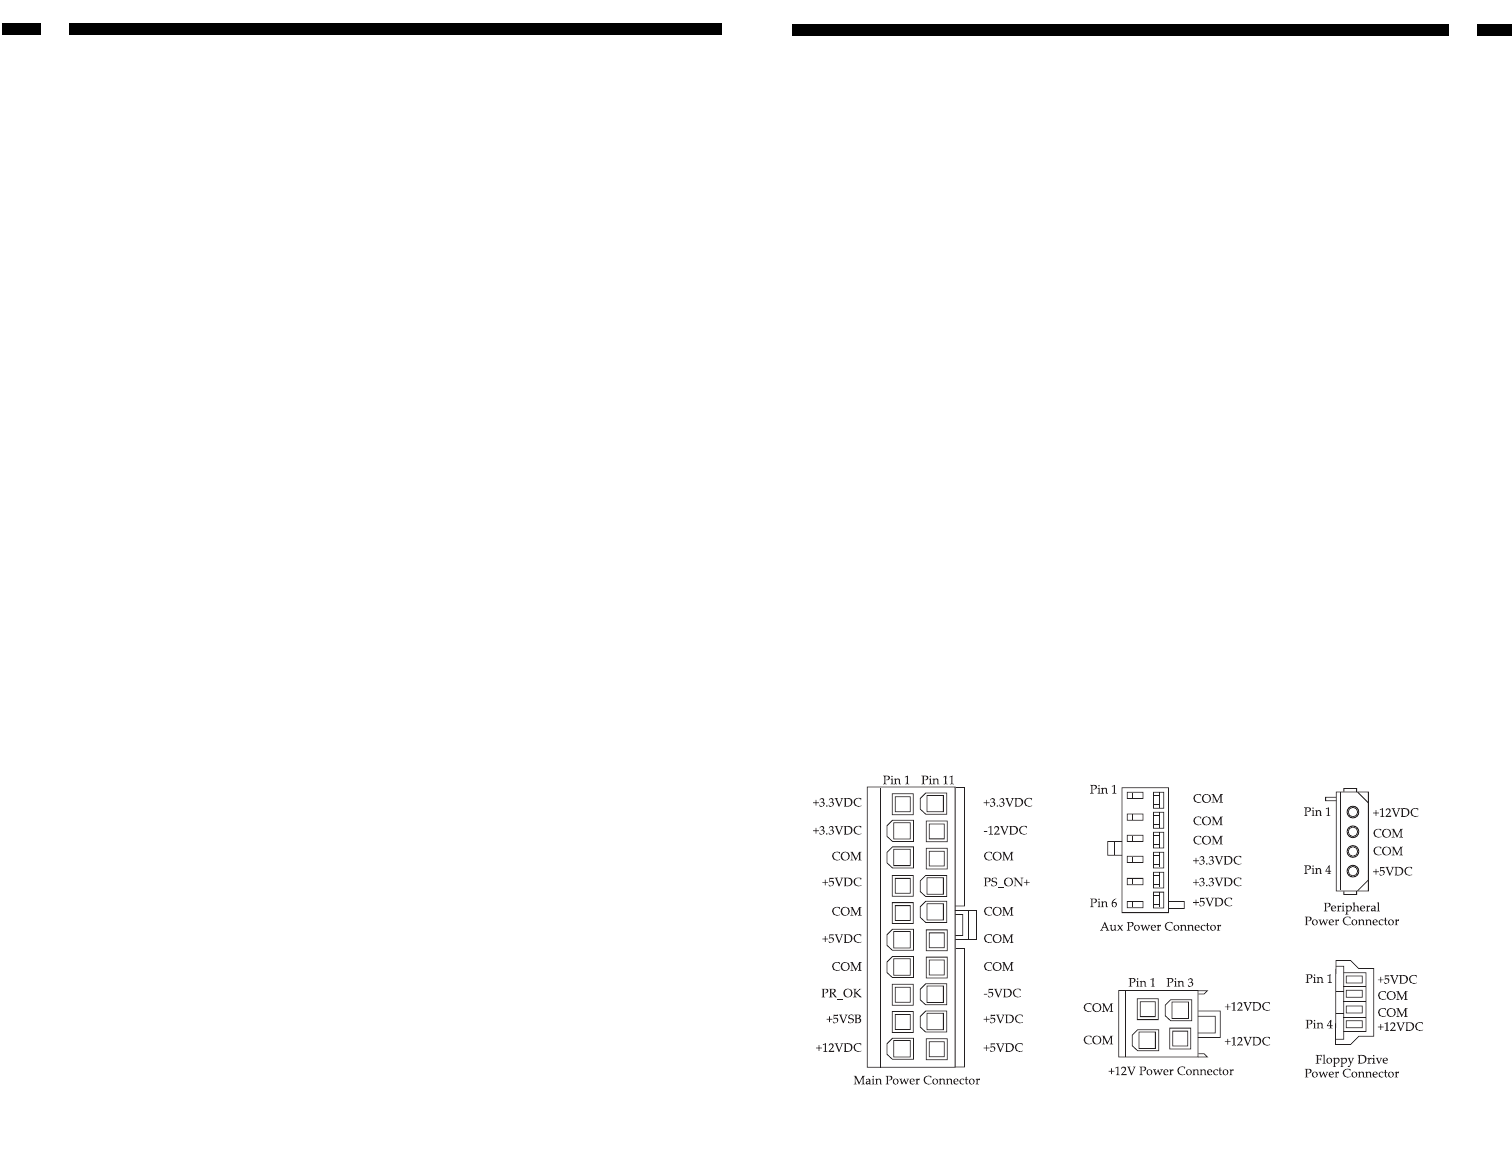
ATXPOWER300/ATXPOWR300GB Connectors
3