Instruction Manual
3
3. Place the 3.5” Serial Attached SCSI drive into the caddy, making sure that the
holes provided at the bottom of the caddy are properly aligned with the holes on
the bottom of the hard drive. Secure the hard drive in the caddy, by inserting and
tightening the screws provided into the holes located on the bottom of the hard drive.
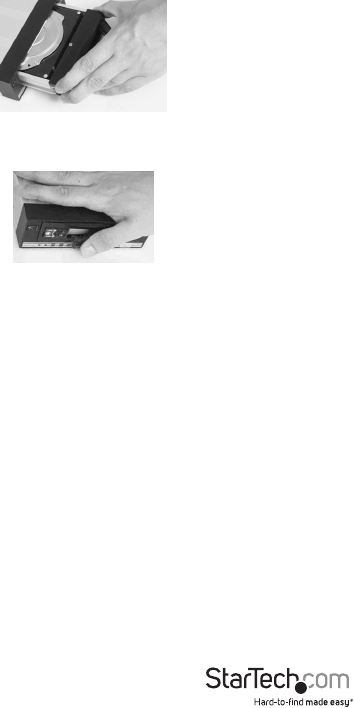
4. Once the hard drive is properly secured onto the caddy, gently slide the caddy into
the enclosure, ensuring that the hard drive power/data ports connect with the
power/data connection at the back of the enclosure. Instruction Manual
5. Close the locking arm. To completely secure the hard drive caddy in the enclosure,
please turn the locking dial to the lock position (clockwise).
Installing the Drive Bay in the PC
1. Make sure that your system is unplugged and you are grounded.
2. Remove the side covers from your PC and remove the front cover from an available
5.25” drive bay (see your computer’s user manual for details, if necessary). 3. Insert
the bay into the 5 1/4” bay slot, making sure that the screw holes on the side of the
bay line up with the holes in the bay slot.
3. Connect an available SAS cable to the connector on the back of the enclosure.
Please note: DRW150SASBK can be connected to the computer using a standard
SATA connection, in place of the SAS connection. If this is the case, please be sure to
attach the necessary power connector.
4. Using the supplied screws, mount the enclosure into the PC bay. Your Serial
Attached SCSI Drive drawer is now connected, and ready to be used. Please restore
power to the PC.


