


IInnssttaallllaattiioonn
To ensure a quick and easy installation, please read through this section before
attempting to install this device.
WARNING: Hard drives require careful handling, especially when being transported. If
you are not careful with your hard disk, it may result in lost data. Always handle your
hard drive with caution.
WARNING: Hard drives, like all computer equipment can also be severely damaged by
static electricity. Be sure that you are properly grounded before opening your computer
case or touching any components. StarTech.com recommends that you wear an anti-
static strap when installing any computer equipment. If an anti-static strap is unavailable,
discharge yourself of any static electricity build-up by touching a large grounded metal
surface (such as the computer case) for several seconds.
WARNING: Do not bump, jar, or drop the device. Do not disconnect any cables or power
sources while the hard drive is active. This can result in data loss and possible damage
to the hard drive. Always make sure that your hard drive is fully spun down before
removing the device.
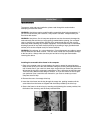
Installing the removable drive frame in the computer
1. Open your computer case. In most designs, the case is opened by removing two or
three screws at the rear of the case and then sliding the covering side panel backward
until it comes free. If your case is a tower style, ensure that you remove the panel that
will expose the top of the computer's motherboard. This is generally the left-side panel.
There are many different case designs, however, so if you are unsure of how to open
your particular case, consult the user manual for your case or contact your local
computer store for help.
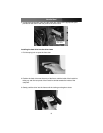
2. Remove the cover of an empty drive bay.
3. Insert the drive frame into the bay through the empty slot, pushing inwards until the
screw holes from the frame are aligned with the holes provided by the drive bay.
4. Secure the frame in the drive bay by inserting and tightening the screws provided, into
the holes of the drive bay, and the newly inserted frame.
Instruction Manual
2