


Instruction Manual
3
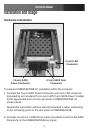
Ensuring the computer is powered down, remove the slot cover from a 3.
3.5” floppy drive bay on the host computer.
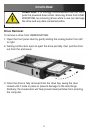
Gently, slide HSB220SAT25B into the now vacant 3.5” floppy drive bay, 4.
threading the connected cables through the opening, until the front
panel of HSB220SAT25B is flush with the computer case front panel.
Make sure the screw slots located on the side panels of 5.
HSB220SAT25B are aligned with the screw holes provided by the
computer drive bay, then secure HSB220SAT25B to the computer drive
bay using the provided screws.
Connect both of the LP4 connectors provided by the Y-cables (see 6.
steps #1, #4) to LP4 connectors provided by the computer power
supply.
Connect the remaining ends of the SATA Data cables to the 7.
appropriate ports on the computer motherboard. You may want to
make note of which SATA ports are used on the motherboard, in
relation to their location on the rear panel of HSB220SAT25B.
Drive Installation
Once HSB220SAT25B has been secured within the computer casing, and
connected appropriately:
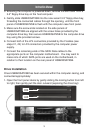
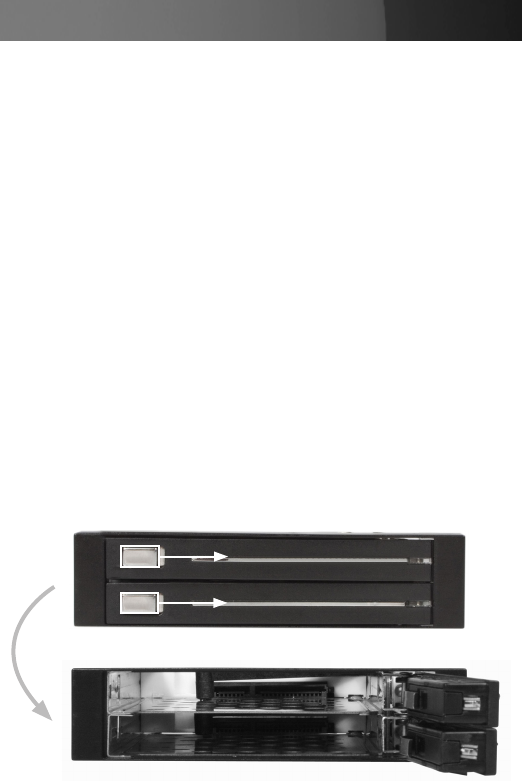
Open the front panel doors by gently sliding the locking button from left 1.
to right, then gently pull the door outward (exposing the drive bay):