Installation
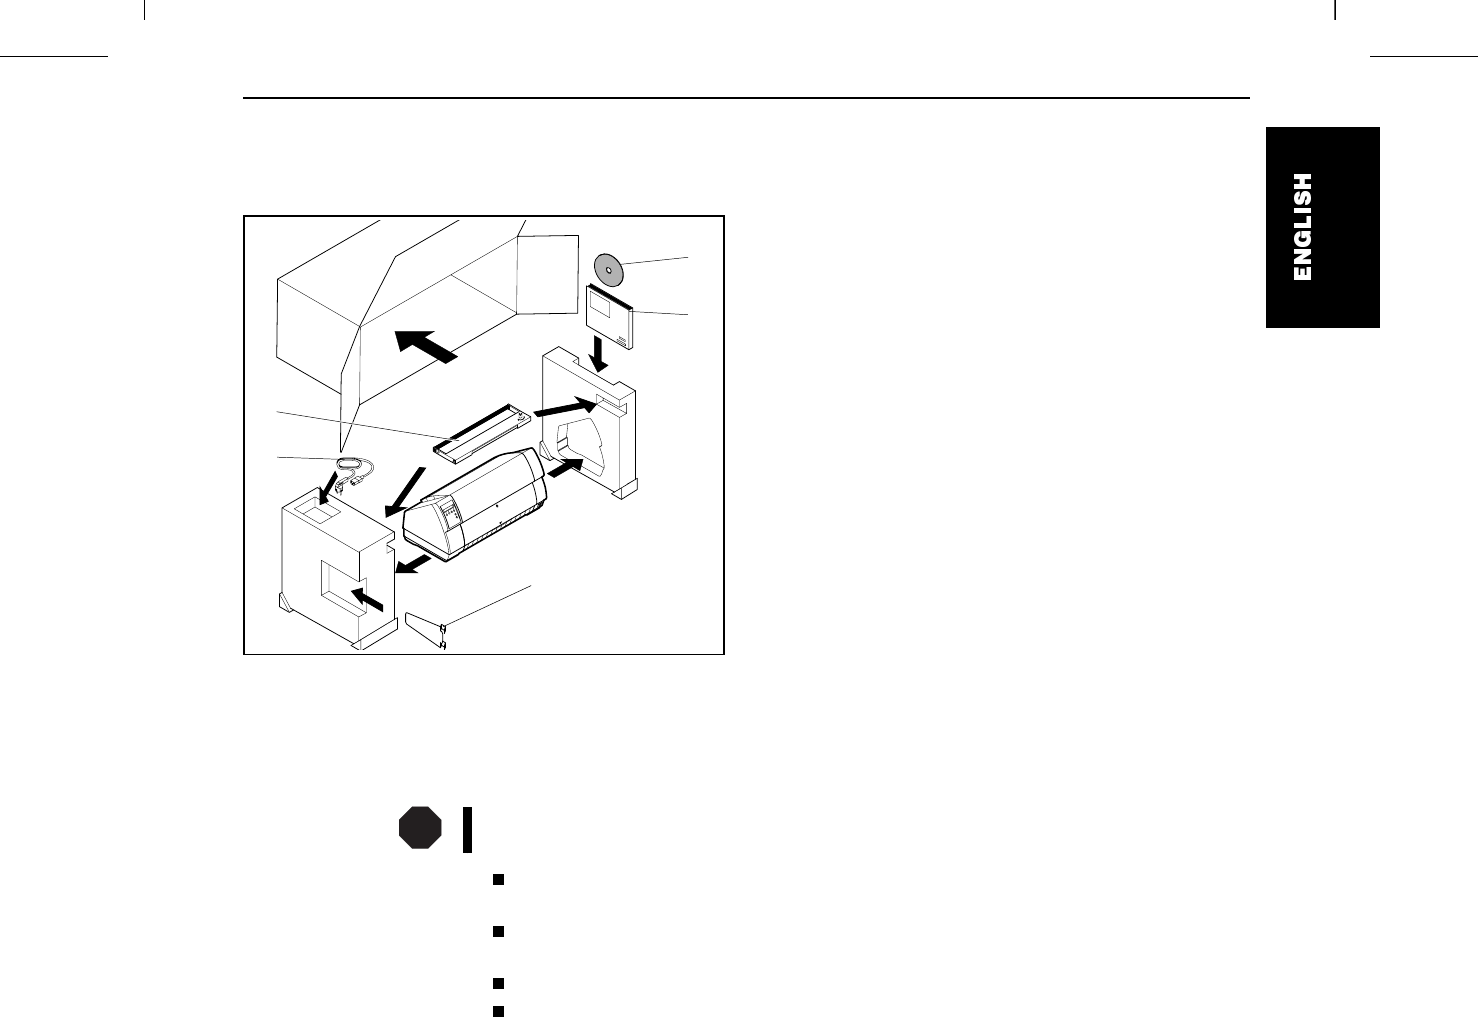
➤ Unpacking the printer
Place your printer on a solid base.
Make sure that the “Up” symbols point to the correct direction.
Open the packaging and take out the ribbon cassette. Pull the
printer out of the cardboard box towards you and remove the
remaining packaging material.
Check the printer for any visible transport damage and com-
pleteness. Apart from this Operator’s Manual (➀), the CD-ROM
(➁, at the back of this manual), the power cable (➂), the ribbon
(➃) and the paper support (➄) must be included.
If you find any transport damage or if any accessories are
missing, please contact your dealer.
➤ Placing your printer Place the printer on a solid, flat and non-slip surface in such a way that it cannot fall down. Make
sure to facilitate access to the control panel and the paper input trays and to leave sufficient space
for the paper ejected.
When selecting the printer location, observe the following additional instructions:
Never place the printer in the vicinity of easily inflammable gas or explosive substances.
Do not expose the printer to direct sunlight. If you cannot avoid placing the printer near a
window, protect it from the sunlight with a curtain.
When connecting the computer with the printer, make sure not to exceed the permitted
cable length (see Reference Manual on the online CD-ROM, Technical specifications).
Ensure sufficient distance between the printer and any heating radiators.
Avoid exposing the printer to extreme temperature or air humidity fluctuations. Protect the
printer from dust.
➀
➁
➂
➃
➄
STOP
Quick Start-up Installation
5


