


9
USER GUIDE
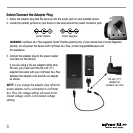
Connect the Power Output Cord
1. Plug the large end of the power output cord into the DC OUT jack on the end of myPower ALL Plus.
(If you have previously selected a voltage, the voltage selection will be returned to the lowest setting.)
Adjust the Voltage Level
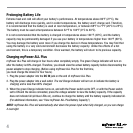
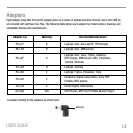
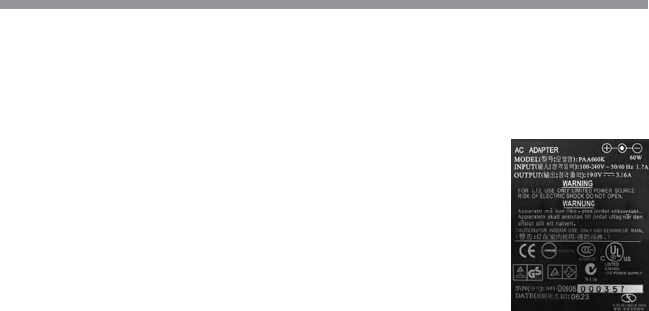
1. Locate the voltage specification for your portable device. This can be found on the
device power adapter label or device specification label which typically is found on
the bottom of the unit. (If available, use the voltage specification shown on the power adapter.)
2. Slide the power switch to ON. The 5V voltage indicator will turn on to indicate that
the voltage is set to the lowest setting.
3. Connect the output cable to the DC OUT port.
4. Press the voltage selector until the voltage indicator for your voltage selection
(5, 6, 7.5, 9, 12, 14, 16, 19) turns on. Set the voltage output to the selection that
is equal to, or one step lower or higher (whichever is closer) than the voltage
identified for your device. For example, if your device requires 6V, set the voltage
to 6V. If you device requires 7.2V, set the voltage to 7.5V. The voltage will be
automatically locked when the device is connected and the light behind the
voltage selector will glow to indicate the voltage is locked.
5. To change the voltage, disconnect the output cable from the device, and select a new voltage.
The voltage will be automatically locked after a device is connected.
CAUTION: It is important to set the voltage selector NO MORE than one step higher than the voltage requirement for
the portable device as an incorrect setting may prevent myPower ALL Plus from working with your device, or may
harm your device in the rare instance that the device accepts the higher voltage. However, for all devices, adjusting
the voltage ONLY one step higher than required will not harm the device.
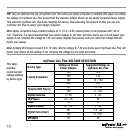
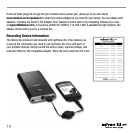
Sample Power
Adapter Label