


GA-1170 SETUP IN A WINDOWS ENVIRONMENT
4 – 1
[ 4 ] SETUP IN A WINDOWS ENVIRONMENT
1. SETTING THE IP ADDRESS OF THE
MACHINE
Before installing the printer driver, be sure to set the IP address of the
machine. Consult your network administrator for the correct IP address,
subnet mask, and default gateway to be entered. If a DHCP server will
automatically assign an IP address to the machine, the following proce-
dure is not necessary. (To check the IP address assigned to the
machine by DHCP, see "2. CHECKING THE IP ADDRESS" .)
Note: If the machine is used in a DHCP environment, the machine's IP
address may change automatically. If this happens, printing will
no longer be possible. In this event, use a WINS server or do not
use the machine in a DHCP environment.
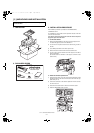
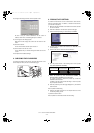
1) Make sure that the LAN cable is connected to the machine and then
turn on the machine.
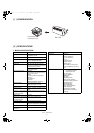
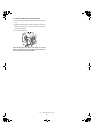
2) Insert the network expansion kit GA-1170 "Software" CD-ROM into
your computer's CD-ROM drive.
3) Click the "start" button, click "My Computer" ( ), and then double-
click the CD-ROM icon ( ).
In Windows 95/98/Me/NT 4.0/2000, double-click "My Computer"
and then double-click the CD-ROM icon.
4) Double-click the "setup" icon ( ).
Note: If the language selection screen appears after you double click
the "setup" icon, select the language that you wish to use and
click the "Next" button. (Normally the correct language is
selected automatically.)
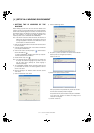
5) The "SOFTWARE LICENSE" window will appear. Make sure that
you understand the contents of the license agreement, and then
click the "Yes" button.
6) Read the message in the "Welcome" window and then click the
"Next" button.
7) Click the "Administrator Tools" button.
8) Click the "NICManager" button.
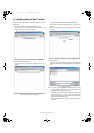
9) The printer or printers connected to the network will be detected.
Click the printer to be configured (the machine).
Select the "GA-1170".
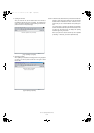
10) Click the "Print Server Card Setup" button.
Enter your password in the password entry screen and click "OK".
The Print Server Card Setup window will appear.
The password for this product has been initially set to "TOSHIBA".
If the "Guest user" checkbox is selected, the settings can be
viewed but not configured.
11) Click the "TCP/IP" tab.