


61
Getting Started
Erasing the Internal Storage Drive
Erasing the Internal Storage Drive
Erasing the internal storage drive will delete all data on the drive,
including the partitions. Be sure to create recovery DVDs/media and
back up your data to external media before erasing the internal
storage drive.
If you want to restore the internal storage drive, use one of the
recovery options instead of erasing the drive. For more information,
see “Recovering the Internal Storage Drive” on page 47.
To delete all data and partitions from the internal storage drive:
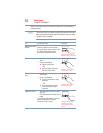
1 Access the Toshiba Recovery Wizard on your internal storage
drive or on your recovery DVDs/media.
❖ To access the Recovery Wizard on your internal
storage drive: Press and hold the 0 (zero) key while
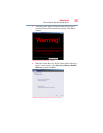
powering on the computer. Read the Warning screen that
displays and then click Ye s to continue.
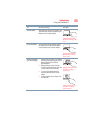
❖ To access the Recovery Wizard on your recovery
DVDs/media: Turn off your computer. Insert the first
recovery DVD into your optional external writable optical
disc drive or connect the USB flash drive containing your
recovery files to your computer, and then power on the
computer. When the initial screen displays, press
F12.
Using the arrow keys, select the DVD or USB Flash
option on the boot menu, depending on which type of
media you are using, and then press
Enter. Select Toshiba
Recovery Wizard, and then click Next.
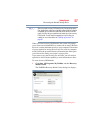
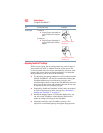
2 Select Erase the hard disk and then click Next.
3 Choose one of the following options on the Erase the hard disk
screen:
❖ Delete all data and partitions from the hard disk—This
option deletes all of the data on the internal storage drive
without overwriting the drive.
❖ Delete all partitions and overwrite all sectors on the
hard disk—This option deletes all data and then
overwrites the entire internal storage drive for security
purposes. This process may take several hours, depending
on the size of your internal storage drive.
NOTE