CONTENTS
42
Maintenance
Lamp replacement
The lamp will eventually begin to project dark
or dull pictures and finally will not light up.
(Lamp’s life length depends on the use
condition.) In such a case, replace the lamp
with new one.
CAUTION
• If you use the projector mounted on the
ceiling, ask the dealer to carry out the
maintenance such as cleaning or
replacement of the lamp.
• When replacing, always use lamp “TLPL6”
(for TLP450U, TLP451U, TLP650U,
TLP651U, TLP470U, TLP471U, TLP670U,
TLP671U) or “TLPL8” (for TLP650A,
TLP651A) (sold separately). For detail, refer
to the lamp instruction.
• If you have been using the projector, the
lamp will be very hot, and may cause burn
injuries. Wait for the lamp to cool (for longer
than 1 hour) before replacing it.
• If the lamp should break, please handle with
care to avoid injury due to broken pieces
and contact your dealer for repair service.
1
2
Unplug the power cord.
Wait until the lamp gets cold
enough.
3
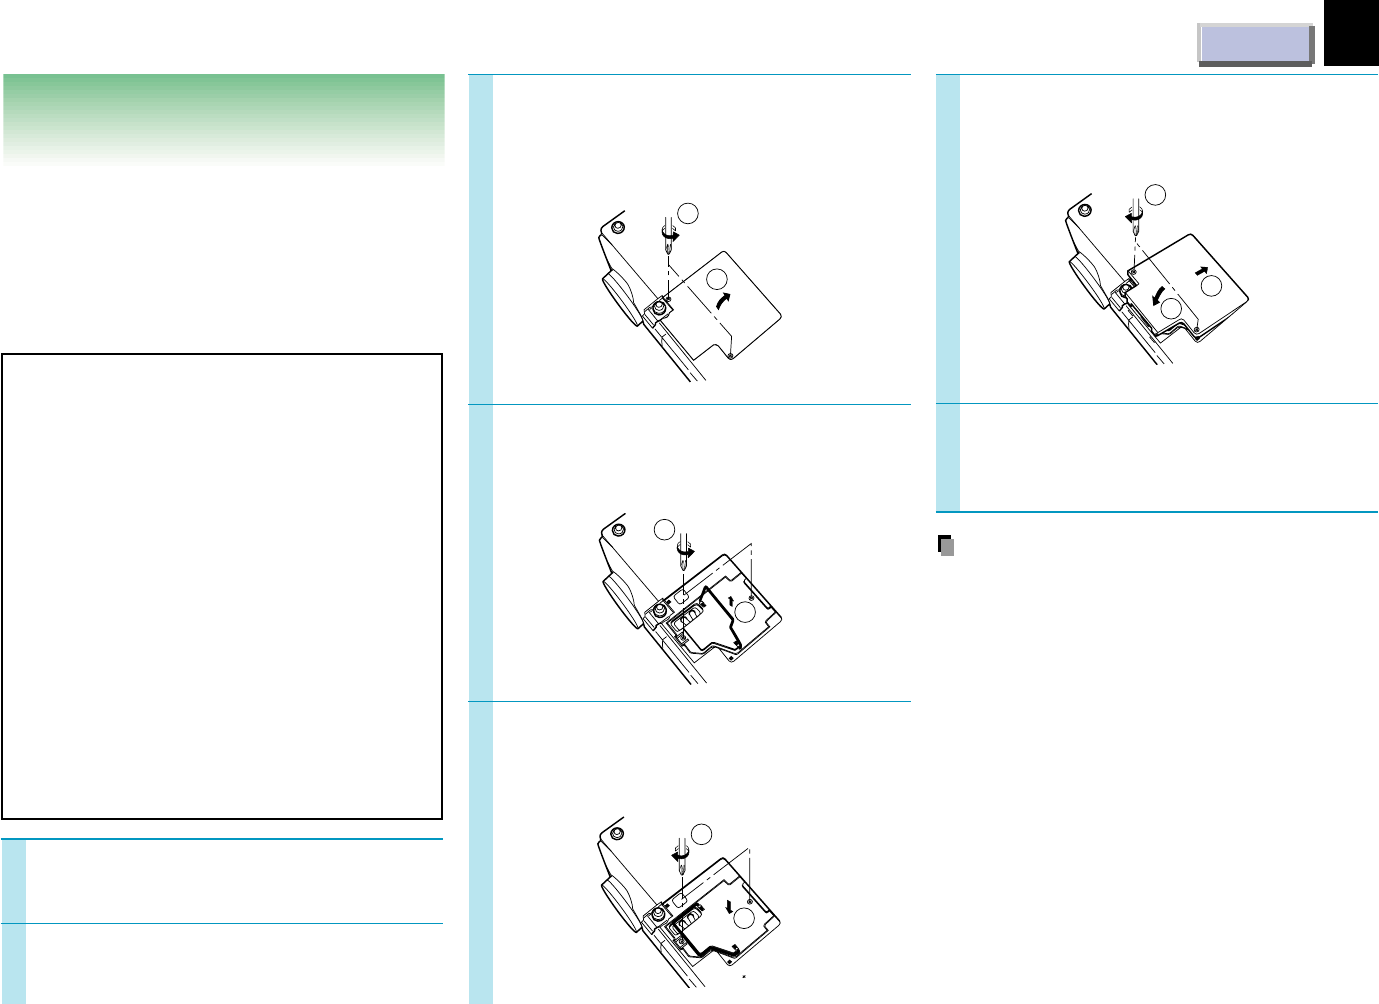
Take off the lamp cover on the
bottom panel.
Loosen two screws, and pull off the lamp
cover.
Pull out the lamp.
Loosen the two fixing screws, and lift up
the handle to pull out the lamp.
Load a new lamp.
Slide until it hits the bottom and tighten
the two fixed screws.
Attach the lamp cover.
Slide the cover in place and tighten two
screws.
Reset the lamp timer.
Refer to the lamp instructions for
resetting.
Notes
• The projector displays the total working time
at every 1,000 hours (only when plugged in
and turned on; ex. “ >1000H ”, “ >2000H ”).
• The lamp should be replaced if the total
working time exceeds about 2,000 hours.
• Attach the lamp cover firmly after replacing
the lamp. If it is not set correctly, the power
will not turn on.
• Use a new lamp when replacing it.
• The lamp is made of glass and is very fragile.
Do not touch the lamp with your bare hands
and do not jolt or damage it. Do not use an
exhausted lamp.
4
5
6
7
1
2
1
2
2
1
3
2
1


