1
2
OPERATIONS
3LCD DATA PROJECTOR
QUICK REFERENCE CARD
Projecting a Picture
• Connect external equipment
such as a computer or
video tape player.
• Connect the power cord to
the projector.
Press ON/STANDBY.
Both the ON and LAMP indications light up
in green.
Turn on the connected equipment
and put it in playback mode.
5
Press INPUT to select the
input source.
Video: VIDEO input picture
RGB: RGB input picture
CAMERA: Camera input picture
Adjust the picture size and
focus.
Zoom ring: Adjust the picture size.
Focus ring: Focus the picture.
4
3
1
2
Turning Off the Power After Use
Put the connected equipment
in the stop mode.
Press ON/STANDBY.
An instruction message appears.
Press ON/STANDBY again.
(Power turns off and then the lamp goes off.)
After confirming the exhaust fan
stops, unplug the power cord.
3
For more informations about usage and operations, see the owner’s manual.
“Camera” function is equipped only with the model which has a document imaging camera model.
4
ON/STANDBY
INPUT
ON/STANDBY
ON/STANDBY
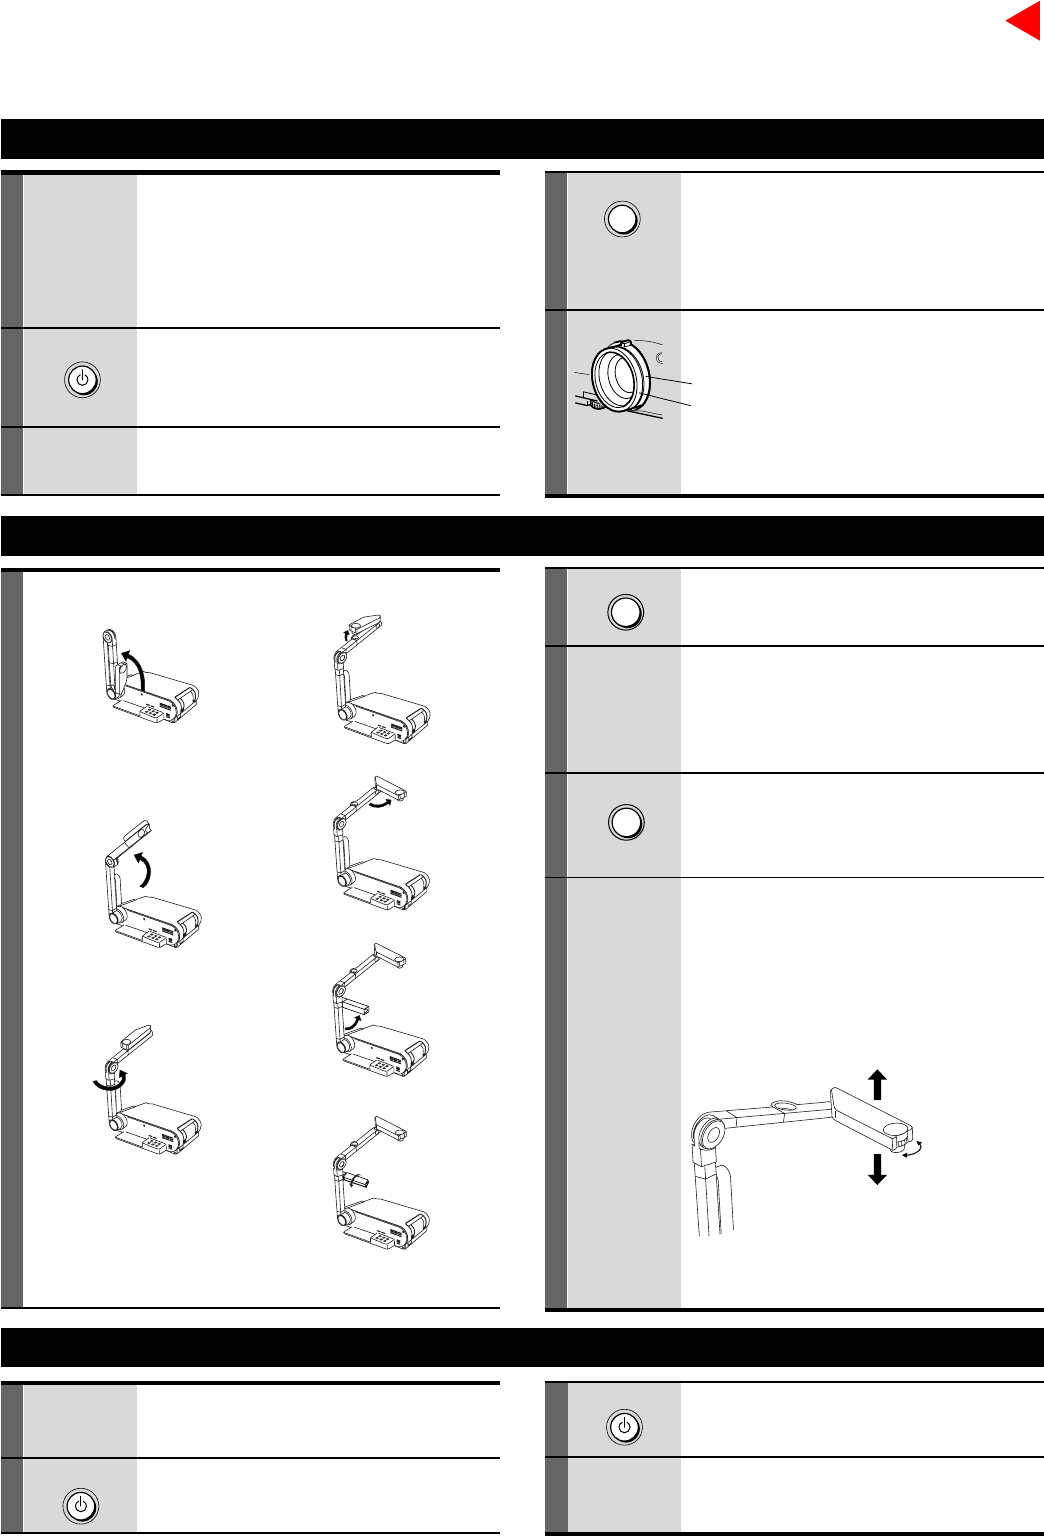
4) Open the camera head.
5) Turn the camera head.
6) Pull up the light.
7) Turn the light.
1
Projecting Images with the Document Imaging Camera
3
4
Press ARM LIGHT.
The light turns on.
Place a document onto or
around the projector, and turn
the camera head to direction
of the document.
Press CAMERA.
The appeared image is a projected one
through the camera.
Move the camera head to
adjust the size of the picture,
and focus on the picture by
turning the focusing ring on
the camera head.
2
5
After using, return the arm to the original position in the
reverse order.
1) Raise up the arm.
2) Stretch the arm.
3) Turn the arm.
ARM LIGHT
CAMERA
Up : to reduce.
Down : To enlarge.
Focusing ring
N : Near
F : Far


