


Adjustment and Function Setting
1
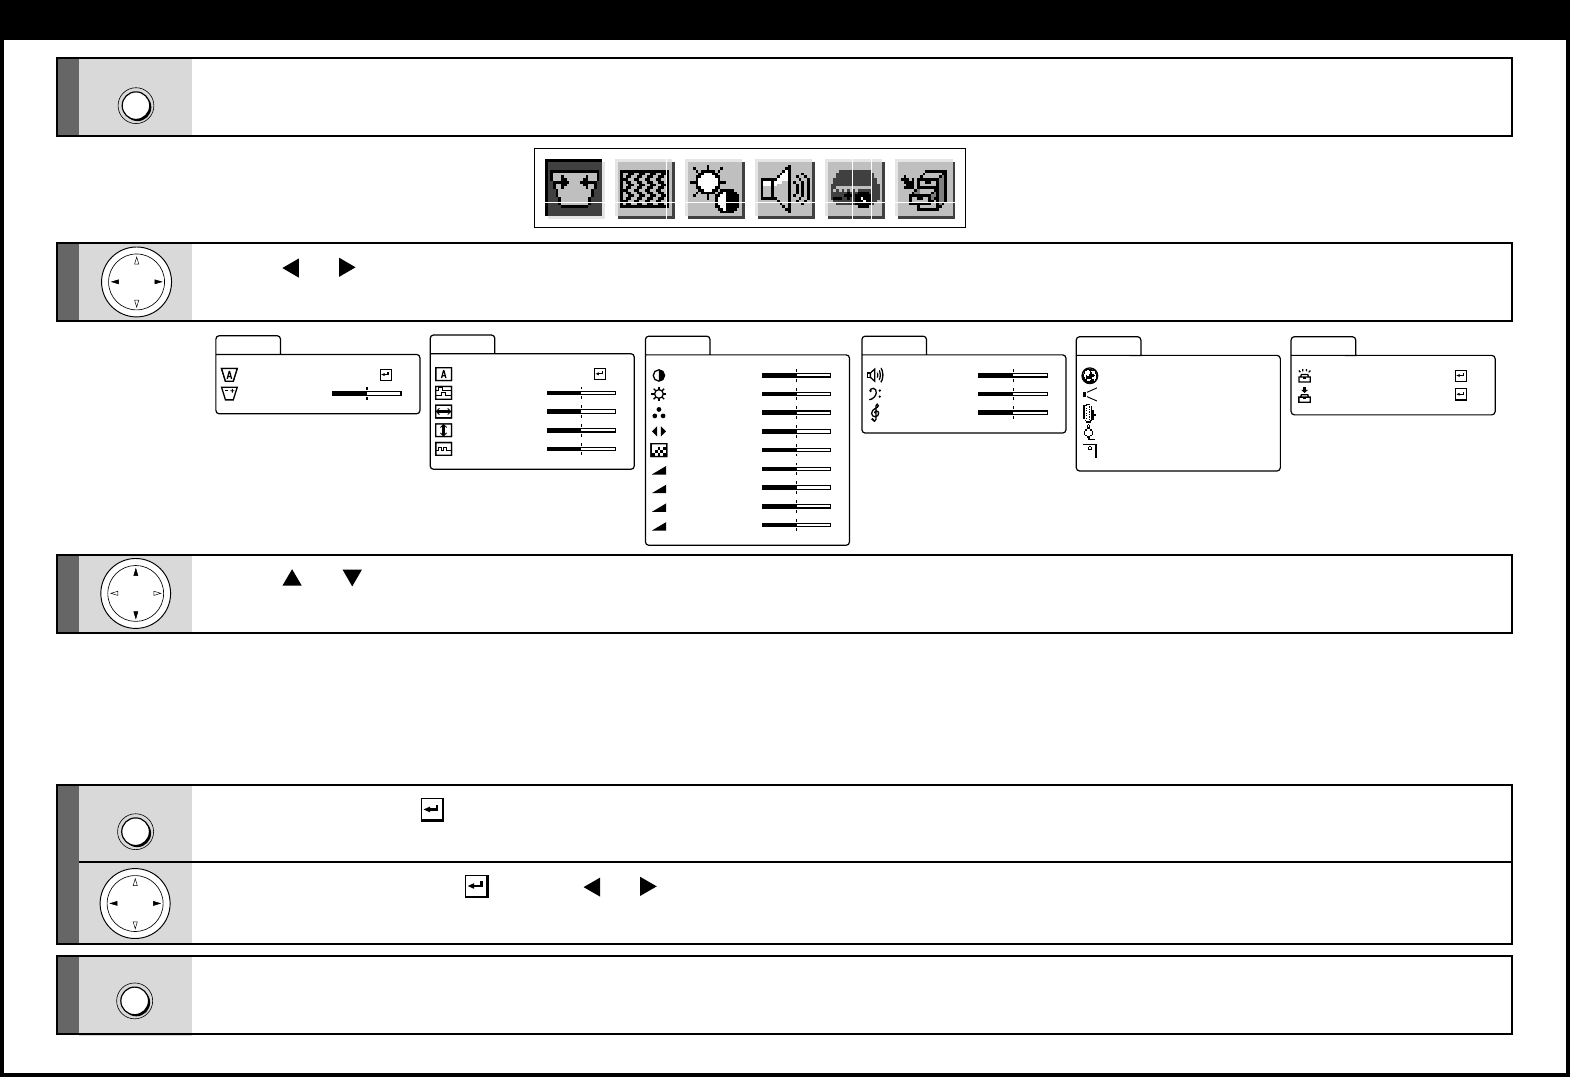
Press MENU.
The menu is displayed.
2
Press or to select the item.
(Item not marked with ). Press or to adjust the value or select the setting.
5
Press MENU.
The menu disappears.
Note: Pressing RESET of the remote control will return all the adjustments or settings currently displayed to their default.
4
(Item marked with ). Press ENTER to execute the item.
Auto set... To correct the keystone
distortion automatically
Adjust...... To make the correction of
keystone distortion
Contrast ..................... Contrast
Brightness .................. Brightness
Color .......................... Color density
Tint ............................ Tint
Sharpness.................. Sharpness
R-level ....................... Red level
G-level ....................... Green level
B-level ........................Blue level
Camera gain ..............Sensitivity
Volume.. To adjust the sound volume
Bass ..... To adjust the bass
Treble ... To adjust the treble
Language ........ To select the lan-
guage
Proj. mode....... To set the projecting
orientation
RGB input ....... To set the signal type
Video signal ..... To set the signal type
Scrn display ... To use of disable on-
screen displays
Save data ... To save the adjustments
and settings on the
menu.
All preset ....To restore the adjust-
ments and settings on
the menu to the factory
set.
Auto sync. .... To adjust the image au-
tomatically
Phase .......... To reduce flickers
H-Position .... To shift the image hori-
zontally
V-Position ..... To shift the image ver-
tically
Clock ........... To remove vertical
stripes
MENU
MENU
3
Press or to select the item.
Auto set
Keystone
Adjust
–
+
Auto syn
Image
c.
Phase
–
+
H–posi t ion
V–posi t ion
Clock
–
+
–
+
–
+
Cont rast
Picture
–
+
Brightness
Color
–
+
–
+
Tint
Sharpness
–
+
–
+
R-level
–
+
G-level
–
+
B- level
–
+
Camera gain
–
+
Vo l ume
Audio
–
+
Bass
Treble
–
+
–
+
Language
Default
Proj .mode
RGB input
Video signal
yScrn displa
Engl ish
Standard
RGB
Auto
On
Save dat
Save
a
All preset
ENTER