


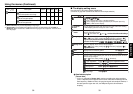

47
Operations
46
Using the document camera (Continued)
■ Image projection with the document camera
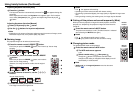
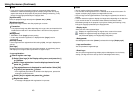
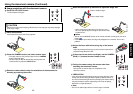
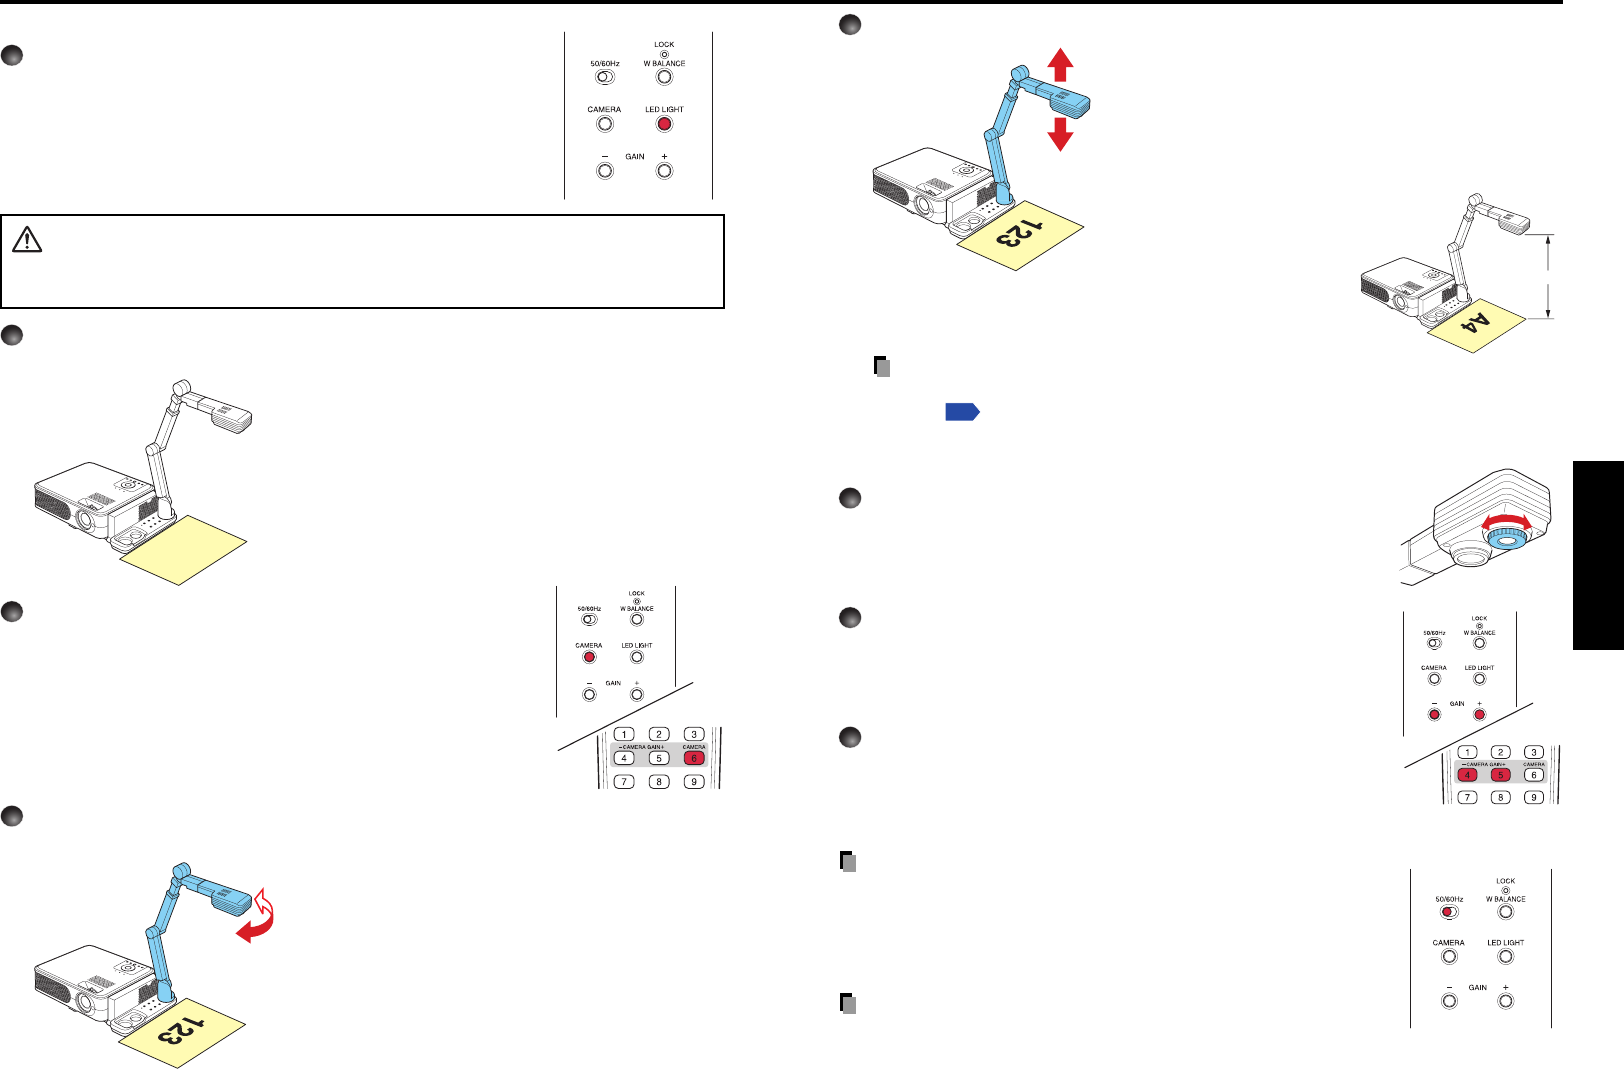
1
Press the LED LIGHT button.
The illumination LED lights.
CAUTION
• Please do not look into the lighting LED directly. The strong light may cause damage
to the eyes or sight.
2
Place the document.
Set the document at the side of the projector.
3
Press the CAMERA button, and select camera input.
• The input returns to the previous input when the CAMERA
button is pressed again.
• Camera input can also be selected by pressing either the
remote control or projector’s INPUT button.
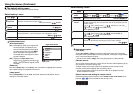
4
Rotate the camera head to align the orientation of the document for
shooting by checking the screen.
5
Move the camera arm up and down to adjust the image size.
• When projecting the document of A4 size (210 mm ×
297 mm), please adjust the height of the camera head
to about 43 cm.
Notes
•You can use the RESIZE function of the remote controller to change the size of an
image.
p.30
• In the camera input mode, the image may disappear for a moment. This is not a
problem.
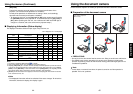
6
Adjust the focus with the focusing ring of the camera
head.
Adjust by rotating the focusing ring of the camera head until the
projected image becomes clear.
7
If the screen is too dark or too bright, use the CAMERA
GAIN (+/–) buttons to make it easier to see.
8
Fold up the camera using the reverse order from
unfolding the document camera.
Fold up with the reverse steps of “Preparation of the
document camera”.
PRECAUTION
• If the room's fluorescent lighting causes the image to flicker, either
change the Shutter setting of shutter speed by 50/60Hz switch, or
turn off the fluorescent light. Note that changing the Shutter setting
may not eliminate the flicker, depending on the state of lighting,
document or image adjustment.
Note
• There is no audio output when the camera input is selected.
Closer: Larger image
Farther: Smaller image
43 cm