


25
Administration
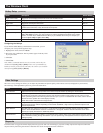
Using the New Schema
Log Server Settings
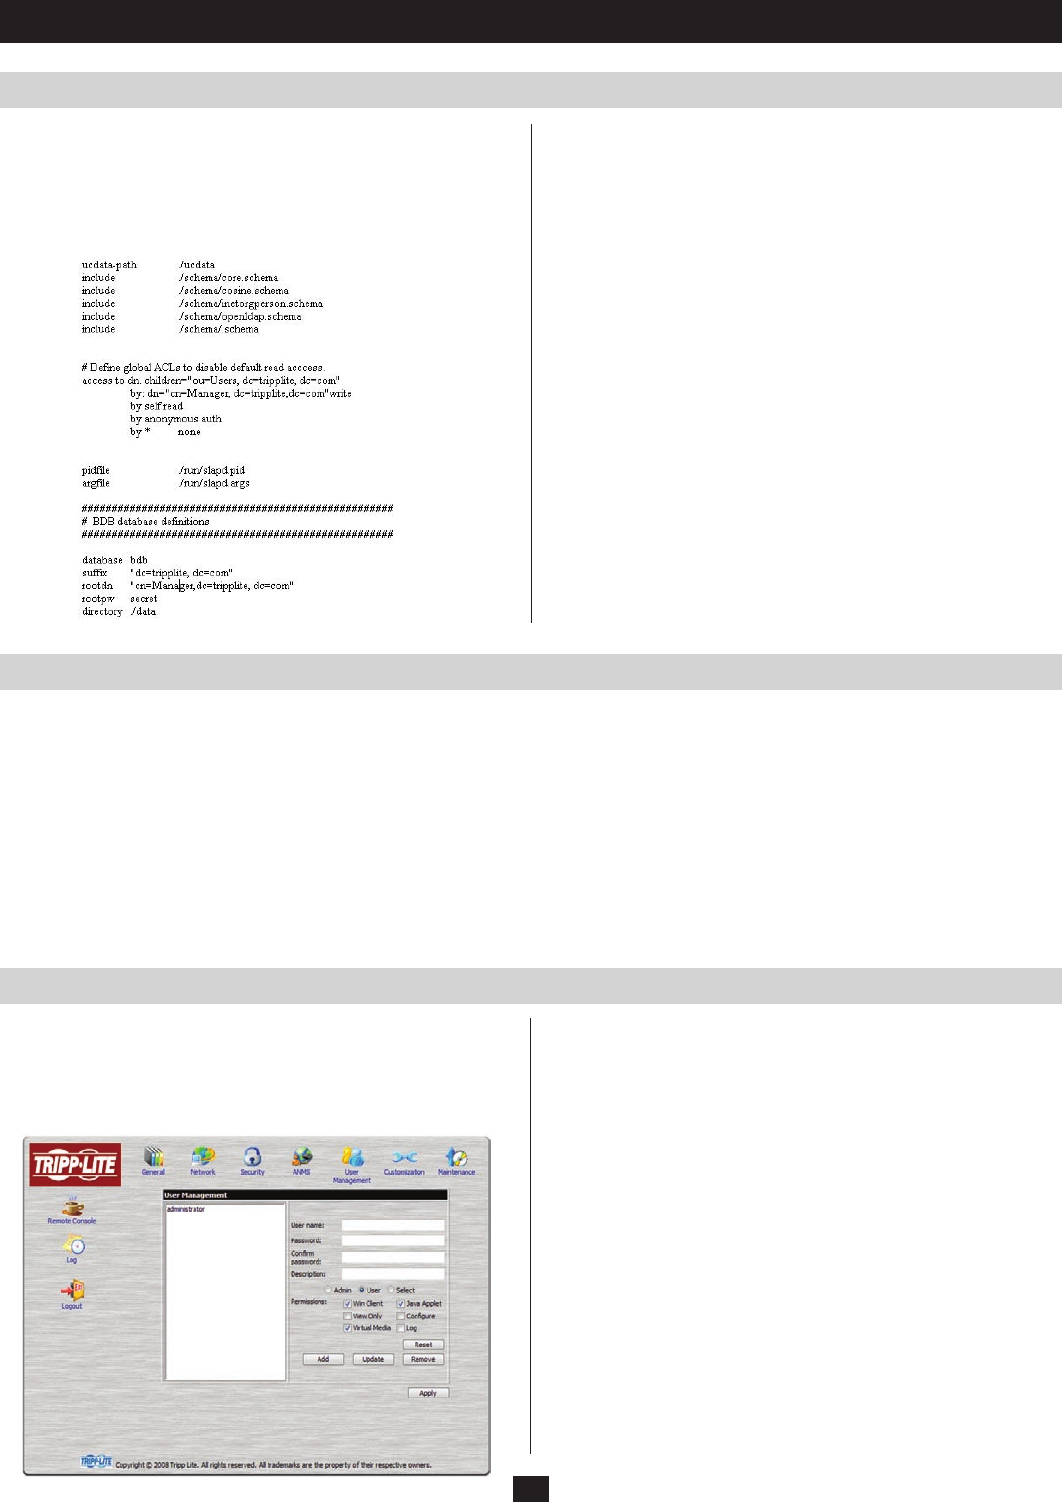
User Management
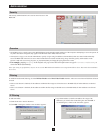
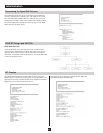
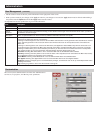
To use the new schema, do the following:
1. Save the new schema file (e.g., B051-000.schema) in the /
OpenLDAP/ schema/ directory.
2. Add the new schema to the slapd.conf file, as shown in the figure,
below:
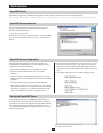
Important transactions that occur on the B051-000, such as logins and internal status messages, are kept in an automatically generated log file. In
order for the B051-000 to communicate with the computer that the Log Server is installed on, the Log Server MAC Address and Port fields must
be filled in. (See Chapter 8 for details on setting up the log server.)
Log Server MAC Address
This field should contain the MAC address of the Log Server computer.
Port
This field should contain the port that the Log Server computer will use to listen for log details. The valid port range is 1024 to 65535. The default
port number is 9001.
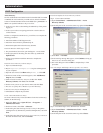
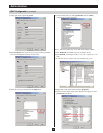
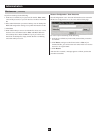
The user management administration icon is used to create and
manage user profiles. Up to 64 user profiles can be established. There
isnolimittothenumberofdifferentusertypes.Youcanhave64
administrators, 64 users or 64 customized profiles, the only limit
being you can have no more than 64 in total.
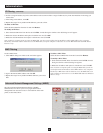
3. Restart the LDAP server.
4. Write the LDIF file and create the database entries in init.ldif with
the ldapadd command, as shown in the following example:
ldapadd -f init.ldif -x -D “cn=Manager,
dc=tripplite,dc=com” -w secret
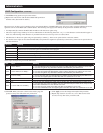
Adding a User Profile
To add a user profile, fill in the information in the right panel of the
screen and click Add. The new user’s name appears in the User List.
Deleting a User Profile
To delete a user profile, select the desired profile from the User List
and click Remove. The user’s name is removed from the panel.
Editing a User Profile
To edit a user profile, you must first select the desired profile from the
user list. The user information will be displayed in the right panel of
the screen. Edit this information and click Update. If you do not click
the Update button, your changes will be lost.
Note: For security purposes, the Password and Confirm fields are
not displayed. If you do not want to change the user’s password,
simply leave the two fields as is. If you do want to change the user’s
password, key in the new password in the Password and the Confirm
fields.