9
Deflating
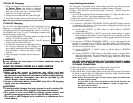
1. Open the valve on your product completely to release air.
2. Fasten the Inflator/Deflator Hose (stored in the compartment on the back of the
unit — see page 2) to the
Deflator Port inside the Air Panel.
3. Attach the appropriate nozzle to the free end of the Inflator/Deflator Hose.
4. Slide the Air Compressor/Inflator Switch to INFLATOR.
5. When product is fully deflated, turn the Air Compressor/Inflator Switch to OFF,
remove hose from valve and close the valve.
CARE AND MAINTENANCE
CAUTION
If the cord, wires, or cables become damaged, return the entire unit
to Power On Board immediately for service/repair.
Replacement Parts
For replacement parts (bulbs, batteries, fuses, adapters, hoses, etc.), contact Customer
Service, toll-free, at at (954) 584-4446 or toll free at (866) 584-5504.
Battery Replacement/Disposal
It is recommended that the unit be returned to Customer Service
for battery replacement.
This unit contains a maintenance-free, non-spillable, sealed lead-
acid battery. This battery is fully recyclable and should be
accepted at any location that accepts common automotive
batteries. Examples of places that accept these batteries are:
county or municipal recycling drop-off centers, scrap metal
dealers and retailers who sell automotive replacement lead acid
batteries.
WARNINGS
Do not dispose of the battery in fire, as this may result in an explosion.
Before disposing of the battery, protect exposed terminals with
heavy-duty electrical tape to prevent shorting (shorting can result in
injury or fire).
Do not expose battery to fire or intense heat, as it may explode.
Fuse Replacement (DC Accessory Adapter)
1. Remove plug from accessory outlet. Remove the gold cap by turning counter-
clockwise and lifting off.
2. Remove center pin and spring. Remove fuse.
3. Replace fuse with same type and size fuse (8 amp).
4. Replace center pin and spring inside plug.
5. Replace gold cap by turning clockwise.
8
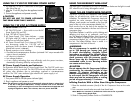
4. Monitor the pressure gauge. When desired pressure is reached, slide the Air
Compressor/Inflator Switch to OFF; open thumb latch and remove connector
from valve stem.
5. Store the compressor hose and tire fitting in storage compartment.
Inflating Products Without a Valve Stem Using the Compressor
Inflation of other items requires use of one of the adapters (nozzles).
1. Insert appropriate adapter (e.g. needle) into the connector (chuck) on the Air
Compressor Hose and close thumb latch.
2. Insert adapter (e.g. needle) into item to inflate.
3. Slide Air Compressor/Inflator Switch to COMPRESSOR.
4. Refer to the following table for approximate filling pressure and time. Small items
such as volleyballs, footballs, etc. inflate very rapidly.
5. Monitor the pressure gauge. When desired pressure is reached, slide the Air
Compressor/Inflator Switch to OFF; open thumb latch and remove connector
from valve stem.
6. Remove adapter from item and store properly.
Typical Inflation Times
Inflation pressure (psi) Approx. Filling time
Vehicle and trailer tires
155/80R 13" 26 2.5 min.
185/70R 14" 30 4.5 min.
235/75R 16" 30 6.5 min.
235/70R 17" 42 16 min.
Bicycle tires
27" X 1" (racing) 90 40 sec.
Football 13 24 sec.
Basketball 10 20 sec.
Volleyball 5 6 sec.
WARNING
Always follow tire manufacturer’s recommendations for pressure on
item to be inflated.
Note: Thermo-protection device shuts down the unit when the unit overheats and
restarts once the unit has reached a safe operating temperature (usually 15
minutes).
Using the Inflator/Deflator
Inflating
1. Locate the inflation valve on your product and open it.
2. Fasten the Inflator/Deflator Hose (stored in the compartment on the back of the
unit — see page 2) to the Inflator Port inside the Air Panel.
3. Attach the appropriate nozzle to the free end of the Inflator/Deflator Hose.
4.
Slide the Air Compressor/Inflator Switch to
INFLA
TOR
.
5.
When product is fully inflated, tur
n the Air Compressor/Inflator Switch to OFF
,
remove hose from valve and close the valve.


