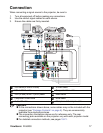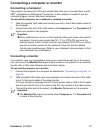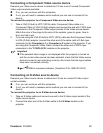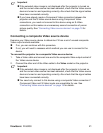
ViewSonic Pro8200 25
Adjusting Projection Image Size
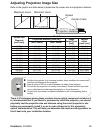
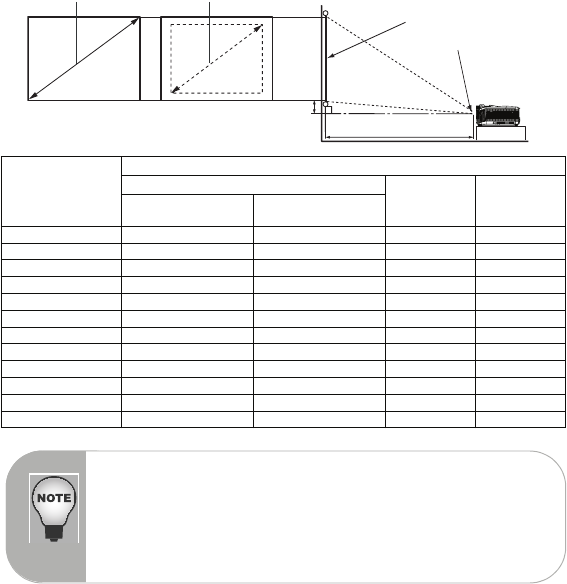
Refer to the graphic and table below to determine the screen size and projection distance.
There is 3% tolerance among these numbers due to optical component variations. It
is recommended that if you intend to permanently install the projector, you should
physically test the projection size and distance using the actual projector in situ
before you permanently install it, so as to make allowance for this projector's
optical characteristics. This will help you determine the exact mounting position so
that it best suits your installation location.
Screen size
Diagonal
[inch (cm)]
16 : 9 Screen
Projection distance [inch (m)] Image
height [inch
(cm)]
Vertical
offset
[inch (cm)]
(min. zoom) (max. zoom)
30 (76) 35 (0.89) 55 (1.39) 14.7 (37) 5.0 (12.8)
40 (102) 48 (1.21) 74 (1.87) 19.6 (50) 6.7 (17.1)
50 (127) 60 (1.52) 93 (2.35) 24.5 (62) 8.4 (21.4)
60 (152) 72 (1.83) 111 (2.83) 29.4 (75) 10.1 (25.6)
80 (203) 97 (2.46) 149 (3.79) 39.2 (100) 13.5 (34.2)
100 (254) 122 (3.09) 187 (4.75) 49 (125) 16.8 (42.7)
120 (305) 146 (3.72) 224 (5.7) 58.8 (149) 20.2 (51.3)
150 (381) 183 (4.66) 281 (7.14) 73.5 (187) 25.2 (64.1)
200 (508) 246 (6.24) 376 (9.54) 98.1 (249) 33.6 (85.4)
220 (559) 270 (6.87) 413 (10.5) 107.9 (274) 37.0 (94.0)
250 (635) 307 (7.81) 470 (11.94) 122.6 (311) 42.0 (106.8)
300 (762) 369 (9.38) 564 (14.33) 147.1 (374) 50.5 (128.2)
Maximum zoom
Minimum zoom
Projection distance
Center of lens
Screen
Vertical offset
Position the projector in a horizontal position; other positions can cause heat
build-up and damage to the projector.
Keep a space of 30 cm or more between the sides of the projector.
Do not use the projector in a smoky environment. Smoke residue may build-
up on critical parts and damage the projector or its performance
/
Consult with your dealer for special installation such as suspending from a
ceiling.


