


6
Getting Started
ViewSonic PT775
Quick Installation
1 Write the serial number on the back of the monitor in the space
provided on page 1 labeled "For your records" and register your
monitor's warranty on the Internet at: http//:www.viewsonic.com.
2 Read the Precautions section thoroughly (page 5) before installing the
monitor. Make sure the computer and the monitor are both turned off
before connecting any cables.
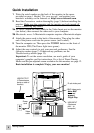
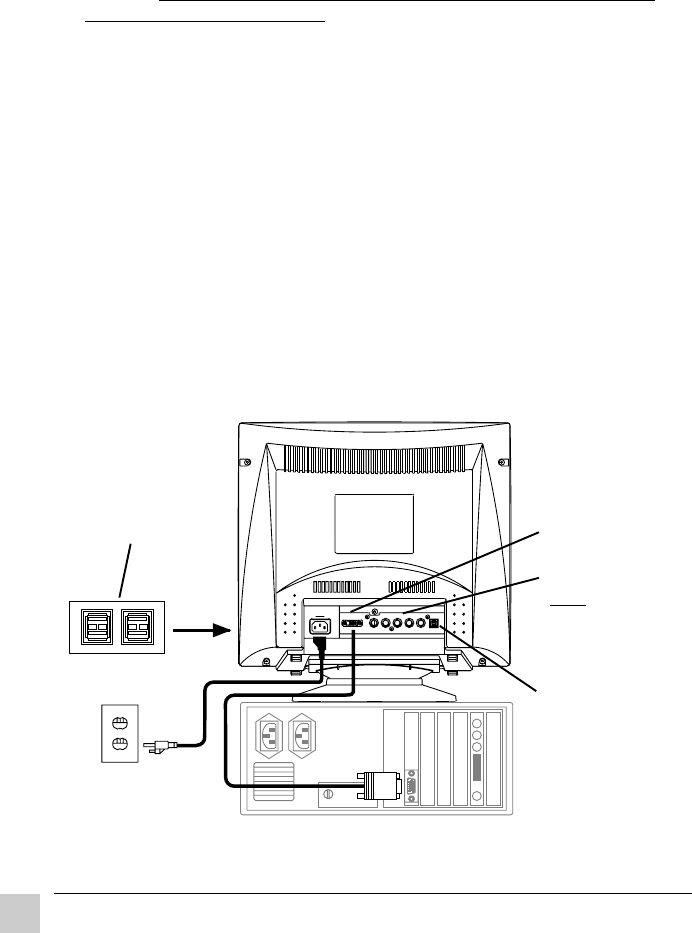
3a PC users: Attach the video cable to the Video Input port on the monitor
(see below), then connect the other end to your computer.
3b Macintosh
®
users: A Macintosh computer requires a Macintosh adapter
4 Attach the power cord to the back of the monitor. Then plug the other
end of the power cord into the power source (wall socket).
5 Turn the computer on. Then press the POWER button on the front of
the monitor ON. (The Power light turns green.)
6 Adjust the user controls to suit your personal preference. See the
Operation section (page 7). If there are any problems, see the
Troubleshooting section (page 13).
Important: To set the screen resolution, see user's guide of your
computer's graphic card for instructions. For a list of Preset Timing
Modes and the pre-adjusted screen resolution for this monitor, see page 12.
Basic installation is complete! Enjoy your new monitor!
Power
cord
Video
cable
BNC video ports
D-sub video port
Note: BNC
does not
support
Plug & Play
USB INPUT
(Upstream
port -- to
computer)
USB OUTPUT
(4 Downstream
ports on side of
monitor)