


D
D
D
L
L
L
P
P
P
P
P
P
r
r
r
o
o
o
j
j
j
e
e
e
c
c
c
t
t
t
o
o
o
r
r
r
–
–
–
U
U
U
s
s
s
e
e
e
r
r
r
’
’
’
s
s
s
M
M
M
a
a
a
n
n
n
u
u
u
a
a
a
l
l
l
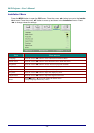
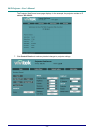
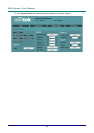
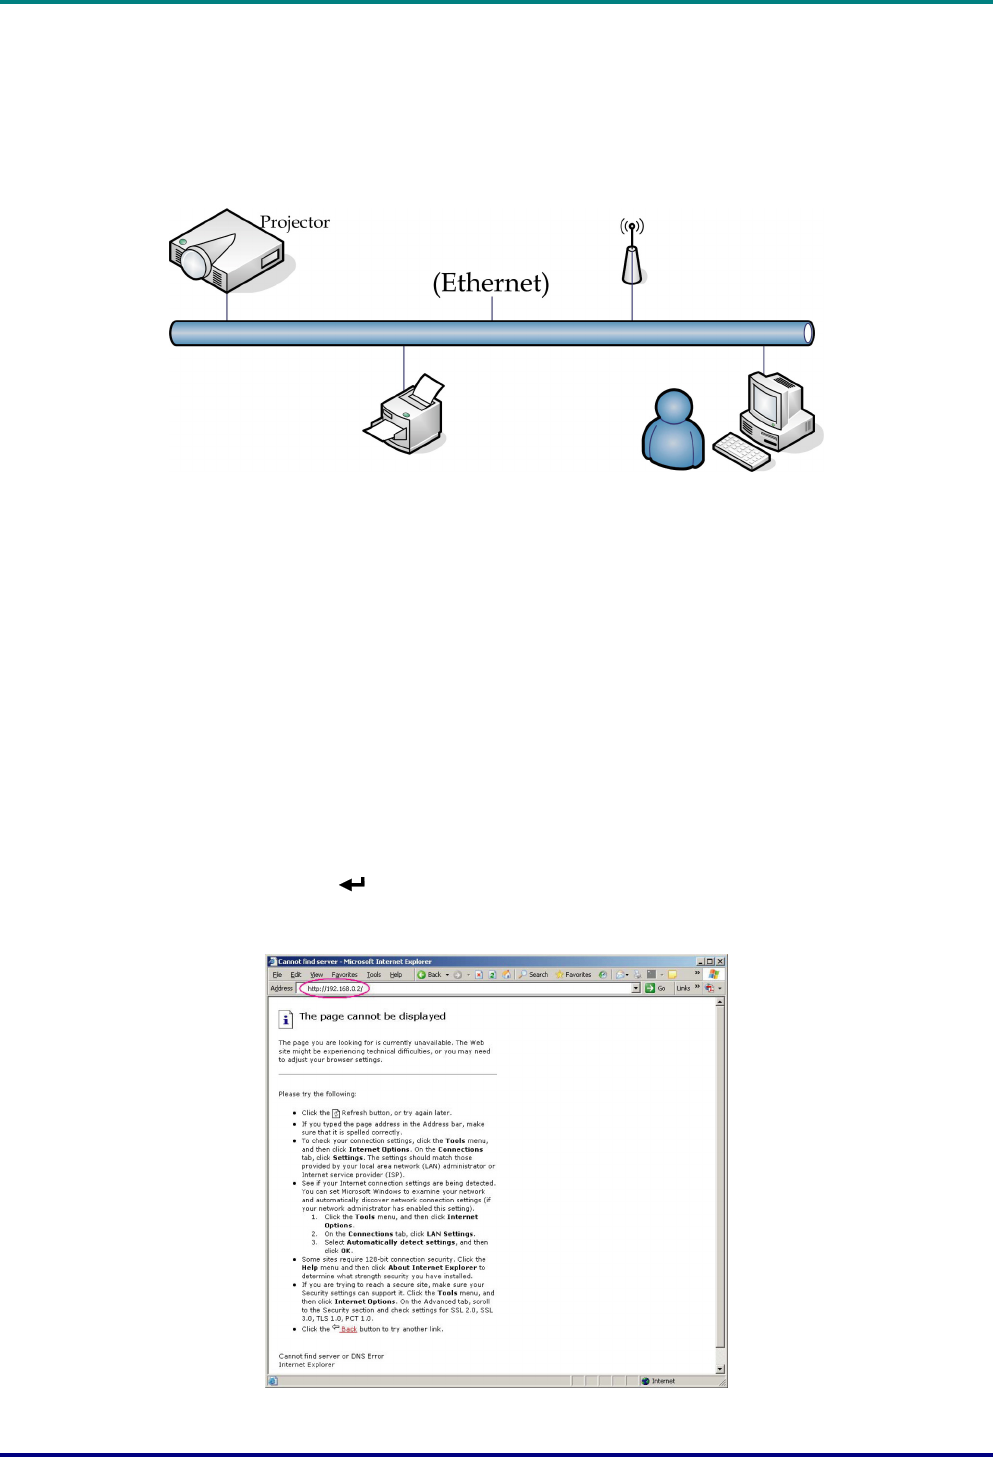
The Network function enables remote management and display of projector functions such as Power
On/Off, Brightness, Contrast, and projector status information over a network (LAN) or from a stand
alone PC or notebook.
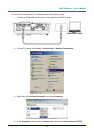
To connect to a network (LAN), refer to the following steps:
1. Connect an RJ45 cable to LAN ports on the projector and a router or hub on the network.
2. Press the MENU button to open the OSD menu.
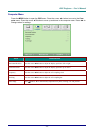
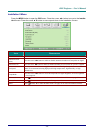
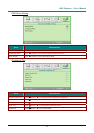
3. Press the cursor ◄► buttons to navigate to Installation II and select Network.
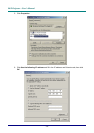
4. Select DHCP and press the cursor ◄► buttons to select On if the network has a DHCP
server or router,
OR
If the network uses Static IP addresses, enter IP, Subnet, Gateway (optional), and DNS
(optional) addresses in the fields provided.
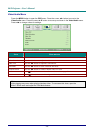
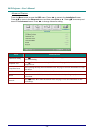
The projector’s IP address must be in the same IP domain as the network and cannot occupy
the same IP address as an existing device. For example, if the control PC or notebook re-
sides at 192.168.000.010, the projector’s IP address must be 192.168.000.nnn (where nnn =
1 to 9 and 11 to 255—10 is occupied by the control PC).
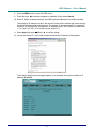
5. Select Apply and press
(Enter) / ► to confirm settings.
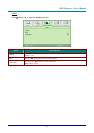
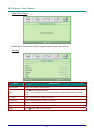
6. On the control PC, open a web browser and enter the IP address of the projector.
– 33 –