


Using the Micro II
with Windows � & Vista
®
After the Micro II has been detected, you can
check if it has been set up as a USB audio device by
clicking Start > Control Panel > Sounds and Audio
Devices.
Then click on the Audio tab and click on the drop
down menu in the Sound Playback section to see
if USB Sound Device is listed.
To use the Micro II as your default audio device,
select it from the list and then click “OK”.
[Windows � specific instructions will be in italics]
After the Micro II has been detected, you can
check if it has been set up as a USB audio device
by clicking Start (circular Windows logo) >
Control Panel > [Win �: Sounds and Audio
Devices] > Sound .
In the Playback tab, the Micro II should appear
in the list as Speakers: USB Sound Device.
To use the Micro II as your default audio device,
right-click on USB Sound Device and select “Set
as Default Device”. A green circle with a check
mark will appear to indicate that this is now
your default sound device.
Using the Micro II
with Windows
®
XP
After the Micro II has been detected, you can
check if it has been set up as a USB audio device
by clicking on the Apple menu icon and go to
System Preferences > Sound. Select the Output
tab and you should see USB Sound Device listed.
Using the Micro II
on a Mac
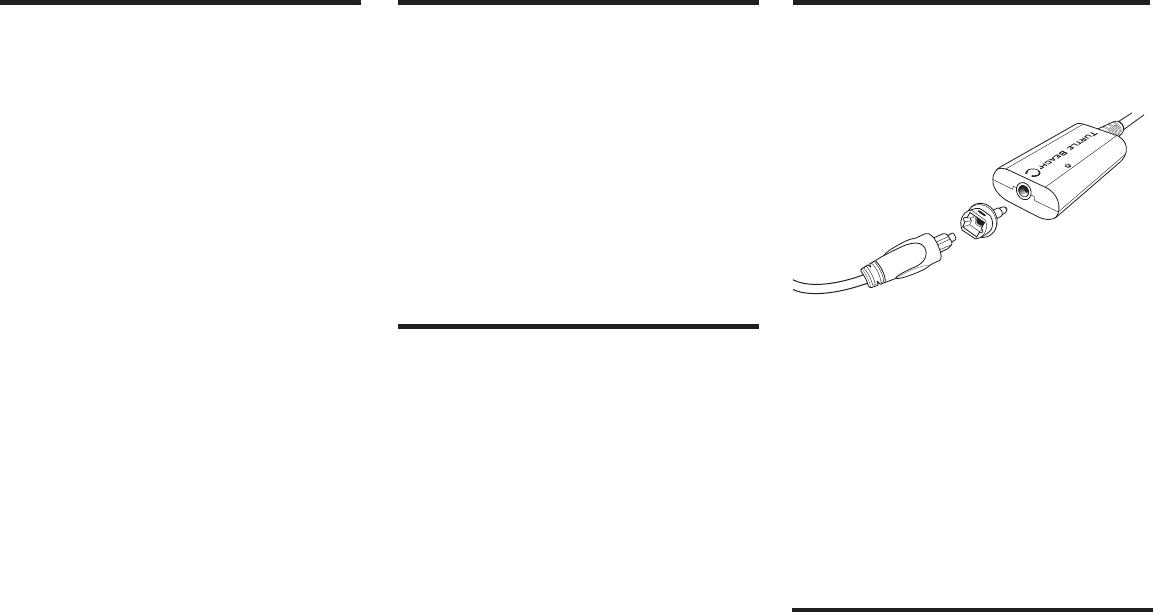
To use the digital optical output, insert the included
S/PDIF digital adapter into the audio output jack and
connect a TOSLINK digital optical cable (not included)
to transfer the digital audio signal to external devices.
The digital audio output may be used to transfer
multi-channel audio to an external system with
built-in . decoder for Dolby
®
Digital or DTS
™
formats. DVD playback of Dolby Digital or DTS
signals requires a software DVD player that
transmits this audio format.
S/PDIF Digital Adapter (included)
Insert this adapter into the audio
output jack to connect a TOSLINK
digital optical cable when using
the digital audio output.
TOSLINK Digital Optical Cable (not included)
Insert a TOSLINK digital optical cable into the S/PDIF adapter to
connect the digital output to external audio equipment.
(The TOSLINK Digital Optical Cable may be purchased at
TurtleBeach.com.)
Using the Digital Optical
Audio Output
Setup Instructions
To use the Audio Advantage Micro II with a
Windows
®
PC/laptop or Mac
®
, simply plug it into a
USB socket and the LED on the unit should light
up, indicating that it’s powered. The Windows or
Mac operating system will automatically detect
the device and inform you when it’s ready to use.
The Micro II’s .mm stereo analog output jack
can be used to connect headphones and powered
speakers. Once the Micro II is set up, as described
below, you can use headphones or speakers by
plugging them into the jack.
Inserting the included TOSLINK adapter into the
jack converts it to an optical digital output. This
adapter works with a standard optional fiber optic
cable (available at www.Turtlebeach.com) to
connect external digital devices to the Micro II.
If your Mac or PC/laptop has more than one USB
socket, you should always try to use the same
socket for plugging in the Micro II. This will assure
that it will always be recognized as the same
device by the operating system.
PLEASE NOTE: Some USB hubs may have problems
providing a consistent data stream for digital
audio and may cause data stream packet loss. This
could result in clicks or distortions on the USB
audio from the Micro II.
If you experience this problem when the Micro II is
connected to your USB hub, do not use the hub
and instead connect the Micro II directly to the
USB port on your Mac or PC/laptop.