


7 Steps for Getting Started
with the WDT2200
1. Remove the Lens Protectors
Remove the protective films from the LCD
display and the scanner lens. This film can
interfere with barcode scanning.
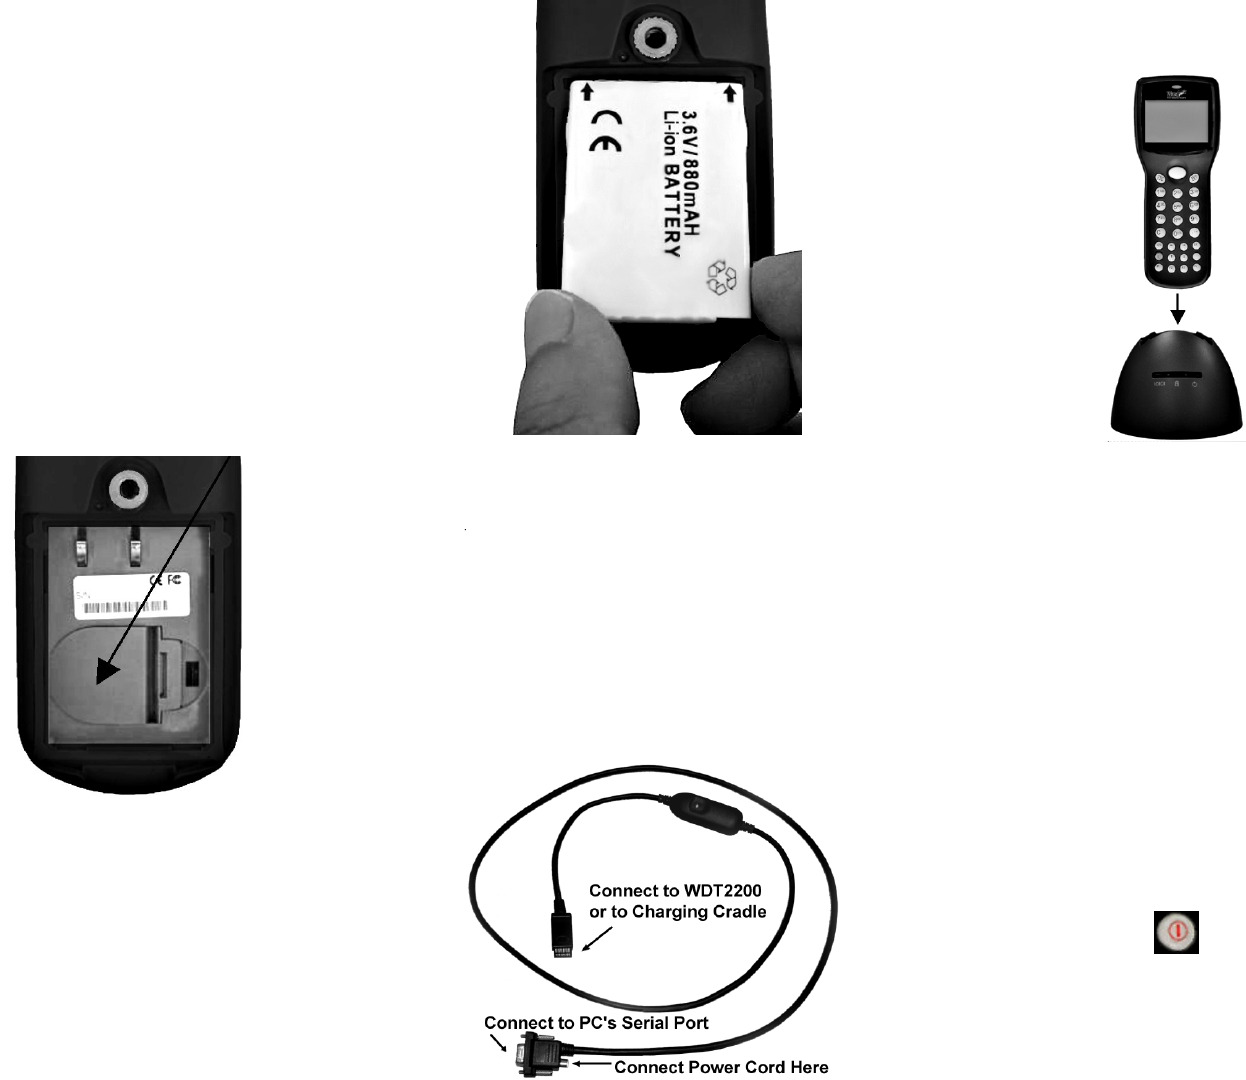
2. Open the Battery Compartment
Remove the battery door from the rear of
the WDT2200 by turning the screw on the
battery cover counterclockwise.
Data loss will occur if you remove the
CR2032 Lithium backup battery that
resides in the lower compartment.
This battery does not have to be replaced
until prompted by a warning message. If
you see a transparent film insulating the
backup battery, please remove it now.
3. Install the Main Battery
Insert the rechargeable Lithium Ion battery
pack into the main battery chamber,
sliding the end with two protruding
terminals into position first.
Reinstall the battery door and tighten the
screw by turning it clockwise.
4. Connect the Communications
Cable and Charge the Main
Battery
Connect the cable’s RS-232 connector to
an available serial port on the back of your
PC. Plug the power adapter into a 120V
AC outlet. Connect the power cord to the
rear of the RS-232 connector.
• If you have a communications /
charging cradle for the WDT2200:
Place the WDT2200 in the cradle to begin
the charging cycle. When the red LED
turns green, the battery is fully charged.
(Note: The LED on the cable itself is
always green when powered and
connected to a cradle.)
• If your WDT2200 is not equipped with
a cradle:
Attach the cable directly to the WDT2200.
The cable’s LED will be red while
charging, then green when the battery is
fully charged.
Charging will require 2 to 3 hours.
5. Power on the WDT2200
Press the red and white power key to turn
on the WDT2200. (Note: To turn the unit
off, press and hold the power key for about
one second.)