


The Document Company
XEROX
DC220/230ST CentreWare
®
Internet Services Quick Install
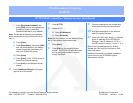
5. Press [HTTP].
6. Enable HTTP:
a) Press [Enablement].
b) Press [Enabled].
Note:The Port Number and the Maximum Num-
ber of Connections are predetermined.
7. Press [Save].
8. Press [Exit] on the Network Setups
screen. The DC220/230 will reboot and
print a configuration sheet in approxi-
mately 3 minutes.
9. Check the settings on the configuration
sheet against those that were entered.
10. At a client workstation on the network,
open the Internet Browser.
11. In the URL field, enter http:// followed
by the IP address of your DC220/230.
Example: If the IP address is 127.0.0.1,
the URL would be http://127.0.0.1.
Refer to the CentreWare manual, Getting
Started with Print and Fax Services for addi-
tional information.
Additional information on network installation
can be found in the DC220/230 System
Administration Guide.
j) Press [Broadcast Address], then
press [Edit] and use the keyboard on
the display screen to enter the
Broadcast Address of your network.
Note: The Broadcast Address is the address
where all host bits are set to either zero (0) or
one (1).
k) Press [Save].
l) Press [Host Name], then press [Edit]
and use the keyboard on the display
screen to enter the Host Name you
want your DC220/230 to use.
m) Press [Save].
n) Press [Save] on the TCP/IP screen to
save all the network settings.
o) Press [Exit] on the Network Setups
screen.
4. Press [Additional Setups] in the upper
right corner of the screen.
©1998 Xerox Corporation
701P97996 Version 1.1, 5-98
For assistance, contact your local Xerox Customer Support Center:
USA: 1-800-821-2797 Canada: 1-800-939-3769