


Configuring a Document Centre 240/255/265/460/470/480/490 with Centreware Internet Services
10 Xerox Document Centre Setup Guide for FlowPort
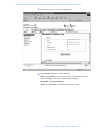
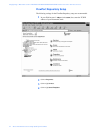
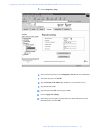
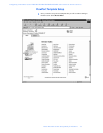
7
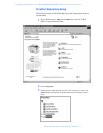
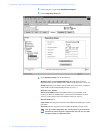
In the list of Select from Repository Servers, select repository that points to the
FlowPort server.
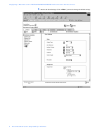
8
Type the Path to Document /
9
Check the Filing Policy New Auto Generate.
10
Document name is DOC.
11
Select the Output Image Format Multi-Page TIFF.
12
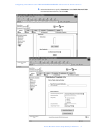
Click on Apply New Settings. The Document Centre is ready to use FlowPort.
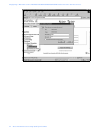
Note: This setup provides users Guest access (Trusted/Shared) to
FlowPort. If a higher authentication level is required, users should use
their FlowPort Login sheet.
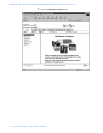
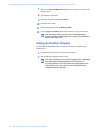
Testing the FlowPort Template
To check that the Document Centre is ready for FlowPort use, perform the
following test:
1
At the Document Centre, place a document in the scanner.
2
Select the FlowPort template and select Scan.
Note: If the Document Centre is properly configured, a DC confirmation
sheet will be printed confirming that the scan to FlowPort was
successful, otherwise an error report with some specific failure notice
will be printed. If the scan to FlowPort was successful a FlowPort
confirmation sheet will also print.