


Installation
ENGLISH
11Xerox© LCD Monitor User’s Manual
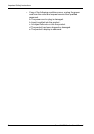
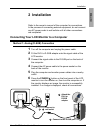
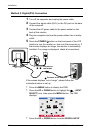
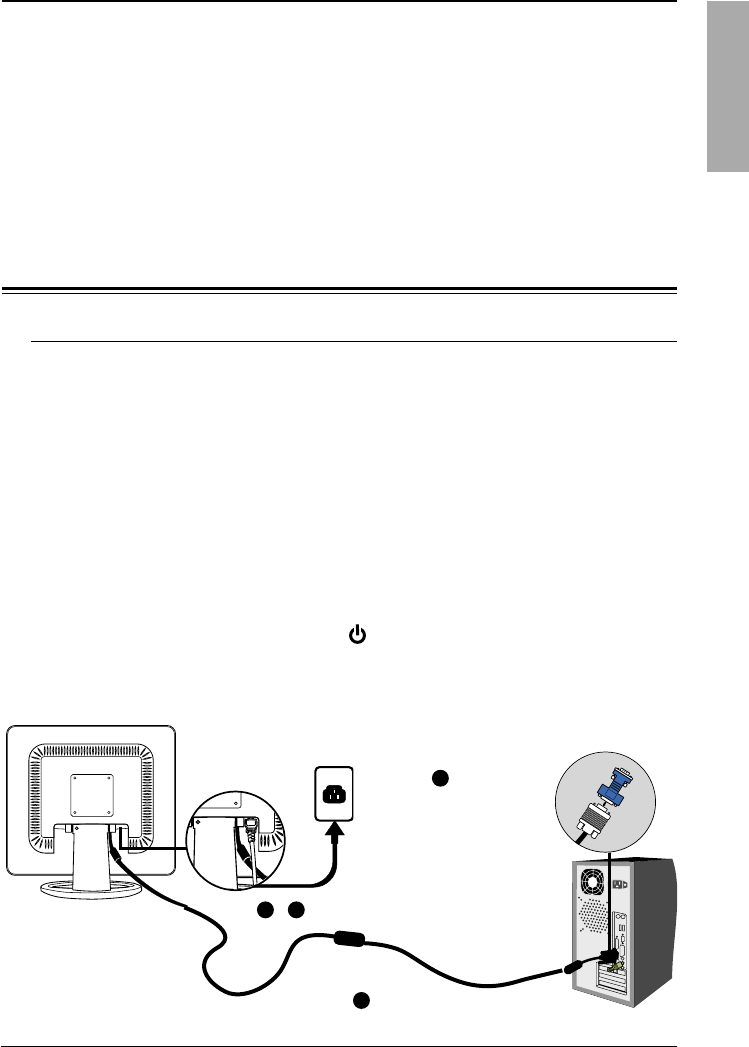
1 Turn off the computer and unplug the power cable.
2 Fit the DVI-I to D-SUB adapter onto the signal cable of the
LCD monitor.
3 Connect the signal cable to the D-SUB port on the back of
the computer.
4 Connect the AC power cable to the power socket on the
back of the monitor.
5 Plug the computer and monitor power cables into a nearby
outlet.
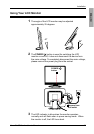
6 Press the POWER/ button on the front panel of the LCD
monitor to turn the monitor on, then turn the computer on. If
the monitor displays an image, the monitor is successfully
installed. If no image is displayed, check all connections.
Refer to the owner’s manual of the computer for connections.
In the process of connecting external equipment, do not connect
any AC power cords to wall outlets until all other connections
are completed.
5
Connect to
wall outlet
3
2
Attach the
DVI-I to
D-SUB
adapter
4
2 Installation
Connecting Your LCD Monitor to a Computer
Connect to the D-SUB port
Method 1: Analog (D-SUB) Connection